TL;DR

Get cleaning gear delivered free with Prime
- Fast, free delivery on millions of items
- Prime Video, Amazon Music and more included
- Member-only deals all year
Clean a move-in home before unpacking whenever possible: work from high surfaces down, focus on kitchens and bathrooms, and finish with the floors. Match each cleaner to the surface, follow product labels, and disinfect only when there is a specific reason. Put supplies where you can reach them and use brief daily resets plus a weekly routine to keep the home clean from day one.
The easiest time to clean a home is before the sofa blocks the baseboards and the kitchen drawers fill with utensils. For a short stretch, your new place is a rare chance to reach corners, cabinet interiors, and floors without moving a mountain of belongings.
This guide shows you what to clean first, how to work room by room, and how to choose products that suit the surfaces in front of you. You’ll also learn how to keep a move-in home clean from day one with a simple routine that fits real life, whether you’re carrying boxes up three flights of stairs or settling into a house with a backyard.
You don’t need a bottle of disinfectant for every room or a punishing weekend schedule. A few well-timed passes, some attention to labels, and a place for your supplies can make your home feel clean, smell fresh, and stay easier to care for.
Clean cabinets, drawers, kitchen counters, and bathroom touchpoints before unpacking when possible.
Work from high surfaces down and leave floors until last so falling dust doesn’t undo your effort.
Use cleaners that fit each material, test unfamiliar products discreetly, and follow appliance and product instructions.
Disinfect only for a specific reason, and keep the surface wet for the full contact time on the label.
Keep supplies handy, clear packing debris, and use short daily resets plus a weekly routine.
Keep Your Move-In Home Clean From Day One
An empty home is easier to clean before boxes and furniture arrive. Focus first on food-preparation areas, bathroom touchpoints, and a routine you can maintain.
Clean in the right order
Work room by room from high surfaces down, so dust does not settle on areas you have already cleaned.
Start with ceiling fixtures, shelf tops, and vents you can safely reach.
Clean cabinet interiors, counters, kitchen handles, and bathroom fixtures while they are accessible.
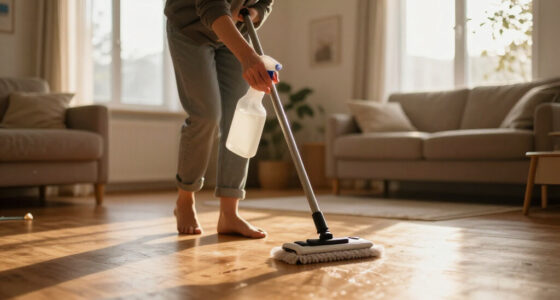
Vacuum or sweep floors and baseboards after unpacking and clearing packing debris.
Prioritize everyday touchpoints
Clean the places where you prepare food, wash your hands, and reach throughout the day.
Food and appliance areas
Wipe counters, cabinet pulls, and refrigerator and oven handles before putting food and utensils away.
Wash-up touchpoints
Clean faucets, flush handles, light switches, and the surface around the sink.
Shared contact spots
Include door handles and light switches in your first pass through each room.
Check appliances and hidden spots
A quick inspection before unpacking can prevent a second round of cleaning.
Choose products for the surface
Stone, finished wood, stainless steel, glass, and painted surfaces may need different care. Check product labels and appliance manuals, and test unfamiliar cleaners in a hidden spot.
- Use soap or detergent and water for ordinary household soil when suitable.
- Match the cleaner to the material and follow its directions.
- Disinfect for a specific reason, such as illness or a contamination concern.
- Keep the surface visibly wet for the full contact time on the label.
Make the routine easy to keep
Set up basic supplies early and clear packing debris as you unpack.
- Keep cloths, suitable cleaners, gloves, and a vacuum or broom together.
- Put a doormat at entrances and give frequently used items a home.
- Use short daily resets and a simple weekly routine.
- Document existing damage before cleaning if you may need a record.
Clean While the Rooms Are Empty, Then Unpack
Clean an empty home before unpacking whenever you can: dust high surfaces first, wipe cabinets and counters, and leave floors until last. With no furniture to work around, you can reach corners, closet shelves, and the strips of floor where dust collects. It’s like sweeping a stage before the props arrive; one clear pass is easier than lifting each box later.
Start with the kitchen and bathrooms, which tend to need the most attention before you use them. Work from top to bottom in each room: ceiling fixtures and upper shelves, then cabinet interiors, counters, fixtures, and finally floors and baseboards. If you wipe the floor first and then dust the shelves, fine gray grit settles right back where you just cleaned.
Suppose you arrive with a broom, a microfiber cloth, and three boxes of pantry goods. Spend a little time wiping the empty pantry shelves and cabinet handles before you unload the cans; once everything is stacked, the same job means clearing the shelves again. If your schedule only allows one focused pass, prioritize surfaces where you’ll prepare food or wash up.
You may need to clean again after unpacking. Cardboard sheds paper dust, and a dolly can track grit across the entry. Break down packing materials as you go and give the floors a final vacuum or sweep once the last box leaves each room.
- Dust high surfaces, such as light fixtures, shelf tops, and vents you can safely reach.
- Wipe cabinets and drawers before filling them, along with counters and other accessible surfaces.
- Clean fixtures and touchpoints in the kitchen and bathroom.
- Finish with floors and baseboards, then pick up packing debris as you unpack.
Products Worth Considering

Dyson W1 PencilWash Wet and Dry Cleaner with Dok Cordless Wet Floor Cleaner

eufy C28 Robot Vacuum Cleaner and Mop for Pet Hair, 15,000 Pa

Roborock Robot Vacuum and Mop Combo with Self-Empty Dock
As an affiliate, we earn on qualifying purchases.
Start With the Kitchen and Bathroom Touchpoints
For a move-in clean, start with the places where you prepare food and wash your hands: kitchen and bathroom surfaces, handles, and fixtures. Wipe counters, cabinet pulls, fridge and oven handles, taps, light switches, and door handles with a cleaner suitable for each material. Cleaning removes everyday dirt and many germs; disinfecting is a separate step that uses a product intended to kill germs on surfaces named on its label.
That distinction helps you avoid spraying a strong disinfectant over every wall and countertop. For ordinary household soil, soap or detergent and water are often enough when used appropriately. If illness or a particular contamination concern gives you a reason to disinfect, read the label for the right surface and keep the area wet for the stated contact time. A product wiped off after a few seconds may not have had the time its instructions require.
Picture your first breakfast: you set a mug on the counter, open the fridge, and reach for a cabinet handle with flour on your fingers. Those are practical places to clean before you put food away. In the bathroom, pay similar attention to the faucet, flush handle, light switch, and the surface around the sink.
Ventilation can make cleaning more comfortable, especially if a product has a strong smell. Open a window when practical and consider unscented options if fragrance bothers you. Always follow the product directions, and don’t mix cleaning products: bleach combined with ammonia or acidic products can produce dangerous fumes.
Cleaning and disinfecting do different jobs. Clean routine soil with an appropriate product; disinfect when there’s a specific reason, following the label’s surface and contact-time directions.
Check Appliances, Cabinets, and the Corners You’ll Miss
Before filling cabinets or relying on appliances, look inside them and clean the parts you can safely reach according to their manuals. Check refrigerator shelves and drawers, the oven interior, dishwasher filter, washing-machine seals, and the range hood. These spots can hold crumbs, old spills, lint, or a stale smell even when the counters look spotless.
Appliance instructions matter because a cleaning method that works on one finish or filter may damage another. Remove only parts the manual says you can remove, and use the recommended products and steps. For example, wiping a refrigerator shelf with a suitable cleaner is different from soaking an electronic control panel. When you aren’t sure, check the manufacturer’s care guidance before applying a product.
Then scan the easy-to-forget places: cabinet and drawer interiors, closet shelves, door frames, vents, and baseboards. If you can move a freestanding appliance safely, look behind it for dust or crumbs; don’t force a heavy refrigerator or reach near exposed wiring. A streak of dust beside the range may be invisible until sunlight hits it, but crumbs behind a toaster can attract pests.
Imagine unpacking a box of glasses into a cabinet, only to spot a sticky ring on the shelf after you’ve stacked everything. A quick check before unpacking avoids that frustrating second round. Note any appliance damage or maintenance issues with clear photos before cleaning if you may need a record for a landlord or property manager.
- Kitchen: refrigerator shelves, oven, dishwasher filter, range hood, and cabinet interiors.
- Laundry: washer seals and accessible lint or detergent residue, following the manual.
- Whole home: vents, closet shelves, light switches, door frames, and baseboards.
Match the Cleaner to the Surface You’re Wiping
Choose a cleaner for the material in front of you, and test an unfamiliar product in a small, hidden spot first. Stone, finished wood, stainless steel, glass, and painted surfaces can react differently to abrasives, acids, or excess moisture. A product that leaves a bathroom mirror bright could dull a stone counter, so “one cleaner for everything” is a risky shortcut.
Read both the cleaner’s label and the surface manufacturer’s care instructions when available. Some natural stone can be damaged by acidic cleaners, while some wood finishes need minimal water. Use a soft cloth or the tool recommended for the material, and avoid abrasive pads unless the manufacturer allows them. A small test behind a faucet or inside a cabinet can reveal discoloration before you clean a large visible area.
For example, if you find a cloudy mark on a stone vanity, don’t scrub harder with vinegar just because it worked on a glass shower door. Pause, identify the material if you can, and check its care guidance. A gentle approach may take another pass, but replacing or refinishing a damaged surface costs far more time.
Green or “natural” on a label doesn’t automatically mean a product is harmless or right for every surface. Check directions, ventilate when needed, and store cleaners in their original containers away from children and pets. If a product needs gloves or other precautions, follow that instruction. Being careful with a surface often means using less product, not a stronger one.
| Surface | Practical move-in approach |
|---|---|
| Natural stone | Check care guidance and avoid acidic products unless approved. |
| Finished wood | Use a suitable cleaner and avoid soaking the finish. |
| Glass | Use a glass-appropriate product and a clean, soft cloth. |
| Stainless steel | Follow appliance guidance and use a nonabrasive cloth. |
Set Up a Small Cleaning Station You’ll Actually Use
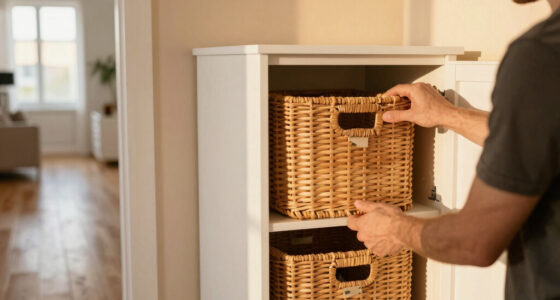
A small, easy-to-reach cleaning station makes it more likely you’ll handle spills before they become weekend projects. Keep a few basics together: microfiber cloths, dish soap, an appropriate general-purpose cleaner, a bathroom cleaner, a suitable floor cleaner, gloves, and a broom or vacuum. You don’t need a cabinet full of specialty bottles to start.
Pick a safe place for supplies that’s convenient but out of reach of children and pets. A high laundry shelf or a latched utility cupboard can work; follow any storage instructions on the labels. Put a cloth near the kitchen sink and a small rubbish bin where you unpack, so crumbs and packing scraps have somewhere to go right away.
Think about the moment you spill coffee while placing boxes on your kitchen counter. If a cloth and suitable cleaner are already nearby, the brown ring takes seconds to wipe. If the supplies are buried in a sealed box in the garage, you may wipe with a paper towel, spread the sticky patch, and deal with it after breakfast.
Place a doormat at the entrance and give frequently used items a home from the start. Shoes, keys, and bags tend to land where you drop them; a mat and a small entry basket help contain grit and clutter. These small choices support an in home clean because they reduce what gets tracked in and make short resets easier to repeat.
- Gather the basics before you begin unpacking.
- Store them safely in their original containers, following label directions.
- Place a doormat by the entrance to catch outdoor grit.
- Keep a cloth handy near the kitchen and bathroom for quick wipe-ups.
Keep Things Tidy With Short Daily Resets and a Weekly Plan
Keep your new home clean with short daily resets and a simple weekly routine instead of waiting for one exhausting deep clean. A few minutes spent wiping a counter, rinsing a sink, and putting away the items you used can stop grime and clutter from piling up. Think of it like brushing your teeth: a small repeatable habit is easier to maintain than trying to make up for months in one afternoon.
Choose habits that fit what you actually do. If you cook most nights, wipe the kitchen counter after dinner and sweep obvious crumbs. If you shower each morning, hang the bath mat to dry and wipe water from a surface when its care instructions allow. The aim isn’t a spotless show home; it’s a space that feels ready for the next meal or bath.
For a realistic example, a household with two people and a dog might spend five minutes each evening on dishes, food splashes, and muddy paw prints. One day a week, they can add a vacuum, bathroom clean, and fresh towels. Your schedule may look different, but assigning recurring tasks to a particular day can keep them from slipping off the radar.
Keep the routine flexible. If you host friends or unpack several boxes in one evening, a quick floor sweep and counter wipe may be enough for that day. Remove cardboard promptly and recycle it according to local rules; damp or torn boxes left by the entry can shed debris and crowd the space. A useful article can offer a plan, but the plan works best when it fits the home you really live in.
- Daily: clear food messes, wipe high-use counters, and return stray items to their places.
- Weekly: vacuum or sweep floors, clean the bathroom, and change towels or linens as needed.
- As needed: clean appliance filters or surfaces according to the relevant instructions.
Document Existing Mess or Damage Before You Clean
If you’re renting or documenting a purchase, photograph pre-existing stains, damage, or maintenance issues before cleaning them. A dated photo of a chipped tile, stained carpet, or broken drawer handle can help you keep a clear record of the home’s condition. Use the landlord’s or property manager’s agreed reporting process, and check your lease or local guidance for any move-in reporting deadline.
Take a wide photo that shows where the issue is, then a closer one that captures the detail. For instance, photograph a discolored patch on the living-room carpet alongside a wider view of the room, so someone reviewing the record can understand both what it looks like and where it sits. Keep the images with any written checklist or message you send.
Documentation also helps you plan the clean. A carpet spot may need a surface-appropriate treatment, while a loose cabinet hinge is a maintenance issue that cleaning won’t fix. Avoid scrubbing a mark aggressively before you know what it is or who is responsible for repairs. If the stain changes when you clean it, a before photo can still show how it looked at move-in.
Digital checklists can make the first few days easier to organize: note which rooms you cleaned, which appliance manuals you checked, and which issues you reported. A simple note on your phone is enough. Requirements differ by lease and location, so follow the instructions that apply to your home rather than assuming one universal rule.
Frequently Asked Questions
What should I clean first when moving into a new home?
Start with rooms that are easiest to clean while empty, often the kitchen and bathrooms. Dust high surfaces, wipe cabinet interiors and counters, clean fixtures and handles, then finish with the floors. That order keeps dust from falling onto areas you’ve already cleaned.
Should I clean before or after unpacking?
Do a thorough clean before unpacking when you can, especially inside cabinets, closets, and appliances. After unpacking, wipe any surfaces that collected dust and sweep or vacuum packing debris. Boxes can shed paper dust, so a final floor pass often helps.
Do I need to disinfect the whole house?
Usually, routine cleaning with an appropriate cleaner is enough for everyday soil. Disinfect when illness or a specific contamination concern gives you a reason, and follow the label’s directions for approved surfaces and contact time. Keep the surface wet for the full stated time.
How can I clean without damaging stone, wood, or other surfaces?
Identify the material, check its care instructions, and test an unfamiliar cleaner in a small, inconspicuous area. Some natural stone can be damaged by acidic cleaners, and finished wood may not tolerate excess moisture. Avoid abrasive pads unless the manufacturer says they’re suitable.
What areas are easy to forget during a move-in clean?
Check cabinet and drawer interiors, refrigerator shelves, appliance handles, dishwasher filters, range hoods, washer seals, light switches, vents, closet shelves, and baseboards. For appliances, follow the manual and remove only the parts it says you can remove. Look behind accessible freestanding appliances only if you can do so safely.
How do I keep a move-in home clean after the first week?
Keep basic supplies easy to reach and spend a few minutes each day wiping food messes, clearing clutter, and returning items to their places. Set a weekly time for floors and bathroom cleaning that fits your household. Small, repeatable habits are easier to sustain than waiting for a major cleanup.
What should renters do about damage that was already there?
Photograph the condition before cleaning, write down what you notice, and report it through the process in your lease or property manager’s instructions. Keep a copy of your notes and photos. Move-in reporting requirements vary by lease and location, so check the rules that apply to you.
Conclusion
Use the empty-home window to clean the places that will be hard to reach once your belongings are in place. Start high, focus on kitchen and bathroom touchpoints, check hidden spots, and match each product to the surface and its care instructions.
Then make the clean easier to keep: leave a cloth within reach, put down a doormat, and give messes a few minutes of attention each day. A home doesn’t stay clean because you scrub it once; it stays welcoming because small habits keep dust, crumbs, and clutter from settling in.