
TL;DR

Get cleaning gear delivered free — and shop member deals
- Fast, free delivery on millions of items
- Access to Prime Big Deal Days deals on October 6–7
- Prime Video, Amazon Music and more included
Cleaning bathroom caulk requires gentle, routine care with mild cleaners like dish soap and water. Recognize signs of damage or mold that need replacing, and take preventive steps to avoid recurring issues. Proper maintenance keeps your bathroom fresh and watertight longer.
Ever notice that slimy, dark stain creeping along your tub’s edge? Or that faint mold smell that refuses to go away? It’s tempting to grab a harsh cleaner and scrub until it’s gone, but that can do more harm than good. Bathroom caulk is delicate — it needs gentle attention if you want it to last.
In this guide, you’ll learn how to clean caulk safely, recognize when it’s time to replace it, and prevent mold from creeping back. You’ll get practical tips, real-world scenarios, and straightforward advice that keeps your bathroom watertight and fresh.
Always start with gentle cleaning—warm water and dish soap are usually enough for routine maintenance.
Recognize signs of damage: cracks, softness, discoloration, or mildew that won’t go away need replacement.
Use soft tools and avoid harsh abrasives or blades during cleaning to prevent damage.
Control moisture with proper ventilation, quick cleanup, and fixing leaks to prevent mold from returning.
Replace old, damaged caulk with a mold-resistant, properly applied sealant for lasting protection.
The Right Way to Clean Bathroom Caulk
That dark, slimy line is not a cue to scrub harder. Gentle cleaning protects the seal; timely replacement protects everything behind it. Here is how to keep bathroom joints fresh, dry and watertight.
Start mild. Let time do the work.
Warm water and a few drops of dish soap handle routine dirt and soap scum. Dwell time loosens buildup so the tool does not have to fight the seal.
Ventilate
Run the fan, open a door and put on gloves.
Wash
Apply warm water with a few drops of dish soap.
Wait
Leave the mild solution on for several minutes.
Agitate
Use a soft toothbrush or microfiber cloth.
Rinse
Remove loosened grime and all cleaner residue.
Dry
Towel the joint until no moisture remains.
For stubborn mildew: choose a bathroom cleaner labeled compatible with the caulk and nearby finishes. Hydrogen-peroxide or oxygen-based products may be useful alternatives to chlorine bleach.
Label first · airflow alwaysIs it dirt, staining or a failed seal?
A black mark is not automatically dangerous mold. Its location, texture and speed of return reveal whether cleaning can work—or merely hide a deeper problem.
Surface buildup
Soap residue, dirt or light mildew sits on an intact, firm bead.
Embedded stain
The joint stays firm and sealed, but discoloration remains after cleaning.
Seal failure
Darkness lies beneath the caulk, returns quickly or accompanies damage.
Never create a chemical cocktail
Do not mix bleach with vinegar, ammonia, rubbing alcohol, hydrogen peroxide, toilet-bowl cleaner or other cleaning products. Dangerous gases or reactions can result.
Match the method to the material.
Most shower joints use flexible silicone or siliconized acrylic. Acrylic is typically more vulnerable to abrasion and prolonged soaking, while adjacent stone and grout add their own constraints.
| Method | Routine caulk care | Best use | Main caution |
|---|---|---|---|
| Warm water + dish soap | ✓ Preferred | Soap scum and routine dirt | Rinse residue and dry fully |
| Hydrogen-peroxide product | ~ Check label | Persistent surface mildew | Ventilate; test compatibility |
| Chlorine bleach | ~ Limited use | Compatible nonporous surfaces | May discolor, irritate or miss hidden growth |
| Vinegar | ~ Installation-dependent | Only on confirmed acid-safe surfaces | Avoid natural stone and acid-sensitive grout |
| Abrasives, blades, wire brushes | ✗ Avoid | Not for routine cleaning | Can cut, scratch or lift the seal |
| Strong solvents or undiluted acids | ✗ Avoid | Not a household caulk remedy | Can damage caulk and surrounding finishes |
Important: even if a cleaner is safe for caulk, it may harm adjacent marble, limestone, travertine, cement-based grout, fixtures or sealants.
Moisture control beats repeated deep cleaning.
Caulk lasts longer when the joint dries quickly. Treat ventilation, leaks and standing water as the core maintenance system—not optional extras.
Your moisture-defense routine
Small repeatable actions extend the useful life of the seal.
When cleaning cannot restore the barrier.
Replace caulk that pulls away, cracks, has gaps, feels soft or brittle, contains subsurface discoloration, or grows mildew again soon after cleaning.
The do’s and don’ts.
Think of caulk care as a gentle spa treatment for the seal—not a demolition project.
Do
- Use mild dish soap and warm water first.
- Scrub gently with microfiber or a soft toothbrush.
- Rinse and dry the joint thoroughly.
- Ventilate during cleaning and after showers.
- Inspect regularly for small gaps and cracks.
Don’t
- Use metal scrapers or razor blades for routine cleaning.
- Apply undiluted acids, solvents or harsh abrasives.
- Let moisture sit on the caulk for long periods.
- Mix household cleaners—especially bleach and acids.
- Paint over moldy, loose or damaged caulk.
Bathroom caulk FAQ
When in doubt, assess the physical condition of the seal—not just its color.
Can black caulk be cleaned?
Sometimes. Surface marks may lift with gentle cleaning. Replace it when stains are embedded, the bead feels gummy or the marks return quickly.
Is every black mark dangerous mold?
No. It may be dirt, soap residue, mildew or embedded staining. If the cause cannot be confirmed and the seal is failing, replacement is prudent.
Is bleach safe for silicone?
Not universally. Repeated or concentrated use may discolor materials or weaken the installation. Check the manufacturer’s directions and ventilate well.
Does vinegar solve caulk mold?
Not behind the seal. It may reduce surface growth, but it cannot reach concealed mold and can damage nearby natural stone or acid-sensitive grout.
How to Safely Clean Bathroom Caulk Without Damage
Bathroom caulk should be cleaned gently, using mild solutions that won’t tear or weaken the seal. The best approach? Warm water mixed with a few drops of dish soap. This combo lifts soap scum, dirt, and grime without harsh abrasives.
Imagine wiping down your tub’s seam with a soft microfiber cloth. No scratching, no pulling. Let the cleaner sit for a few minutes to loosen stubborn grime before gently scrubbing with a soft toothbrush. Rinse thoroughly and dry with a towel. Repeat this every week to keep the seal looking fresh.
For stubborn mildew or soap scum, use a bathroom-specific cleaner labeled safe for caulk. Hydrogen peroxide or oxygen-based cleaners are safer options than chlorine bleach, which can discolor or weaken the seal over time. Always ventilate and wear gloves when applying stronger cleaners.
mold-resistant bathroom caulk sealant
As an affiliate, we earn on qualifying purchases.
As an affiliate, we earn on qualifying purchases.
How to Spot When Your Caulk Needs Replacing
Not all stains are fixable. If your caulk pulls away from the surface, cracks, feels soft, or has missing chunks, it’s time for a new bead. But why does this happen? Over time, exposure to moisture, temperature fluctuations, and cleaning chemicals can degrade the material, causing it to lose its elasticity and seal integrity. Discoloration or persistent mildew also indicate that the caulk’s protective barrier has broken down, allowing mold and water to penetrate beneath. Recognizing these signs early is crucial because ongoing damage can lead to leaks, structural issues behind tiles, and increased mold growth. Replacing damaged caulk restores the barrier, but neglecting it can escalate problems, resulting in costly repairs or health hazards. Proper removal, cleaning, and reapplication ensure your bathroom remains watertight and safe, emphasizing the importance of timely maintenance to prevent long-term damage.
Picture a bathroom where the caulk around the tub looks gummy and dark—not just surface dirt, but underlying decay. That’s a sign that mold or water has penetrated beneath, and cleaning won’t fix the root problem.
Remove old caulk carefully, clean the joint thoroughly, and apply a fresh, mold-resistant sealant. This ensures a long-lasting, watertight barrier. Don’t forget: fixing leaks or improving ventilation is key to preventing recurring mold and damage.
silicone caulk remover and applicator kit
As an affiliate, we earn on qualifying purchases.
As an affiliate, we earn on qualifying purchases.
Top 5 Do’s and Don’ts When Cleaning Bathroom Caulk
| Do’s | Don’ts |
|---|---|
| Use mild cleaners like dish soap and warm water | Use metal scrapers or razor blades for routine cleaning |
| Gently scrub with a soft toothbrush or cloth | Apply undiluted acids or strong solvents |
| Dry thoroughly after cleaning | Let moisture sit on the caulk for long periods |
| Ventilate well during cleaning sessions | Mix household cleaners, especially bleach and vinegar |
| Inspect caulk regularly for small gaps or cracks | Paint over moldy or damaged caulk without removal |
Following these simple tips keeps your caulk healthier longer. Think of it like giving your bathroom a gentle spa treatment rather than a rough scrub.
gentle bathroom tile and caulk cleaner
As an affiliate, we earn on qualifying purchases.
As an affiliate, we earn on qualifying purchases.
Why Proper Ventilation and Maintenance Are Your Best Defense
The secret to long-lasting caulk? It’s not just cleaning — it’s controlling moisture. Running the exhaust fan during and after showers for at least 20–30 minutes helps keep humidity down. Opening windows or doors when possible speeds up drying.
Imagine a bathroom where the shower curtain dries quickly, and no damp spots linger. That’s a healthy environment that prevents mold from taking hold.
Wipe down wet surfaces after each use, fix leaks promptly, and repair damaged grout to stop water from seeping behind the caulk. These small steps make a big difference in extending the life of your sealant.
Remember: moisture is the enemy. Good ventilation and quick cleanup are your best tools for a mold-free bathroom.
As an affiliate, we earn on qualifying purchases.
When and How to Replace Bathroom Caulk the Right Way
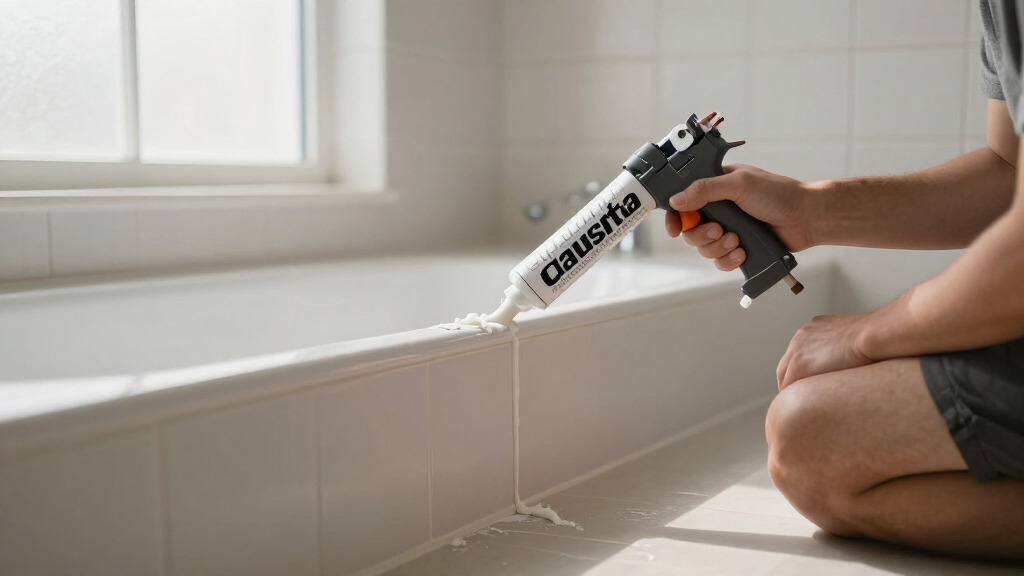
Replace caulk when it pulls away, cracks, feels soft, or shows persistent mold. Carefully remove the old sealant with a caulk remover tool or a plastic scraper. Clean the joint thoroughly, removing all residue and dry it completely before applying new caulk. This step is critical because residual debris or moisture can prevent proper adhesion, leading to quick failure of the new sealant. Proper removal also reduces the risk of trapping mold or dirt underneath, which can cause ongoing odors or health issues.
Choose a bathroom-rated, mold-resistant silicone or acrylic sealant. Apply it in smooth, even beads, and follow the manufacturer’s curing instructions. Most caulks need at least 24 hours before getting wet. This curing period is essential because it allows the sealant to fully adhere and develop its waterproof properties, preventing premature failure and leaks.
Imagine sealing the joint with a fresh, shiny strip that’s smooth and pliable. That’s your best line of defense against water damage.
Proper removal and application ensure your bathroom stays dry and mold-free longer. Don’t rush this step — it’s worth doing right.
Frequently Asked Questions
Can black caulk be cleaned, or must it be replaced?
Surface stains on black caulk can sometimes be cleaned off with gentle cleaners like hydrogen peroxide or mildew remover. However, if the staining is embedded, the caulk feels soft or gummy, or stains return quickly, replacing it is usually the best option.Is black material on caulk always dangerous mold?
Not necessarily. Black marks can be mold, but they could also be soap residue, dirt, or embedded staining. Only a close inspection can confirm if it’s mold—if in doubt, replace the caulk for safety.Is bleach safe for silicone caulk?
Bleach can be used on some non-porous caulk but repeated or concentrated use may weaken or discolor it. Always check the manufacturer’s instructions, ventilate well, and never mix bleach with other cleaners like vinegar or ammonia.Does vinegar kill mold on caulk?
Vinegar may reduce surface mold and mildew, but it doesn’t reach behind the sealant where mold can grow. For persistent or embedded mold, professional removal or replacement is often more effective.How often should I replace my bathroom caulk?
It depends on the condition. Replace caulk when it cracks, pulls away, feels soft, or shows signs of persistent mold. Regular inspections help catch problems early and keep your bathroom dry.Conclusion
Keeping bathroom caulk clean and intact isn’t about harsh chemicals or endless scrubbing. It’s about gentle, consistent care and paying attention to signs of wear. Think of your caulk as a silent guardian—if you treat it well, it will keep your bathroom dry and mold-free for years.
Next time you wipe down the shower, remember: a little care today saves big repairs tomorrow. Your bathroom will thank you with a fresh, clean look that lasts.
Fall Picks
fall essentials
As an affiliate, we earn on qualifying purchases.

![Bukit Bintang Hicks Flat: DBKL Orders Cleanup After Viral Video Exposes Dirty Conditions [WATCH] - NST Online](https://outrightcleaning.com/wp-content/uploads/2026/09/bukit-bintang-hicks-flat-dbkl-orders-cleanup-after-viral-video-exposes-dirty-con-featured-560x300.jpg)