
TL;DR
Cleaning between floor tiles mainly involves removing dirt, grease, and mold from grout lines. Regular maintenance with natural solutions like baking soda, hydrogen peroxide, or steam cleaners keeps grout fresh and stain-free, extending tile lifespan.
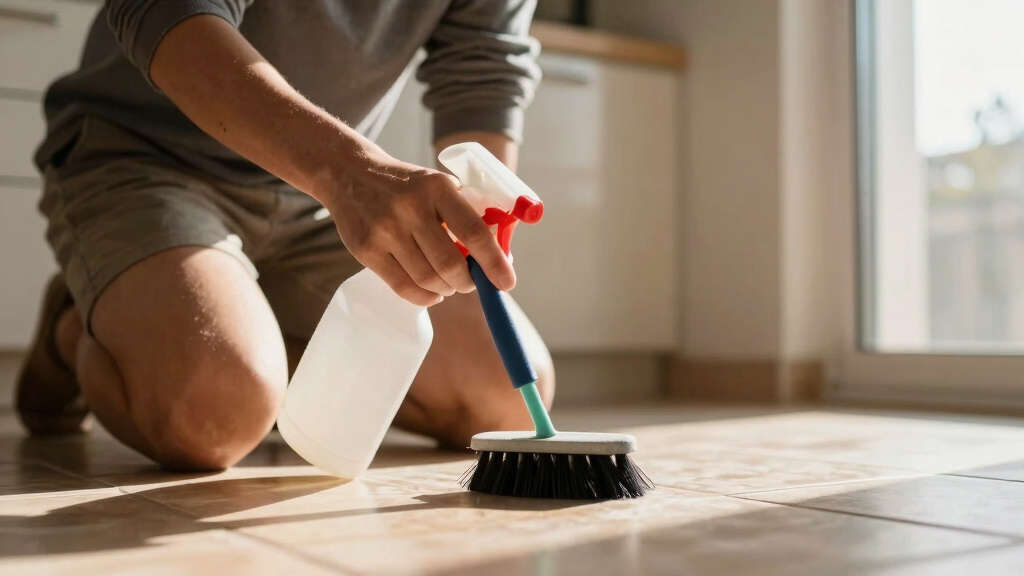
Ever looked down at your tiled floor and wondered why the grout lines look dull or stained? You’re not alone. Many people overlook the importance of cleaning between tiles, but that dirt, grime, and mold can build up fast—especially in kitchens and bathrooms.
In this guide, you’ll learn straightforward methods to keep your grout bright and fresh. From everyday tips to deep cleaning tricks, you’ll get the tools and techniques you need for a cleaner, healthier home.
Regularly sweeping and dry brushing prevents buildup and keeps grout looking fresh.
Natural solutions like baking soda and hydrogen peroxide are effective for routine cleaning and mild stains.
Sealing grout after cleaning creates a barrier that resists future stains and moisture.
Steam cleaners and ultrasonic devices offer chemical-free deep cleaning options.
Deep cleaning every few months, combined with prompt spill cleanup, prolongs grout life.
How to Clean Between Floor Tiles
TL;DR: Cleaning between floor tiles means lifting dirt, grease, and mold from porous grout lines before stains settle in. A steady routine with dry brushing, baking soda, hydrogen peroxide, steam, and proper sealing keeps grout brighter, healthier, and easier to maintain.
Light maintenance prevents buildup before grime turns into discoloration.
Steam, targeted stain treatment, and resealing help extend tile and grout life.
Grout is porous, so prevention beats heroic scrubbing.
Key insightBrush, treat, dwell, scrub, rinse, and dry.
Let cleaners loosen grime before scrubbing.
Heat loosens dirt and helps sanitize surfaces.
A barrier helps resist moisture and stains.
The Clean-Grout Method
Think of grout lines as narrow, porous channels. Dry dirt, kitchen grease, soap residue, and bathroom humidity collect there first, so the best routine combines gentle abrasion, stain-specific chemistry, and thorough drying.
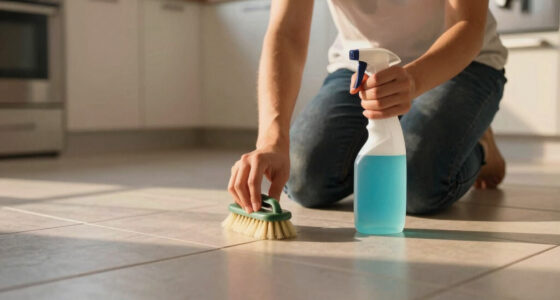
Dry brush first
Sweep and brush grout lines before adding liquid. This prevents loose grit from scratching tile and reveals the stains that need targeted treatment.
Match the cleaner
Baking soda paste handles routine soil, hydrogen peroxide lifts organic stains, and pH-balanced products help with stubborn discoloration.
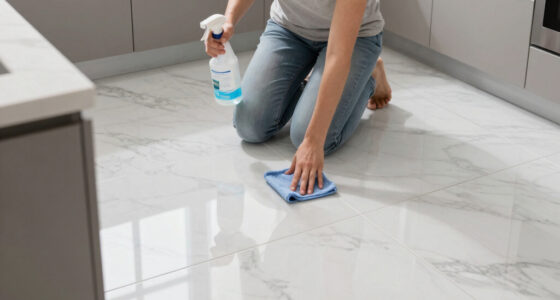
Rinse, dry, seal
Residue attracts new dirt. Clean water, a microfiber cloth, and grout sealer create the finish that keeps future cleaning easier.
Brush
Lift loose dirt from narrow lines.
Apply
Add paste, peroxide, or grout cleaner.
Wait
Give stains time to loosen.
Scrub
Use firm pressure, not force.
Dry
Remove moisture that feeds mold.

Lumkew Grout Cleaner Brush V Shape, Stiff Grout Cleaning Brushes for Tile Floor, Handheld Grout Scrub Brush Set for Shower, Bathroom, Kitchen, Household Use,2 pcs
V Shape Design: V grout cleaner brush fits precisely into each groove, and reaches deeply into narrow joints….
As an affiliate, we earn on qualifying purchases.
As an affiliate, we earn on qualifying purchases.
Natural vs. Commercial
Natural cleaners are excellent for routine maintenance and mild stains. Commercial formulas can work faster on heavy buildup, but they need careful use, ventilation, and compatibility checks for stone, grout, and tile finishes.
| Feature | Natural Cleaners | Commercial Grout Cleaners | Best Use |
|---|---|---|---|
| Ingredients | Baking soda, vinegar, hydrogen peroxide, mild detergent. | Enzymatic, pH-balanced, surfactant, or disinfecting formulas. | ✓ Choose by stain type. |
| Safety | Lower exposure risk for regular household maintenance. | Requires label directions, gloves, and ventilation. | ~ Test a hidden spot first. |
| Effectiveness | Strong for fresh grime and mild discoloration. | Better for deep-set stains, mold, and old grease. | ✓ Escalate only when needed. |
| Risk areas | Vinegar can etch natural stone surfaces. | Harsh chemicals can weaken grout when overused. | ✗ Avoid blind application. |
| Finish step | Rinse well, dry fully, seal after cleaning. | Neutralize or rinse exactly as directed. | ✓ Residue-free grout stays cleaner. |

Steam Cleaner, Portable Steamer for Cleaning with 16pcs Accessories, 6-Level Adjustable and 15s Heat-Up, Handheld Steam Cleaner for Home, Tile, Dirt, Grout, Grease, Car Detailing
Powerful Steam Cleaner: This steam cleaner heats up in just 15 seconds, releasing high-temperature steam at 221°F (105°C)…
As an affiliate, we earn on qualifying purchases.
As an affiliate, we earn on qualifying purchases.
Where Effort Pays Off
The most effective grout care is not one massive annual scrub. It is a layered schedule: frequent dry removal, occasional natural treatment, periodic deep cleaning, and sealing when the surface no longer repels moisture.
Cleaning Impact by Habit
Relative impact score based on prevention value, stain removal strength, and long-term grout protection.
Stain Severity Scale
Low severity: sweep, dry brush, mild soap, and microfiber drying. Medium severity: baking soda or hydrogen peroxide with dwell time. High severity: steam, specialty cleaner, resealing, or regrouting if discoloration is permanent.
MRS. MEYER'S CLEAN DAY Baking Soda Cream Cleaner, Cuts Grease, Scratch-Free Polish, Apple Blossom, 16 Fl Oz, Pack of 1
Mrs. Meyer’s Baking Soda Cream Cleaner removes soap scum and grease build-up to make your kitchen sparkle
As an affiliate, we earn on qualifying purchases.
As an affiliate, we earn on qualifying purchases.
From Dirt to Durable Grout
Each action connects to the next. The goal is not just brighter lines today; it is a cleaner surface that resists moisture, bacteria, mold, and recurring stains over time.
Dry Brush
Removes loose grit before wet cleaning.
Clean Treat
Targets grease, mold, and discoloration.
Dwell
Lets chemistry break down stains.
Scrub
Dislodges embedded grime safely.
Rinse Dry
Clears residue and moisture.
Seal
Creates future stain resistance.
Use Caution With Stone
Vinegar can damage natural stone and some sensitive finishes. When in doubt, use a pH-neutral cleaner and test in a hidden area before treating the whole floor.
Seal After Cleaning
Clean grout absorbs less grime when protected. If water no longer beads on the grout line, resealing helps block moisture and makes the next cleanup easier.
Miracle Sealants Grout Sealer Aerosol Spray, 15 oz
SCS Certified INDOOR ADVANTAGE GOLD
As an affiliate, we earn on qualifying purchases.
As an affiliate, we earn on qualifying purchases.
Why Grout Gets Dirty and How It Affects Your Floors
Grout lines are like sponges—porous and eager to trap dirt, grease, and mold. Over time, this buildup turns your once-bright white into a dull gray or even black. This isn’t just an aesthetic issue; it has practical implications for your home’s health and longevity. When grout is neglected, stains become ingrained, making them more difficult to remove over time. This can lead to a cycle where cleaning becomes less effective, and dirt accumulates faster. Additionally, the porous nature of grout means it can harbor bacteria, mold, and mildew—potential health risks, especially in humid environments. Understanding why grout stains matter emphasizes the importance of routine cleaning and sealing, which not only restores appearance but also maintains a hygienic surface that resists future staining and mold growth.
What Tools Make Cleaning Between Tiles Easier
- Soft-bristled toothbrushes or grout brushes—these are designed to reach into narrow lines and scrub away grime without damaging the grout. Using the right brush prevents the abrasive action that can erode grout over time, which is especially important for maintaining the structural integrity of your tile surface.
- Old toothbrushes for tight spots—perfect for corners and edges where larger brushes can’t reach, ensuring thorough cleaning in hard-to-access areas. They allow for precision, reducing the risk of spreading dirt or damaging surrounding tiles.
- Microfiber cloths for wiping—these trap dirt and moisture, reducing the risk of mold growth after cleaning. Their gentle texture helps lift residual dirt without scratching delicate surfaces.
- Spray bottles for applying cleaning solutions—allow for even distribution of solutions, minimizing waste and ensuring full coverage. Proper application ensures that cleaning agents penetrate deep into the grout, breaking down stains and grime more effectively.
- Steam cleaners for deep cleaning—use high-temperature vapor to loosen dirt and kill bacteria without harsh chemicals, but be cautious with delicate tiles or grout that may be sensitive to heat or moisture. They can sanitize surfaces while reducing chemical exposure, but excessive use or improper technique can damage grout or tiles, so understanding your materials’ tolerance is key.
Choosing the right tools isn’t just about convenience; it directly influences the effectiveness of your cleaning routine and the longevity of your tiled surfaces. Investing in quality brushes and proper applicators ensures thorough, safe cleaning that preserves the integrity of your grout and tiles, ultimately saving time and effort in the long run.
How to Clean Between Floor Tiles in 5 Simple Steps
- Start with dry brushing—remove loose dirt and debris from grout lines. This step is crucial because it prevents scratching the tile surface during wet cleaning and ensures that dirt isn’t just pushed around. Proper dry brushing also exposes the true condition of your grout, helping you identify stubborn stains or mold that need targeted treatment.
- Mix a cleaning solution: baking soda and water or hydrogen peroxide for organic stains. The choice of solution affects how deeply you can clean; natural options are gentle but may need more frequent application, while stronger solutions tackle stubborn stains but require caution. Selecting the right solution based on stain type and surface sensitivity minimizes damage and maximizes cleaning efficacy.
- Apply the solution directly onto grout, letting it sit for 5-10 minutes. This dwell time allows the active ingredients to break down stains and loosen grime, which is essential for effective cleaning. Rushing this step can lead to incomplete stain removal, while patience ensures a more thorough clean and reduces the need for aggressive scrubbing.
- Scrub with a grout brush or toothbrush, focusing on stained areas. Proper scrubbing dislodges embedded dirt, but excessive force can damage the grout. Understanding the right pressure—gentle but firm—is key to maintaining grout integrity while achieving a deep clean. Over-scrubbing can cause cracks or erosion, shortening the lifespan of your grout.
- Rinse thoroughly with clean water and dry with a cloth to prevent mold. Complete rinsing removes residual cleaning agents that, if left, can attract more dirt or cause discoloration. Drying also inhibits mold growth, which thrives in moist environments, ensuring your grout stays bright and hygienic longer.
Think of this routine as a way to refresh your tiled surfaces—much like cleaning a muddy outdoor path, it lifts grime efficiently while safeguarding the material. Consistent application of these steps prevents stubborn stains from setting in, prolongs the life of your grout, and keeps your floors looking pristine.
Comparing Natural Cleaners and Commercial Grout Cleaners
| Feature | Natural Cleaners | Commercial Cleaners |
|---|---|---|
| Ingredients | Baking soda, vinegar, hydrogen peroxide—these ingredients are common household staples that can effectively clean without introducing harsh chemicals. Their efficacy hinges on their ability to chemically break down stains and mold but may require longer contact time or multiple applications for stubborn grime. | Enzymatic formulas, pH-balanced solutions—these are specially formulated to target specific stains and bacteria, often containing surfactants and disinfectants that enhance cleaning power. They can be more aggressive and faster-acting but may contain chemicals that pose risks if not used properly. |
| Safety | Eco-friendly, non-toxic—these options are safer for children, pets, and the environment, making them ideal for regular maintenance. They also reduce the risk of chemical exposure and accidental ingestion, which is especially important in households with kids or animals. | Follow manufacturer instructions, some chemicals can be harsh—using these requires caution to avoid skin or eye irritation and damage to delicate tiles or grout if misapplied. Proper ventilation and protective gear are recommended when using commercial cleaners. They may also pose environmental concerns if not disposed of properly. |
| Effectiveness | Good for routine cleaning and mild stains—natural cleaners are excellent for regular upkeep and light stains but may struggle with deep-set or moldy grout without additional treatment. They often require more time and repeated applications to achieve desired results. | Better for stubborn stains and deep cleaning—these formulations are designed to tackle ingrained dirt, mold, and discoloration effectively, often requiring less scrubbing but with potential chemical exposure risks. They can restore heavily stained grout more quickly but should be used with caution. |
| Cost | Low—using common household items makes natural cleaning highly affordable, especially for routine maintenance. The tradeoff is that they may require more frequent application and longer cleaning sessions. | Varies, sometimes pricier—commercial products can be costlier but may save time and effort for tough stains or large areas, justifying their expense for some homeowners. They can also reduce the need for multiple products if formulated effectively. |
Think of natural options as your gentle, regular maintenance tools—perfect for weekly upkeep that preserves your grout’s health and appearance. Commercial products, on the other hand, excel at tackling stubborn, ingrained stains quickly. Balancing these options based on your specific needs, stain severity, and safety considerations ensures optimal results without compromising your health or budget.
Frequently Asked Questions
How often should I clean between my floor tiles?
Ideally, do a quick sweep or dry brush weekly to prevent dirt buildup. Deep cleaning with natural solutions or a steam cleaner every 3 to 4 months keeps grout looking bright and fresh.
What’s the best way to remove mold or mildew from grout?
Mix baking soda with hydrogen peroxide into a paste, apply it to the moldy areas, and scrub with a brush. Rinse thoroughly and dry. For stubborn mold, commercial mold removers can help, but always follow safety instructions. Prompt action is crucial because mold can cause health issues and damage the grout if left untreated.
Can I use vinegar to clean grout?
Yes, vinegar works well on many stains and is a natural disinfectant. However, avoid using it on natural stone tiles as the acidity can etch the surface. Vinegar is effective for general cleaning but should be used cautiously with sensitive surfaces to prevent damage.
How do I restore stained or discolored grout?
Use specialized grout stain removers or try regrouting if discoloration is severe. Regular sealing afterward helps prevent future staining and keeps grout looking fresh. Deep stains may require professional cleaning or reapplication of grout for best results, especially if the discoloration is ingrained or extensive.
Is it safe to use a steam cleaner on grout?
Yes, steam cleaners can effectively deep clean grout without chemicals. Just ensure your grout and tiles are heat- and moisture-resistant before use. Always follow manufacturer instructions to avoid damage, and test in a small area first to confirm compatibility.
Conclusion
Keeping between your floor tiles spotless isn’t complicated—just consistent. Use the right tools, natural solutions, and a sealing routine to make grout maintenance simple and effective. Think of your tile floor as a canvas that reveals your home’s neatness—keep it bright, and it will always make your space feel fresh.
Next time you see a stained grout line, remember: a quick scrub with baking soda or a steam cleaner can restore its brightness. Your floors will thank you for it—making every step feel cleaner and more inviting.