TL;DR

Get cleaning gear delivered free — and shop member deals
- Fast, free delivery on millions of items
- Access to Prime Big Deal Days deals on October 6–7
- Prime Video, Amazon Music and more included
Cleaning your reusable water bottle daily with soap or natural cleaners like vinegar keeps it free of bacteria and odors. Deep cleaning weekly with brushes and proper drying extends its life and safety. Recent innovations include antimicrobial bottles and UV sanitizers, but simple cleaning remains effective.
Clean your bottle daily with soap or natural solutions to prevent bacteria buildup.
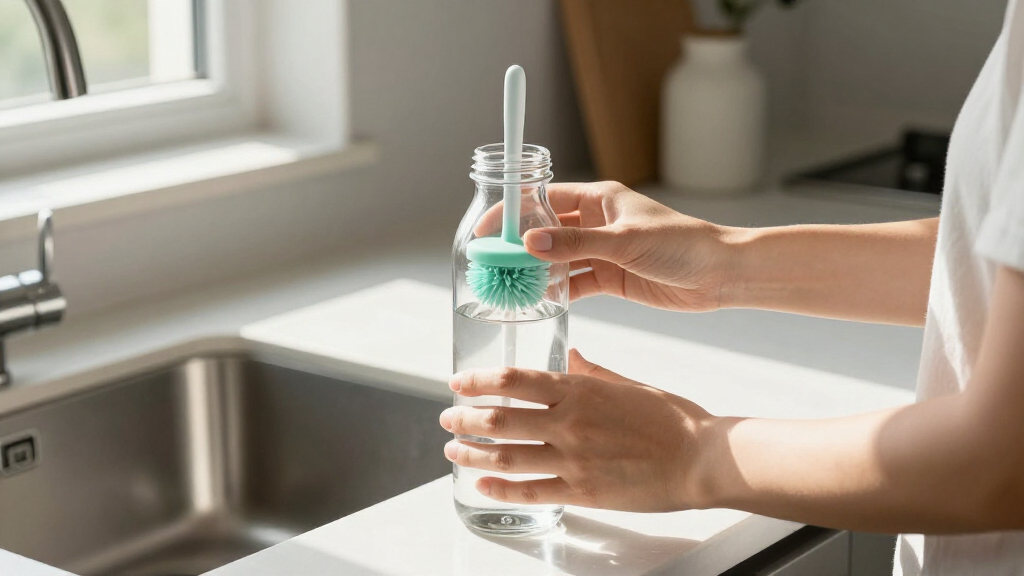
Use a long-handled bottle brush to reach all hidden spots, especially in narrow bottles.
Deep clean weekly with vinegar soak and thorough scrubbing for odor and stain removal.
Always dry your bottle completely and store with the lid off to prevent mold.
Avoid harsh chemicals like bleach unless specified; opt for eco-friendly cleaners instead.
How to Clean a Reusable Water Bottle Properly
A quick rinse leaves biofilm, residue and moisture behind. Use this practical daily-and-weekly routine to keep every cap, straw, seal and bottle interior fresh, safe and ready for your next refill.
Five steps to a truly clean bottle
Damp, dark crevices around threads, seals and mouthpieces encourage bacteria and mold. Disassembly, friction and complete drying matter as much as the cleaning solution itself.
Take it apart
Remove the cap, straw, gasket, bite valve and every detachable seal. Hidden parts need direct cleaning.
Warm rinse
Flush away loose debris and drink residue before it dries onto the bottle or its components.
Soap + scrub
Use dish soap and a long brush. Focus on the base, mouthpiece, threads, corners and narrow channels.
Vinegar soak
Soak for 15 minutes to loosen mineral deposits, neutralize odors and support deeper cleaning.
1 part vinegar : 4 parts waterAir-dry fully
Dry every part separately. Reassemble only when no moisture remains, then store with the lid off.
Match the method to the bottle
Manufacturer instructions come first. The correct technique removes residue without scratching, clouding or degrading the material.
| Material | Routine cleaning | Deep cleaning | Avoid | Best quality |
|---|---|---|---|---|
| Plastic | ✓Warm water and mild dish soap | ~Occasional diluted vinegar soak | ✗Unapproved bleach, excess heat and continued use after cracking | Lightweight and portable |
| Glass | ✓Soap and water; dishwasher only when labeled safe | ✓Vinegar or baking soda for residue | ✗Impacts, thermal shock and use after chipping | Non-porous and odor-resistant |
| Stainless steel | ✓Hot water, mild soap and a soft brush | ✓Diluted vinegar for odors and mineral spots | ✗Abrasive scrubbers that can scratch the finish | Durable and long-lasting |
Simple tools do the heavy lifting
Soap and physical scrubbing remain the foundation. Natural cleaners help with odors, stains and mineral deposits while preserving the bottle’s finish.
Bottle brush
Long handles and firm, non-abrasive bristles reach the bottom and disrupt buildup on interior walls.
White vinegar
Helps neutralize odors and dissolve mineral deposits. Dilute for routine deep-cleaning soaks.
Baking soda
Use with water as a gentle paste or soak for stubborn smells and surface stains.
Dish soap
Breaks down oils, flavor residue and everyday grime during the essential daily wash.
Cleaning priority by situation
The more residue a drink leaves—and the longer moisture remains—the more urgent a thorough wash becomes. These bars show relative cleaning priority, not measured bacterial counts.
Stop mold and odors before they return
Cleaning removes buildup; drying prevents the damp environment that lets it return. Small storage habits make the largest difference between washes.
Make this routine
- Wash daily and immediately after sugary or flavored drinks.
- Clean caps, straws, seals and mouthpieces separately.
- Use a small detail brush for threads and narrow channels.
- Place every part upside down or on a rack with airflow.
- Store the empty bottle open with the lid removed.
- Inspect regularly for cracks, cloudiness and trapped residue.
Avoid these mistakes
- Relying on a quick water rinse as the only cleaning step.
- Reassembling the bottle while seals or straws are damp.
- Using abrasive tools on stainless steel or soft plastic.
- Putting an unapproved bottle or cap in the dishwasher.
- Using bleach unless the manufacturer specifically permits it.
- Ignoring persistent mold, cracks or odors that survive cleaning.
Retire a bottle when cracks, damaged seals, persistent odors or mold cannot be fully cleaned away.
Good habits connect from wash to refill
Antimicrobial surfaces
Designed to inhibit microbial growth, but they do not replace washing, scrubbing and drying.
UV-C sanitizers
Portable UV-C systems offer an additional sanitizing step, especially for travel and outdoor use.
Basic cleaning wins
Even advanced bottles need residue removed from caps, seals and surfaces with regular manual cleaning.
Why Regular Cleaning Keeps Your Water Bottle Safe and Smelling Fresh
Reusable water bottles can harbor bacteria, mold, and unpleasant odors if neglected. Bacteria can multiply rapidly in damp, dark places — a single day of use can lead to a buildup that affects taste and health. Regular cleaning with soap and water disrupts this growth. For example, after a workout, a quick rinse isn’t enough; a thorough scrub is essential to prevent the slimy feeling and sour smell that can develop within days.
According to experts, bacteria levels in unclean bottles can reach dangerous levels within 24 hours, especially if you add sugary or flavored drinks. Cleaning your bottle daily or after every use prevents this. It’s not just about hygiene — a dirty bottle shortens its lifespan and leaves residues that can stain or corrode materials.
Deep cleaning also helps remove mineral deposits, stains, and residues that regular rinsing can miss. These buildups can create microenvironments where bacteria thrive, leading to persistent odors and potential health risks. Neglecting regular cleaning may cause your bottle to develop a sour smell or even mold, which can be difficult to eliminate if left unchecked. Consistent cleaning ensures your bottle remains a safe and pleasant vessel for hydration, reducing the risk of illness and extending its usability.
long-handled water bottle cleaning brush
As an affiliate, we earn on qualifying purchases.
As an affiliate, we earn on qualifying purchases.
Choose the Right Cleaning Method for Your Bottle Material
The way you clean depends on what your bottle is made of. Plastic, glass, and stainless steel each need different care. Plastic bottles are lightweight but can stain or retain odors. Glass bottles are non-porous, making them easier to clean but fragile. Stainless steel is durable and resistant to odors but can get water spots.
Here’s a quick comparison:
| Material | Cleaning Tips | Best For |
|---|---|---|
| Plastic | Use warm water, dish soap, and occasional vinegar soak. Avoid bleach unless specified. Be mindful that plastics can stain or retain flavors over time, which can impact taste and hygiene. Regularly inspecting for cracks or cloudiness is important because damaged plastics can harbor bacteria in microcracks. | Lightweight, inexpensive, easy to carry. |
| Glass | Wash with soap, vinegar, or baking soda. Dishwasher safe if labeled. Glass is non-porous, so it resists stains and odors, but it can break if dropped. Handle with care to prevent cracks that can harbor bacteria, making thorough cleaning essential. | Non-porous, odor-resistant, easy to sterilize. |
| Stainless Steel | Hot water, mild soap, and vinegar. Avoid abrasive scrubbers as they can scratch the surface, creating tiny crevices where bacteria can hide. Stainless steel resists odors and stains but can develop water spots; regular drying prevents this. | Durable, odor-free, long-lasting. |
Choosing the appropriate cleaning method based on your bottle’s material ensures thorough sanitation without damaging the surface. For example, abrasive cleaning on stainless steel can scratch the finish, making it harder to clean in the future, while harsh chemicals on plastic can degrade the material. Understanding these nuances helps you maintain your bottle’s integrity and hygiene over time.
reusable water bottle vinegar cleaner
As an affiliate, we earn on qualifying purchases.
As an affiliate, we earn on qualifying purchases.
Step-by-Step: How to Deep Clean Your Water Bottle in 5 Easy Steps
- Disassemble all removable parts — caps, straws, seals. This exposes hidden spots where mold and bacteria can hide, ensuring a more thorough cleaning.
- Rinse with warm water to remove loose debris, which can harbor bacteria if left unwashed.
- Scrub with a long-handled brush and dish soap. Focus on the mouthpiece, threads, and any crevices, as these are common areas for buildup. Proper scrubbing physically removes biofilms and residues that can’t be eliminated by rinsing alone.
- Soak in a vinegar solution (1 part vinegar to 4 parts water) for 15 minutes. Vinegar’s acetic acid disrupts bacterial cell walls and dissolves mineral deposits, reducing microbial presence and preventing odors. This step enhances the effectiveness of manual scrubbing and helps reach microscopic contaminants.
- Air dry completely before reassembling. Store with the lid off to allow airflow and prevent mold growth. Proper drying eliminates residual moisture, which is crucial because damp environments promote bacterial and mold growth, especially in hard-to-reach areas.
Imagine the satisfaction of opening a bottle that smells fresh and looks spotless. This routine keeps your bottle safe and odor-free, avoiding the slimy, sour buildup that can happen in just a few days. Deep cleaning not only maintains hygiene but also extends the lifespan of your bottle by preventing corrosion and material degradation caused by residues and mineral buildup.
As an affiliate, we earn on qualifying purchases.
Best Tools and Natural Cleaners That Make Cleaning Easier
Getting the right tools can turn cleaning into a breeze. A long-handled bottle brush is a must-have. It reaches the bottom and sides of narrow bottles, where grime hides, ensuring no spot is left uncleaned. For natural cleaning, vinegar and baking soda are your best friends—effective, safe, and eco-friendly. These natural agents not only clean but also prevent the buildup of residues and odors, making maintenance easier over time.
- Bottle Brush: Look for one with stiff bristles and a long handle. A good brush reaches every corner, reducing the need for harsh scrubbing and minimizing scratches.
- Vinegar: Kills bacteria, neutralizes odors, and dissolves mineral deposits. Regular vinegar soaks can prevent stubborn stains and microbial growth, especially in hard water areas.
- Baking Soda: Deodorizes and gently scrubs stains. When used as a paste or in soaking solutions, it helps lift residues and keeps your bottle smelling fresh.
- Dish Soap: Breaks down grease and residues, ensuring a thorough clean without leaving chemical residues that could be harmful or affect taste.
For stubborn stains or persistent odors, soaking the bottle overnight in vinegar or a baking soda paste can significantly improve cleanliness. These methods are safer and more sustainable than harsh chemical cleaners, preserving the integrity of your bottle material and protecting your health and the environment.
As an affiliate, we earn on qualifying purchases.
How to Prevent Mold and Odors from Coming Back
Prevention is key to maintaining a fresh, odor-free bottle. Thoroughly drying your bottle after each wash removes residual moisture that promotes mold and bacterial growth. Leaving the lid off in a well-ventilated area allows airflow, which accelerates drying and reduces humidity inside. For lingering odors, a baking soda paste or vinegar soak can neutralize smells at their source, preventing them from re-establishing. For instance, placing a teaspoon of baking soda in the bottle overnight absorbs odors and moisture, helping keep it smelling clean.
Storing the bottle upright with the cap loosely on allows air circulation, further reducing moisture accumulation. Regular cleaning, especially after flavored or sugary drinks, prevents residue buildup that can harbor mold. Think of it as giving your bottle a quick breath of fresh air after every use. Developing these habits ensures your bottle remains hygienic and odor-free, saving you time and effort in the long run.
Latest Tech and Trends in Water Bottle Hygiene
New tech makes cleaning easier and more effective. Some bottles now feature antimicrobial coatings that inhibit bacterial growth on the surface, reducing microbial buildup over time. Others incorporate UV-C light sanitizers that disinfect in minutes — just put the bottle inside, activate, and wait. These innovations can significantly reduce bacteria by up to 99%, providing a convenient way to maintain hygiene, especially when regular scrubbing isn’t feasible.
However, it’s important to understand that these technologies are supplementary rather than replacements for manual cleaning. Natural cleaning with soap, vinegar, and thorough drying remains the most reliable method for daily hygiene because it physically removes contaminants and residues. UV sanitizers and antimicrobial coatings can be part of an overall cleaning routine, especially for busy lifestyles or travel, but should not replace regular manual cleaning.
Additionally, many bottles are now made from BPA-free, eco-friendly materials that resist staining and odors, making cleaning easier and safer for your health. These materials often require less aggressive cleaning methods and are less prone to harboring bacteria, contributing to overall better hygiene and sustainability.
Common Mistakes That Ruin Your Water Bottle and How to Avoid Them
One big mistake is neglecting to dry the bottle completely. Leftover moisture breeds mold and bacteria fast, especially in hidden crevices and threads. This can lead to persistent odors and even health risks if mold spores are inhaled or ingested. Another mistake is using harsh chemicals like bleach unless explicitly recommended by the manufacturer — they can degrade materials, cause discoloration, and leave residues that are harmful or affect taste. Over-cleaning or scrubbing with abrasive tools can scratch surfaces, creating tiny crevices that trap dirt and bacteria, making future cleaning less effective. Lastly, storing your bottle with the lid sealed tight traps moisture inside, creating a perfect environment for mold and bacteria to thrive.
To avoid these pitfalls, always follow manufacturer instructions, opt for natural cleaners, and ensure your bottle is thoroughly dried before storage. Giving your bottle proper care not only prolongs its lifespan but also maintains optimal hygiene, preventing costly replacements or health issues. Developing these habits ensures your hydration vessel remains safe, clean, and functional for years to come.
Frequently Asked Questions
How often should I clean my reusable water bottle?
Ideally, clean it daily if used regularly. Deep cleaning with vinegar or baking soda should happen once a week to keep bacteria and odors at bay.Can I put my water bottle in the dishwasher?
Many bottles, especially glass and stainless steel, are dishwasher safe. Always check the manufacturer’s instructions first, especially for plastic bottles, to avoid warping or damage.What’s the best way to clean a narrow-neck bottle?
Use a long-handled bottle brush designed for tight spaces. Soaking in vinegar or baking soda solution first can loosen grime, making scrubbing easier.Are natural cleaners like vinegar safe for all bottles?
Yes, vinegar and baking soda are safe and effective for most materials. Avoid using vinegar on certain plastics if the manufacturer warns against it. When in doubt, check your bottle’s care instructions.How can I tell if my bottle needs replacing?
Look for persistent odors, cracks, or mold that won’t go away after cleaning. If the bottle becomes stained or starts to leak, it’s time for a new one.Conclusion
Keeping your water bottle fresh isn’t complicated — just consistent, proper cleaning. Think of it as giving your trusty hydration buddy a spa day after every use. A clean bottle means safer drinking and longer life for your favorite container. So, grab that brush and vinegar, and step up your cleaning game today.Fall Picks
fall essentials
As an affiliate, we earn on qualifying purchases.