
TL;DR

Get cleaning gear delivered free with Prime
- Fast, free delivery on millions of items
- Prime Video, Amazon Music and more included
- Member-only deals all year
Cleaning outdoor light fixtures boosts brightness and prevents damage. Always turn off power first, use gentle materials, and follow manufacturer instructions for safety and best results.
If your outdoor lights look dull or dusty, don’t ignore them. Dirt, pollen, insects, and mineral deposits can cloud lenses, block light, and accelerate corrosion. A little effort now means brighter evenings, longer-lasting fixtures, and fewer repairs down the line.
But cleaning outdoor fixtures isn’t just about aesthetics. It’s a safety step. Water and electrical parts don’t mix well, and improper cleaning can damage delicate components. This guide walks you through safe, effective ways to keep your outdoor lighting shining brightly and functioning safely all year round.
Always disconnect power at the breaker before cleaning any outdoor fixture to prevent shock.
Use only gentle, nonabrasive materials—warm water, mild soap, and soft cloths—to avoid damaging finishes and plastics.
Regular inspections help catch issues like rust, cracks, or water intrusion early, saving repair costs.
Clean solar panels and lenses frequently to maintain brightness and efficiency.
Follow manufacturer instructions carefully—different materials and fixtures require specific cleaning methods.
How to Clean Outdoor Light Fixtures
Dirt, pollen, insects, and mineral deposits cloud lenses, block light, and accelerate corrosion. A little effort now means brighter evenings, longer-lasting fixtures, and fewer repairs — done safely, with the power off and gentle materials only.
Three Safety Rules Before You Touch Anything
Power Off at the Breaker
Flipping the wall switch is not enough — smart fixtures, timers, photocells, and miswired circuits can stay live. Kill the breaker, verify with a non-contact tester, and let bulbs and metal parts cool before you begin.
Follow Manufacturer Guidelines
Delicate coatings, plastic lenses, and sealed optical chambers need specific care. Harsh chemicals, abrasives, or pressure washing can cloud plastics, strip finishes, degrade seals — and void your warranty.
Gentle Tools Only
Warm water, mild dish soap, microfiber cloths, and a soft toothbrush. Avoid steel wool, scouring pads, bleach, ammonia, solvents, and high-pressure sprays — they scratch, cloud, and degrade seals.
The 12-Step Cleaning Routine
Kill power & verify
Switch off at the breaker; test with a non-contact tester.
Let it cool
Wait for bulbs and metal parts to cool completely.
Set the ladder
Sturdy ladder on firm, level ground.
Dry-brush debris
Remove leaves, webs, and insects with a dry brush.
Detach parts
Remove glass, shades, or globes; track screws and clips.
Wash glass
Warm, soapy water — no sudden temperature changes.
Wipe the body
Damp (not dripping) microfiber cloth only.
Detail work
Soft toothbrush around seams and decorations.
Rinse residue
Wipe soap away with a clean, damp cloth.
Dry fully
Lint-free cloth; every component bone-dry.
Inspect
Check seals, sockets, wiring, and drainage points.
Reassemble & test
Restore power and confirm the light works.
Clean Each Material the Right Way
| Material | Recommended Approach | Important Cautions |
|---|---|---|
| Glass | Mild soap, warm water, soft cloth | ✗ Sudden temperature shifts & abrasive scrubbers |
| Acrylic / Polycarbonate | Mild soap and a clean microfiber cloth | ✗ Ammonia, solvents, rough paper towels, vigorous scrubbing |
| Powder-Coated Metal | Damp cloth with mild soap | ✗ Abrasive cleaners that remove the protective finish |
| Brass | Gentle soap; polish only if manufacturer approves | ✗ Polishing may remove deliberate patina or coating |
| Copper | Wash gently; preserve natural patina if desired | ✗ Metal polish changes the aged appearance |
| Stainless Steel | Wipe with the grain; dry thoroughly | ✗ Chlorine-based cleaners and steel wool |
| Aluminum | Mild soap and water | ✗ Aggressive acids, alkaline cleaners, abrasive polishing |
| Coastal Fixtures | Rinse salt deposits gently; clean more often | ✗ Salt accelerates corrosion even on resistant materials |
Tackle Stubborn Stains with Confidence
Mineral Deposits
Restores clarity, but vinegar can etch or discolor some metals and plastics if left too long. Test first, rinse thoroughly.
Bird Droppings
Acids in droppings stain and pit finishes. Prompt removal prevents damage and discourages birds from perching again.
Rust Spots
Light rust can be treated with a rust-appropriate product; deep rust or perforation usually means replacement. Rust inhibitors slow reformation.
Cloudy Plastic
Surface contamination cleans off, but UV damage is usually permanent — know the difference before deciding to clean or replace.
LEDs, Sensors & Solar Panels
LED Fixtures
Wipe accessible surfaces with a dry microfiber cloth. Never open sealed modules unless the manufacturer approves it.
Sensors & Photocells
Gently clean the sensor window with a microfiber cloth. Keep it free of dirt, webs, and mineral buildup for proper operation.
Solar Panels
Turn the unit off, rinse with water, and wipe with a soft cloth. Clean frequently — dirty panels slash charging efficiency.
Never immerse the electrical housing, socket, transformer, photocell, motion sensor, or permanently attached LED assembly. If you find exposed wiring, scorching, or persistent moisture inside a fixture — call a licensed electrician.
Safety Bottom LineWhy Turning Off Power Is Non-Negotiable Before Cleaning
Turning off the power at the breaker is your first move. Even a small spark or short circuit can cause serious harm or damage. Many people assume flipping the wall switch is enough — it’s not.
Imagine reaching for a dusty fixture on a ladder. You forget the breaker, accidentally touch a bare wire, and get a shock. Not worth the risk. Always verify the fixture is dead before starting. Wait a few minutes for bulbs and metal parts to cool, especially on hot days.
This step is critical. It protects you from electrical shock and prevents accidental damage. If you’re unsure about wiring or exposed components, call a licensed electrician.
outdoor light fixture cleaning kit
As an affiliate, we earn on qualifying purchases.
As an affiliate, we earn on qualifying purchases.
Follow the Manufacturer’s Cleaning Guidelines for Your Fixture
Every fixture is different. Some have delicate coatings, plastic lenses, or sealed optical chambers that require special care. Always read the label or instruction sheet that came with your light.
If the manufacturer advises against using harsh chemicals or pressure washers, respect that. Abrasive cleaners can scratch glass, cloud plastics, or strip protective finishes. Using the wrong method might void your warranty or cause irreversible damage.
When in doubt, stick to gentle cleaning—warm water, mild soap, and soft cloths. Your fixture will thank you.
As an affiliate, we earn on qualifying purchases.
Use Gentle Materials and Tools to Keep Fixtures Safe
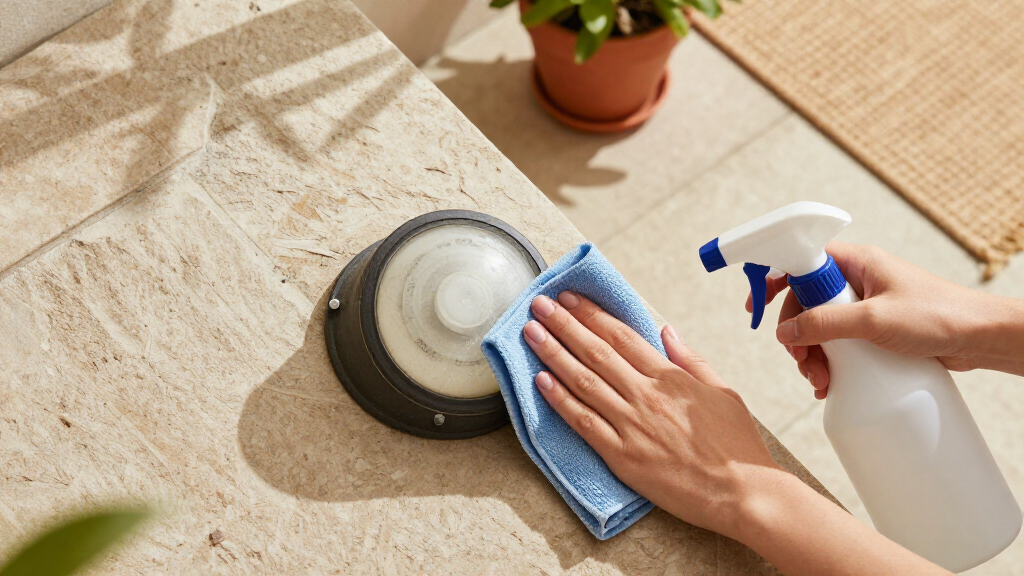
Gentle cleaning materials are your best friends. Think soft microfiber cloths, nonabrasive sponges, and a soft-bristled toothbrush. Mild dish soap diluted in warm water is usually enough to lift dirt without harming surfaces.
A quick tip: avoid steel wool, abrasive powders, harsh solvents like bleach or ammonia, and high-pressure sprays. These can scratch, cloud, or degrade finishes, seals, and plastics.
For example, a microfiber cloth gently lifting pollen from a plastic lens preserves clarity, while a steel wool pad might leave scratches that turn cloudy over time.
nonabrasive cleaning cloth for outdoor lights
As an affiliate, we earn on qualifying purchases.
As an affiliate, we earn on qualifying purchases.
Step-by-Step: How to Safely Clean Outdoor Light Fixtures in 12 Easy Steps
- Turn off the power at the breaker. Confirm no current flows by testing with a non-contact tester.
- Let bulbs and metal parts cool down.
- Place a sturdy ladder on firm, level ground near your fixture.
- Remove leaves, webs, and insects with a dry brush or cloth.
- Carefully detach removable glass, shades, or globes, keeping track of screws and clips.
- Wash glass parts with warm, mildly soapy water—avoid sudden temperature changes.
- Wipe the fixture’s body with a damp microfiber cloth, avoiding dripping water.
- Use a soft toothbrush around seams and decorative details.
- Rinse or wipe away soap residue with a clean, damp cloth.
- Dry every component thoroughly with a lint-free cloth.
- Inspect seals, sockets, wiring, and drainage points for damage or debris. Reassemble, restore power, and test the light.
outdoor light fixture maintenance tools
As an affiliate, we earn on qualifying purchases.
As an affiliate, we earn on qualifying purchases.
How to Clean Different Materials Without Causing Damage
Different materials need different care. Here’s a quick guide:
| Material | Recommended Approach | Important Cautions |
|---|---|---|
| Glass | Mild soap, warm water, soft cloth | Avoid sudden temperature shifts and abrasive scrubbers |
| Acrylic/Polycarbonate | Mild soap, microfiber cloth | No ammonia, solvents, or rough scrubbing |
| Powder-coated Metal | Damp cloth, mild soap | No abrasive cleaners |
| Brass | Gentle soap; polish only if approved | Polishing can remove protective patina |
| Copper | Gently wash; preserve natural patina if desired | Metal polish changes look |
| Stainless Steel | Wipe with the grain, dry thoroughly | Avoid chlorine cleaners and steel wool |
Always match your cleaning method to the material. When in doubt, test on a small, hidden area first. Proper cleaning preserves the material’s integrity, appearance, and corrosion resistance. Failing to do so can lead to scratches, discoloration, or deterioration, which may compromise the fixture’s safety and longevity. Understanding the implications of using incorrect cleaners or techniques helps prevent premature failure and costly repairs, ensuring your outdoor lighting remains functional and attractive for years.
Tackle Stubborn Stains and Common Problems with Confidence
Mineral deposits, bird droppings, rust, and clouded plastic are common issues. Here’s how to handle them:
- Mineral deposits: Lightly dampen a cloth with diluted white vinegar, place it on the glass for a few minutes, then rinse and dry. This method dissolves mineral buildup, restoring clarity. But be cautious: vinegar can etch or discolor some metals or plastics if left too long. Always test first and rinse thoroughly afterward to prevent residue that might attract more dirt or cause corrosion.
- Bird droppings: Soften with a damp cloth before wiping. Wear gloves to avoid contact with bacteria or irritants. Prompt removal prevents corrosive acids in droppings from damaging surfaces or finishes, which can lead to staining or pitting. Regular cleaning also discourages birds from nesting or perching, reducing future messes.
- Rust: Light rust spots can often be treated with a rust-appropriate product. Deep rust or perforation may mean replacement. Addressing rust early prevents it from spreading and weakening the fixture’s structural integrity. Using rust inhibitors after cleaning can slow reformation, extending the fixture’s life.
- Cloudy plastic: Surface contamination can often be cleaned off; UV damage is usually permanent. Recognizing the difference helps you decide whether cleaning is worthwhile or if replacement is necessary. Avoid harsh abrasives that can worsen clouding or scratches.
Persistent water inside fixtures indicates a seal failure or blocked drain. If water remains despite cleaning, it’s essential to have a professional evaluate the fixture to prevent electrical hazards and further deterioration. Regular inspections can catch these issues early, avoiding costly repairs and ensuring safe operation.
Caring for LEDs, Sensors, and Solar Panels—What You Need to Know
LEDs and sensors are delicate but vital parts of modern outdoor fixtures. Clean them carefully.
- LED fixtures: Wipe accessible surfaces with a dry microfiber cloth. Don’t open sealed modules unless approved by the manufacturer.
- Sensors and photocells: Gently clean the sensor window with a microfiber cloth. Keep it free of dirt, webs, and mineral buildup for proper operation.
- Solar panels: Turn off the unit, then rinse with water and wipe with a soft cloth. Keep panels free of dust, pollen, and bird droppings to maintain efficiency.
Remember: Never spray water directly into electrical enclosures or sealed LED modules. Regular cleaning keeps these components working their best. Neglecting proper maintenance can lead to reduced efficiency, false readings, or complete failure of sensitive electronic parts. Proper care ensures your system functions reliably, saving you money and headaches in the long run.
How Often Should You Clean Outdoor Fixtures? Setting a Realistic Schedule
Frequency depends on your environment. Near the coast or busy roads? Expect to clean more often.
A practical plan: Inspect monthly—look for webs, dirt, or insect nests. Do a deep clean two to four times a year, or more if needed.
After storms, freezing weather, or nearby construction, give your fixtures a quick check. Regular maintenance prevents build-up, corrosion, and electrical issues.
For solar lights, clean panels whenever dirt or grime reduce brightness. Seasonal cleaning helps maintain energy efficiency and safety.
Routine Checks to Keep Fixtures Safe and Working Well
Cleaning isn’t just about looks. Use this opportunity to inspect your fixtures for damage or wear.
- Check for cracked or loose glass or plastic parts.
- Look for missing or loose screws and mounting hardware.
- Examine gaskets, seals, and drainage openings for deterioration or blockage.
- Inspect for rust, pitting, or corrosion, especially in coastal areas.
- Ensure wiring, sockets, and electrical components aren’t damaged or waterlogged.
If you find serious issues—corrosion, cracked wiring, or damage—call an electrician. A little prevention now saves big repairs later. Regular checks help catch early signs of deterioration, preventing safety hazards and prolonging fixture life, which ultimately saves money and maintains the aesthetic appeal of your outdoor space.
What’s New in Outdoor Lighting Maintenance? Modern Fixtures and Better Design
Latest fixtures are more durable and easier to maintain. Many now use sealed LED modules, smart controls, and corrosion-resistant coatings.
Modular designs let you replace parts rather than whole fixtures. UV-resistant paints and advanced finishes resist fading and salt damage. These improvements mean less frequent cleaning and repair.
However, newer fixtures often require special care. For example, sealed LED units shouldn’t be opened without manufacturer approval, and smart controls need careful handling during cleaning. Recognizing these advancements helps you adapt your maintenance routines to take advantage of longer-lasting, more efficient fixtures, ultimately saving time and money while keeping your outdoor lighting modern and reliable.
Key Facts That Make Outdoor Fixture Care Smarter
Keeping your outdoor lights bright is more than aesthetics. Dirt on lenses or solar panels can cut brightness by half, according to Outright Cleaning. This reduction in brightness can compromise safety by making pathways less visible and increasing the risk of trips or accidents at night. Regularly turning off the power before cleaning is essential not only for safety but also to prevent short circuits or damage to sensitive electronic components. Materials like brass or copper can be polished to restore shine, but this may remove the protective patina or alter the fixture’s appearance, which could be a concern if you prefer a vintage look. Conducting regular checks helps catch early signs of rust, corrosion, or water intrusion, avoiding costly repairs and extending fixture lifespan. Coastal homes face additional challenges; salt deposits accelerate corrosion, making vigilant maintenance even more critical to preserve both function and aesthetics.
Your Top Questions About Outdoor Light Maintenance Answered
Can I clean an outdoor light without turning off the breaker? It’s safer to disconnect power at the breaker. Wall switches don’t fully disconnect the fixture, risking shock or damage.
Can I use a hose or pressure washer? Usually not. High pressure can damage seals and wiring. Use a damp cloth instead unless the manufacturer states otherwise.
Can removable glass shades go in a dishwasher? Only if explicitly approved by the manufacturer. Vibration and heat can crack or damage glass and hardware.
How do I remove oxidation from brass or copper? Use approved polish if you want a shiny finish. For a natural look, gentle washing and preservation of patina work best. Be aware that polishing can remove protective coatings or alter the fixture’s appearance, so consider whether you want a shiny or aged look before proceeding.
Why is there water inside my fixture? Common causes include a failed gasket, cracked lens, or blocked drain. Persistent water needs professional attention to prevent electrical hazards and further damage.
Conclusion
Keeping outdoor fixtures clean isn’t just about appearances; it’s about safety, efficiency, and longevity. A simple routine of turning off power, using gentle materials, and inspecting for damage can extend their life and brightness for years to come.
Next time you see dust or grime on your outdoor lights, remember: a quick, careful cleaning is a small effort that makes a big difference. Brighten your evenings and protect your investment—your fixtures will thank you.
Fall Picks
fall essentials
As an affiliate, we earn on qualifying purchases.