TL;DR
Rust on kitchen knives appears as reddish-brown spots and can be removed with natural remedies, abrasive methods, or commercial products. Regular maintenance and proper storage prevent future rusting and keep blades sharp.
Nothing ruins a good meal like a dull, rust-stained knife. That reddish-orange patch that shows up on the blade can seem like the end of the line for your favorite kitchen tool. But don’t toss it just yet. Removing rust from knives is often straightforward, and you don’t need fancy equipment or toxic chemicals.
In this guide, you’ll learn practical, safe techniques to restore your knives’ shiny edge. Whether you prefer natural solutions, abrasive scrubbing, or specialized rust removers, I’ll walk you through each step. Think of your knife as a trusty companion — with a little care, it can stay sharp and rust-free for years to come.
Start with natural remedies like lemon and baking soda for safe rust removal.
Use gentle tools like soft cloths or toothbrushes — avoid harsh abrasives that could scratch your blade.
Always dry and oil your knives after cleaning to prevent future rust.
Sharpen your blade after rust removal to restore its cutting power.
For heavily rusted knives, consider replacement to avoid safety risks.
How to Remove Rust From Kitchen Knives
Reddish-orange spots do not automatically mean the end of a favorite blade. Start gently, match the method to the severity, then dry, sharpen, and protect the steel to keep rust from returning.
Spot rust before it bites deeper
Rust is iron oxide created when iron or steel meets moisture and oxygen. Early surface spots are usually manageable; deep pitting can weaken the blade and make replacement the safer choice.
Orange spots
Small reddish-brown freckles or streaks are often early-stage surface rust and the easiest type to remove.
Rough or flaky
A gritty, dull patch suggests corrosion has progressed. Work slowly and inspect the steel after every pass.
Deep pitting
Visible cavities, cracks, chips, or extensive metal loss may compromise strength and food-safe performance.
Water left after washing, humid storage, acidic food residue, damaged coatings, and dishwasher cycles all give oxidation more opportunity to develop.
Four ways to lift the rust
Begin with the least aggressive treatment. Repeat a gentle process before escalating to a harsher abrasive or chemical, especially on high-carbon, patterned, coated, or specialty steel.
Lemon + salt
Sprinkle salt over the spot, add fresh lemon juice, wait, then scrub gently with a soft cloth. Rinse and dry immediately.
White vinegar
Submerge only the rusty blade area, monitor it closely, then brush away loosened corrosion. Avoid prolonged exposure.
Baking soda
Mix a thick paste with a few drops of water, cover the rust, wait, and work it with a soft toothbrush. Repeat patiently if needed.
Commercial remover
Choose a metal-safe product suitable for kitchen tools, follow its instructions precisely, and test a small area before full application.
Choose the right treatment
No single technique suits every knife. Consider rust severity, blade finish, steel type, required speed, and the risk of discoloration or scratching.
| Method | Light rust | Stubborn rust | Blade risk | Watch-out |
|---|---|---|---|---|
| Lemon + salt | ✓ Excellent | ~ Limited | ✓ Low | Acid can affect reactive steel if left too long |
| White vinegar | ✓ Strong | ~ Moderate | ~ Medium | Monitor high-carbon and specialty blades closely |
| Baking soda | ✓ Excellent | ~ Repeat | ✓ Low | Use a soft brush and avoid excessive pressure |
| Fine pad or wool | ~ Excessive | ✓ Effective | ✗ Higher | May leave micro-scratches or dull the finish |
| Commercial remover | ~ Usually unnecessary | ✓ Fast | ~ Product-dependent | Confirm food-contact and blade compatibility |
✓ Preferred ~ Use judgment ✗ Avoid unless necessary
Clean without damaging the blade
The safest technique uses controlled motion and the softest effective tool. Keep fingers clear of the edge, scrub from spine toward edge, and never work blindly beneath an opaque cloth.
The safe sequence
Use cut-resistant protection where practical and keep a stable grip on the handle.
Check for discoloration, coating damage, or scratches before treating the whole blade.
Choose a soft cloth, sponge, toothbrush, or nylon pad before considering fine-grade steel wool.
Remove all cleaner, towel-dry immediately, and confirm that no active rust or residue remains.
From rusty to ready
Rust removal is only half the rescue. A clean blade must be dried, its edge assessed, and the steel protected before returning to service.
Check rust depth, steel condition, and edge damage.
Start with the gentlest compatible method.
Use controlled strokes and inspect frequently.
Remove residue and eliminate moisture at once.
Restore the edge and add a protective barrier.
Restore cutting performance
Use a honing steel for a rolled but otherwise sound edge. Use a whetstone or professional sharpening service when the edge has nicks, chips, severe dullness, or uneven geometry. Smooth, controlled strokes are safer and more consistent than speed.
Keep rust from coming back
Corrosion prevention is mainly moisture control. A short routine after every use protects the finish, preserves the edge, and reduces the need for future repair.
Hand-wash and dry
Wash promptly with mild soap, towel-dry the entire knife, and pay special attention to the heel, bolster, joint, and handle seam.
Choose dry ventilation
Use a clean knife block, blade guard, ventilated drawer organizer, or magnetic strip away from sinks and humid areas.
Apply food-grade oil
Wipe a very thin coat of food-grade mineral oil or knife oil onto reactive steel, especially in humid climates.
Skip the dishwasher
Heat, prolonged humidity, harsh detergent, and contact with other utensils can damage coatings, edges, and corrosion resistance.
Surface rust only
Proceed when the blade remains solid, smooths out after cleaning, and has no serious cracks, deep pits, or unstable edge damage.
Structural damage
Retire the knife if corrosion is extensive, the blade is deeply pitted or cracked, the edge crumbles, or safe cleaning is no longer possible.
Five rules for a cleaner, safer blade
Start with lemon, baking soda, or another gentle treatment.
Use a soft cloth or toothbrush before any stronger abrasive.
Rinse, dry, and oil the blade immediately after cleaning.
Hone or sharpen the edge after removing corrosion.
Replace blades with deep pitting, cracks, or major metal loss.
Key insight: Natural remedies such as lemon juice and baking soda can remove light rust effectively while reducing reliance on harsher chemicals. Always confirm compatibility with the knife manufacturer’s care guidance.
Spotting Rust on Your Kitchen Knives — What to Look For
Rust appears as rough, reddish-brown or orange patches on your knife’s surface. It usually starts as tiny spots but can spread if ignored. Take a close look at your blades after washing — especially if they’ve been stored in humid places or not dried thoroughly.
For example, if your knife has a dull, flaky area that feels gritty or looks discolored, that’s likely rust. Sometimes it’s superficial and easy to remove; other times, it’s deeply ingrained, affecting the blade’s performance. Recognizing rust early makes removal simpler and prevents it from eating into the metal.
Understanding why rust forms is crucial. It results from oxidation when iron reacts with moisture and oxygen, creating iron oxide. This process can weaken the metal over time, leading to pitting or structural damage if left unchecked. Early detection means you can address rust before it compromises the integrity of your knife, saving you money and effort in the long run.
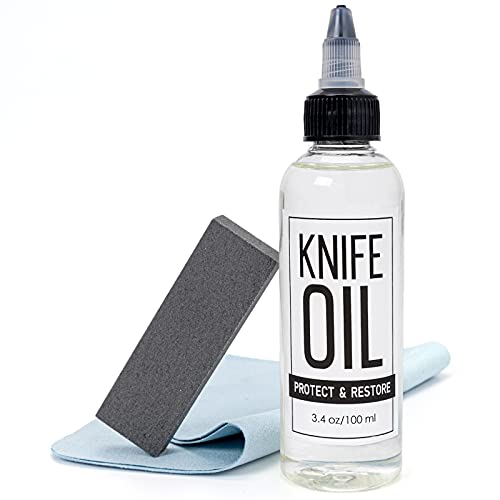
PuGez Knife Oil Rust Eraser Kit, Extra Large Rust Remover for Knives, Sword Maintenance Oil (3.4 oz) for Carbon Steel Blade, Cleaning, Protection And Lubricant Care Set
- Professional Knife Maintenance Oil: Protects steel and carbon steel blades
- Large Rust Eraser Tool: Measures 3x1x0.5 inches for surface rust
- Food-Grade Safe Formula: Odorless, tasteless, and food-safe
As an affiliate, we earn on qualifying purchases.
As an affiliate, we earn on qualifying purchases.
Quick Guide: 4 Easy Ways to Remove Rust from Your Knives
- Lemon and Salt: Sprinkle salt on the rust, then squeeze fresh lemon juice over it. Let it sit for 10 minutes, then scrub gently with a soft cloth or sponge. Rinse and dry thoroughly. This method works because the acidity of lemon breaks down rust, while salt acts as a mild abrasive. It’s particularly effective for light rust and is gentle enough not to damage most knives, making it a preferred eco-friendly option.
- Vinegar Soak: Submerge the rusty part in white vinegar for 1-2 hours. Use a soft brush or cloth to scrub away loosened rust. Rinse well and dry immediately. Vinegar’s acetic acid dissolves rust by converting it into a soluble compound, but prolonged soaking can risk discoloration or damage to certain blades, especially high-carbon or specialty steels. It’s essential to monitor exposure time and always rinse thoroughly to prevent corrosion or pitting.
- Baking Soda Paste: Mix baking soda with a few drops of water until it forms a thick paste. Apply to rust spots, let sit for 15 minutes, then scrub gently with a toothbrush. Rinse and dry. Baking soda’s mild abrasive properties help lift rust without scratching the metal surface. This method is versatile and safe but may require repeated applications for stubborn rust, emphasizing patience in the process.
- Commercial Rust Removers: Use products designed for metal rust, following instructions carefully. Usually, they involve applying the remover, waiting, then scrubbing and rinsing. These products contain chemicals formulated to break down rust quickly, but they can be harsh and may damage delicate blades if misused. Always read labels and test on a small area first to weigh the tradeoff between effectiveness and potential harm.
Each method works well on lighter rust and is safe for most kitchen knives when used gently. For heavily rusted blades, you might need to combine techniques or repeat the process, but always consider the potential impact on your knife’s steel and finish.

Dalstrong Rust Remover & Eraser — Knife Maintenance Tool — For Removing Rust, Stains & Oxidation on Kitchen Knives, Whetstones & Steel Cookware — Easy 60-Second Restore, Gift-Ready, customer support
- Effective Rust Removal: Removes rust, stains, and oxidation easily
- Versatile Compatibility: Works on various steels and cookware
- Restores Whetstones: Cleans and rejuvenates dull sharpening stones
As an affiliate, we earn on qualifying purchases.
As an affiliate, we earn on qualifying purchases.
How to Safely Remove Rust Without Damaging Your Knife
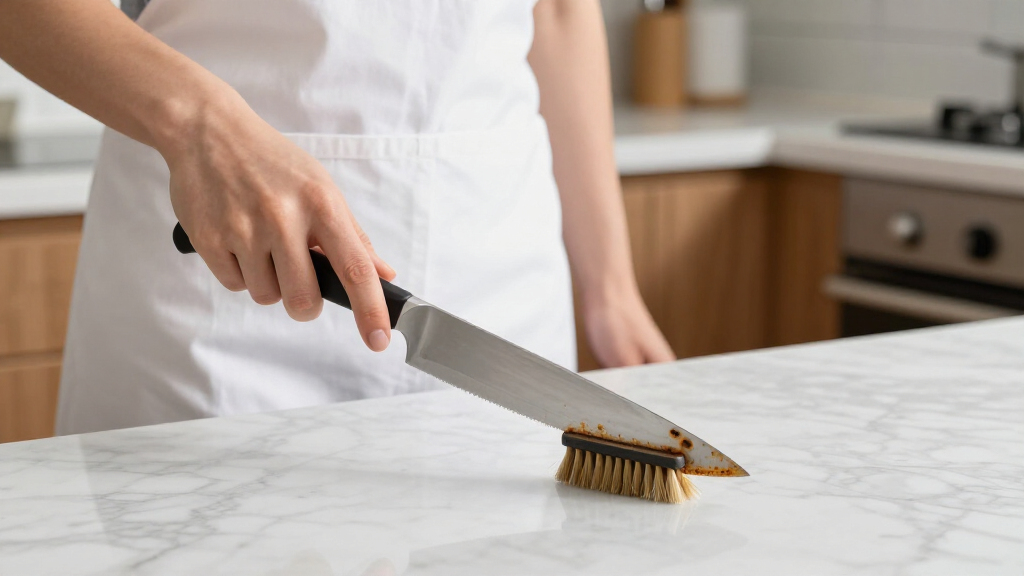
Removing rust without harming your blade requires a gentle touch and understanding the implications of each method. Natural remedies like lemon and baking soda are effective because they work by chemical reaction or mild abrasion, which minimizes risk to the steel’s integrity. Using non-abrasive tools such as soft cloths or toothbrushes ensures you lift rust without scratching the surface, preserving the blade’s sharpness and finish.
For stubborn rust, fine-grade steel wool or nylon scrub pads can be used, but only after testing on a small, inconspicuous area. These abrasives are more aggressive and can cause micro-scratches that might weaken the steel or dull your edge prematurely. Avoid harsh abrasives or metal brushes unless absolutely necessary, and even then, proceed with caution. Remember, patience and gentle pressure are key — rushing can cause irreversible damage, reducing the lifespan of your knife.
Safety tip: Always wear gloves when scrubbing to prevent tiny rust particles from irritating your skin or becoming embedded in cuts. After cleaning, wash and dry the knife thoroughly, and consider applying a light coat of oil to protect against future rust, especially in humid environments. These precautions help maintain the blade’s longevity and performance.
PuGez Knife Oil Rust Eraser Kit, Extra Large Rust Remover for Knives, Sword Maintenance Oil (3.4 oz) for Carbon Steel Blade, Cleaning, Protection And Lubricant Care Set
- Professional Knife Maintenance Oil: Protects steel and carbon steel blades
- Large Rust Eraser Tool: Measures 3x1x0.5 inches for surface rust
- Food-Grade Safe Formula: Odorless, tasteless, and food-safe
As an affiliate, we earn on qualifying purchases.
As an affiliate, we earn on qualifying purchases.
Restoring Your Knife’s Sharpness After Rust Removal
Once the rust is gone, your knife’s edge might feel dull or uneven. Restoring its sharpness involves more than just honing; it’s about realigning the microscopic edge that can become bent or rolled during rust removal. Using a honing steel or sharpening stone, hold the blade at a consistent 20-degree angle and run it along in smooth, controlled strokes. This process re-establishes the cutting edge, making slicing easier and safer.
If you notice chips, nicks, or uneven edges after rust removal, a more thorough sharpening is necessary. A whetstone or professional sharpener can restore the blade’s geometry and remove any remaining imperfections. Regular honing after each cleaning session maintains the edge and prevents rust from causing further damage. Think of it as giving your knife a tune-up — the effort pays off in improved performance and longevity.
For example, after removing rust with vinegar, I took the time to sharpen my chef’s knife on a whetstone. The difference was night and day: it sliced through tomatoes with ease and felt like new. Proper sharpening not only restores function but also reinforces the steel’s resilience against future corrosion.

Joseph Joseph BladeBrush Knife & Cutlery Cleaner, Kitchen Cleaning Brush
- Safe blade cleaning: Cleans sharp blades safely
- Wrap-around design: Cleans both sides simultaneously
- Opposed bristles: Ensures effective cleaning
As an affiliate, we earn on qualifying purchases.
As an affiliate, we earn on qualifying purchases.
Prevent Rust From Coming Back — Top Tips
- Dry your knives thoroughly after every wash. Moisture is rust’s best friend because it accelerates oxidation and creates ideal conditions for corrosion. Using a clean towel and air drying reduces the risk significantly.
- Store knives properly in a dry, ventilated drawer or on a magnetic strip. Proper storage minimizes exposure to humidity and prevents accidental knocks that can chip or scratch blades, which can trap moisture and promote rust.
- Oil the blades with food-grade mineral oil or specialized knife oil weekly. Applying a thin, even coat creates a protective barrier that repels moisture and slows oxidation, especially in humid climates or when storing knives long-term.
- Avoid dishwasher cleaning. The combination of high heat, humidity, and detergents can strip protective coatings and introduce moisture, speeding up rust formation. Hand washing and thorough drying are safer for maintaining your knives’ integrity.
- Regular maintenance includes honing, inspecting for spots, and re-oiling as needed. This proactive approach catches early rust signs before they become severe, extending the life of your blades.
For example, I keep a small bottle of mineral oil in my kitchen. Every few weeks, I wipe my knives with it, especially after cleaning or exposure to humidity — rust doesn’t stand a chance when you maintain a routine.
Rusty Knives: When to Fix and When to Toss
Light rust on a well-made knife often results from environmental exposure and can be cleaned off with proper technique. Restoring it preserves the knife’s value and performance, saving money and reducing waste. However, rust that has penetrated deeply — causing pitting, structural weakening, or corrosion through the steel — can compromise safety and functionality. In such cases, attempting to repair might be futile or even dangerous.
Deciding whether to repair or replace depends on the extent of damage and the cost involved. If rust has caused pitting or the blade feels brittle or unstable, the structural integrity is compromised, and replacement becomes the safer choice. Think of it like a car: a small dent is fixable, but a rusted frame might be beyond repair. Prioritize safety and performance over nostalgia or cost savings when in doubt.
Remember: a good knife is an investment, and neglecting severe rust can lead to injury or poor cutting results. If the rust is extensive or the blade shows signs of weakening, it’s best to replace it with a new, high-quality knife to ensure safe and effective use.
Frequently Asked Questions
Can I use baking soda to remove rust on my knives?
Yes, baking soda forms a gentle abrasive paste that lifts rust without damaging the metal. Mix with a little water, apply to rust spots, and scrub gently with a soft brush or cloth.
Is vinegar safe for all types of kitchen knives?
Vinegar is safe for most stainless steel knives, but avoid soaking high-carbon or specialty blades for too long, as it can cause discoloration or damage. Use it for light rust removal and rinse thoroughly afterward.
How often should I oil my knives to prevent rust?
Apply a thin coat of food-grade mineral oil or knife oil once every 2-4 weeks, especially if you live in a humid climate or store knives in less ventilated areas.
Can rusted knives still be sharpened?
Yes, if rust is superficial. However, if rust has caused pitting or deep corrosion, sharpening may be ineffective or unsafe. In such cases, replacing the knife is often the best choice.
Conclusion
A rusty knife isn’t the end of the world — it’s a sign you need a little TLC. With patience and the right techniques, you can wipe away rust and bring your blades back to life. Think of it as giving your kitchen tools a fresh start, ensuring they stay sharp and safe to use.
Remember: a well-maintained knife isn’t just easier to use — it’s safer, too. Keep your blades dry, oil them regularly, and treat rust spots early. Your knives will thank you with years of reliable service, slicing through your favorite meals with ease.