TL;DR

Get cleaning gear delivered free with Prime
- Fast, free delivery on millions of items
- Prime Video, Amazon Music and more included
- Member-only deals all year
You can clean the main surfaces and fixtures in a regularly maintained bathroom in 30 minutes by clearing clutter, applying suitable cleaners, and working from the shower and toilet to the sink and floor. The time limit does not cover heavy buildup, detailed grout work, or mold remediation, and product labels, surface guidance, ventilation, and separate toilet cloths still matter.
A bathroom timer can turn a small cleaning job into a frantic race—unless you give the products time to work while you tackle something else. Thirty minutes can cover the main fixtures and surfaces in a regularly maintained bathroom, but it cannot erase months of buildup or solve a moisture problem.
This guide shows you how to deep clean a bathroom in a focused half hour, from the first counter clear to the final floor spot-check. You’ll get a practical schedule, ways to protect delicate surfaces, and a clear sense of what should wait for another cleaning session.
Think of the routine like a short kitchen service: each task has a place, and the order keeps you from redoing work. If a shower has thick soap residue or a bathroom has recurring mold, set realistic expectations and plan extra time or professional help for the underlying issue.
A 30-minute clean covers the main fixtures and surfaces in a regularly maintained bathroom, not heavy buildup or mold remediation.
Apply suitable products early in the routine so they can sit for the label’s contact time while you clean another area.
Work from shower and tub to toilet, sink, and floor; use a dedicated cloth for the toilet.
Check surface and product directions, ventilate, and never mix cleaners.
Wiping wet surfaces and handling spills promptly can make the next timed clean more manageable.
A focused home reset · 30-minute field guide
How to Deep Clean a Bathroom in 30 Minutes
A well-ordered routine can refresh the main fixtures and surfaces in a regularly maintained bathroom. Clear clutter, apply suitable cleaners early, then work from shower to toilet, sink, and floor while products follow their label directions.
01 / The sequence
Six stages, one clean pass
Start high and finish low. The order lets products sit as directed while you clean elsewhere, and helps keep drips and dust from landing on finished surfaces.
Clear and gather
Ventilate, collect cloths and a non-scratch scrubber, clear counters and floor, and read product labels.
Start contact time
Apply suitable cleaners to the shower or tub, sink, and toilet bowl as each label directs.
Scrub and rinse
Clean walls, fixtures, tub, or shower floor. Rinse or wipe according to the product directions.
Bowl, then exterior
Scrub under the rim. Wipe the exterior from cleaner areas down to the base with a dedicated cloth.
Mirror, sink, counter
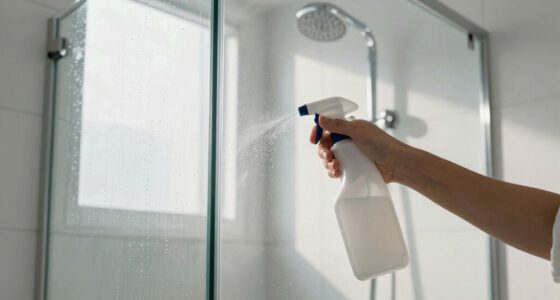
Remove residue from the mirror, faucet, basin, and counter. Dry areas prone to water spots.
Floor and reset
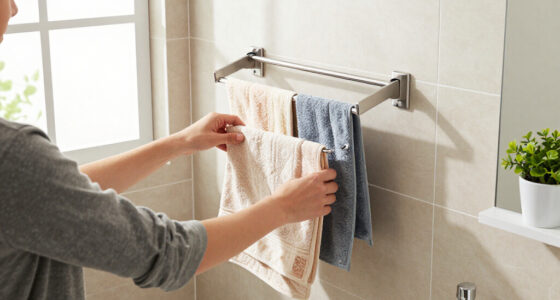
Empty trash, replace towels, spot-clean the floor, and return only needed items to the counter.
02 / The route
Let the cleaner dwell as you move
Apply products during minutes 3–8. While they sit for the label’s stated time, scrub another area. Cleaning removes soil; disinfecting is a separate task that works only when used as labeled, including any required wet contact period.
Use a separate cloth for the toilet and keep it away from the vanity. Never mix cleaners, especially bleach with ammonia or acids such as vinegar. Keep products away from children and pets, and leave ventilation running until surfaces are dry and fumes have cleared.
03 / Surface guide
Match the method to the material
Use products labeled for both the surface and the residue. Check manufacturer care instructions, and test an inconspicuous spot when recommended.
| Area or surface | Practical approach | Watch for |
|---|---|---|
| Shower or tub | Choose a product labeled for the material and soap residue; use a non-scratch tool. | Rough pads can scratch some finishes. Follow rinse directions. |
| Natural stone | Use the cleaner recommended by the stone or surface manufacturer. | Acids, including vinegar, can damage some stone. |
| Toilet bowl | Use a toilet product as labeled and a dedicated toilet brush. | Do not mix it with bleach or other cleaners. |
| Mirror and faucet | Use a compatible cleaner and a clean, soft cloth. | Check finish guidance and dry water-prone areas. |
04 / Set expectations
Thirty minutes has a useful limit
A timed clean is a thorough pass over a maintained room—not a reset for every bathroom problem. Decide what belongs in today’s routine before the timer starts.
Main surfaces
Shower or tub, toilet, sink, mirror, counter, and visible floor spots in a regularly maintained room.
Deep detail
Cabinet organizing, washing bath mats, cleaning exhaust fans, repairs, and full grout restoration need their own time.
Recurring moisture
Heavy buildup or mold that keeps returning may need extra time, a product-specific method, or professional assessment.
05 / Keep it manageable
Small habits shorten the next pass
Wipe wet surfaces. A quick wipe after use can reduce the residue that builds up between cleans.
Handle spills promptly. Fresh splashes are easier to remove than dried-on spots.
Ventilate regularly. Follow product label advice and keep air moving after cleaning.
Choose one suitable product. Vinegar and baking soda react and largely neutralize each other; use a product appropriate to the task.
What 30 Minutes Can Really Get Clean
A 30-minute bathroom clean covers the main surfaces and fixtures in a room that gets regular upkeep: shower or tub, toilet, sink, mirror, counter, and visible floor spots. It does not include cabinet organizing, repairs, a full grout restoration, or mold remediation. This is a focused maintenance clean with a deeper pass over high-use areas.
That distinction matters when you look at a ring around the tub or dark grout lines and expect one timed session to fix everything. A regularly wiped shower might need a few minutes of scrubbing; a shower with months of soap scum may need repeated treatment according to the cleaner label. Minutes is enough for the first situation, while the second deserves its own block of time.
Picture a small hall bathroom used by one adult during the week. The sink has toothpaste flecks, the mirror shows water spots, and the tub has a thin film of soap. You can clean those visible areas in half an hour. If the same room has a leak behind the toilet or mold returning along the ceiling, a quick clean will not solve the cause.
A useful article should help you judge the room before starting. Scan for heavy buildup, damaged caulk, or moisture that keeps coming back. Put routine soil on today’s list, and plan separate care for conditions that need more time, a product-specific method, or professional assessment.
Products Worth Considering

Blueair Blue Pure 211i Max Smart Air Purifier for Large Rooms

Dyson V8 Cordless Vacuum

Ring Floodlight Cam 2K Wired Security Camera, 3-Pack, Black
As an affiliate, we earn on qualifying purchases.
Use This 30-Minute Order to Avoid Recleaning
To clean a bathroom in 30 minutes, clear and apply products first, then work through the shower, toilet, sink, and finishing tasks in that order. This sequence gives products their labeled contact time while you clean another area, and it moves from higher surfaces toward the floor so loosened dust and drips don’t land on freshly cleaned spots.
- Minutes 0–3: Turn on ventilation, gather cloths and a non-scratch scrubber, clear the counter and floor, and read product labels. Keep children and pets away from the work area.
- Minutes 3–8: Apply toilet bowl cleaner and suitable cleaners to the shower or tub and sink. Follow each label’s directions for where to use it and how long to leave it.
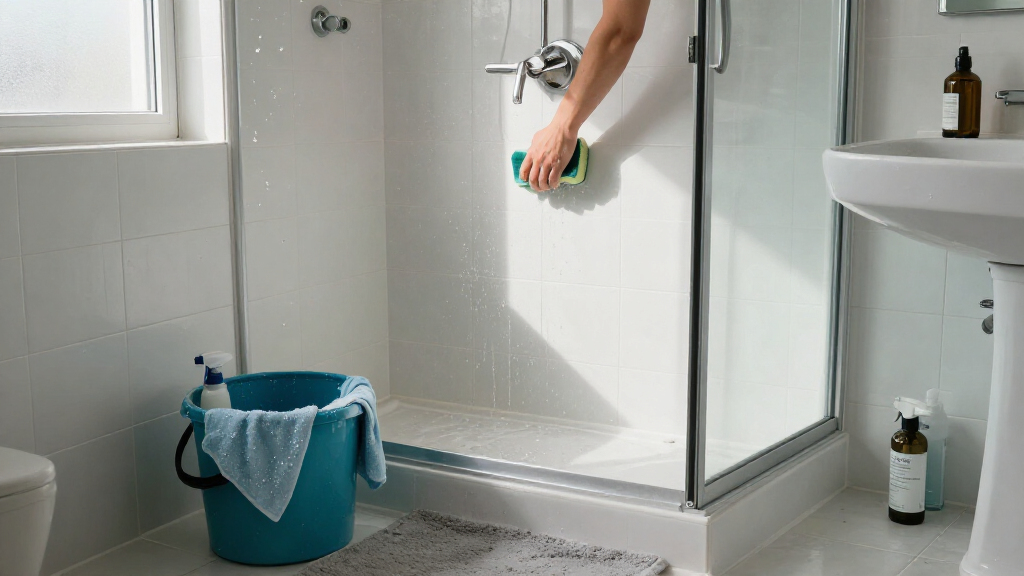
- Minutes 8–15: Scrub the shower or tub, including fixtures and the floor. Rinse or wipe as the product label directs.
- Minutes 15–20: Scrub inside the toilet bowl, including under the rim. Use a separate cloth to wipe the exterior from cleaner areas down toward the base.
- Minutes 20–25: Clean the mirror, faucet, basin, and counter. Dry where water spots are a concern.
- Minutes 25–30: Empty the trash, replace towels, spot-clean the floor, and return only needed items to the counter.
Say you’re cleaning before a guest arrives. Applying the tub cleaner at minute three lets you scrub while the toilet bowl product sits; no extra waiting block is needed. Keep a toilet-only cloth aside, and don’t use it on the vanity. When the timer rings, leave ventilation on until surfaces dry and fumes clear, even if your active cleaning is done.
Let Cleaner Contact Time Do Some of the Work
Bathroom products need the contact time listed on the label to do the job they claim to do. Applying a cleaner and wiping it away seconds later may remove some visible dirt, but it does not follow the product’s directions. Cleaning removes soil; disinfecting is a separate task that only works as labeled, including any stated time a surface must stay wet.
This is why the 30-minute schedule starts with product application instead of scrubbing. If a cleaner’s directions call for several minutes on a surface, use that interval to scrub a different area. For example, apply a suitable shower product, then clean the mirror while the shower product sits only if its label permits that use and timing.
Products are not interchangeable. A product made for toilet bowls may not suit a stone countertop, and an all-purpose spray may not claim to disinfect. Check the label for the intended surface, rinsing directions, and any precautions. Don’t mix products, especially bleach with ammonia or acids such as vinegar; mixtures can release dangerous fumes.
Imagine wiping a disinfectant off your faucet right away because you want the shine. If its label calls for a wet contact period, that fast wipe may cut the stated disinfection step short. Follow the directions instead, and ventilate the room as advised. Put bottles away from children and pets after use, even when the caps are closed.
Choose Tools and Cleaners That Won’t Harm Bathroom Surfaces
The safest bathroom cleaner is one labeled for the surface and the residue you need to remove. Natural stone, specialty finishes, and some acrylic or coated surfaces can react poorly to acidic, abrasive, or highly alkaline products. Check manufacturer care instructions before reaching for a familiar cleaner, and test an inconspicuous spot when guidance recommends it.
| Area or surface | Practical approach | What to watch for |
|---|---|---|
| Shower or tub | Use a product labeled for the material and soap residue; scrub with a non-scratch tool. | Rough pads can scratch some finishes. Follow rinse directions. |
| Natural stone | Use the cleaner recommended by the stone or surface manufacturer. | Acidic products, including vinegar, can damage some stone. |
| Toilet bowl | Use a toilet product as labeled and a dedicated toilet brush. | Do not mix it with bleach or other cleaners. |
| Mirror and faucet | Use a compatible cleaner and a clean, soft cloth. | Check finish guidance and dry water-prone areas. |
For example, a renter sees hard-water spots on a stone vanity and reaches for vinegar because it is already in the kitchen. That shortcut can etch some stone, leaving a dull patch that is harder to fix than the original spots. A surface-safe product may take another application, but it protects the finish.
Keep the tool kit simple: separate cloths for the toilet and other areas, a toilet brush, a mirror cloth, and a non-scratch scrubber will handle most routine work. A green-cleaning label or a familiar household ingredient does not guarantee compatibility or disinfection. Match the product to the surface and task, and don’t treat vinegar and baking soda together as a powerful cleaner; they react and largely neutralize each other.
Know When Soap Scum, Hard Water, or Mold Needs More Time
Soap scum, mineral spots, and visible grime often respond to a suitable cleaner and a patient scrub, but stubborn buildup may need repeated treatment. Choose a product labeled for the residue and safe for your surface, let it sit only as directed, and rinse or wipe according to its instructions. A hard-water ring is not a reason to scrub harder with a tool that could scratch the finish.
Consider a family shower where white mineral marks have formed around the faucet. You can treat a small area with a compatible product, check the result, and repeat later if needed. Trying to force every mark away in one five-minute pass can damage a delicate surface or leave cleaner residue behind. Time limits should not outrank surface care.
Mold calls for a different kind of judgment. For a small area, follow relevant product and public-health guidance, ventilate, and address the moisture source. If growth is extensive, returns after cleaning, or may be inside a wall, get a professional assessment. A fast wipe can hide a symptom while a leak or ventilation problem keeps feeding it.
For instance, if a dark patch reappears above the shower each week, the cleaning schedule is not the main problem. Check whether ventilation is working and whether moisture is lingering; recurring growth or suspected hidden mold needs more than a timed surface clean. Don’t claim that one bathroom routine eliminates all germs or mold: products, surfaces, and the reason for the problem all affect the right response.
Keep the Next Clean Short With Small Habits
A half-hour clean becomes more realistic when you prevent residue from piling up between sessions. Wipe wet surfaces, ventilate, and handle spills promptly; these small habits reduce the soap film and water marks that turn a quick scrub into a long one. They do not replace periodic tasks such as washing bath mats or cleaning exhaust fans, but they make routine fixture care easier.
After a shower, a quick pass over the wet wall or door can stop droplets from drying into spots, if that approach suits the surface. Run ventilation according to its instructions, and hang towels so they can dry rather than bunching them in a damp heap. If toothpaste lands on the counter, wiping it before it hardens takes seconds; scraping it later can take longer.
Think of upkeep as keeping a small path clear through fresh snow. One short walk is easy; a week of drifts takes more effort. The same applies to the bathroom: regular light cleaning keeps soap residue thin and gives your 30-minute plan a fair chance. A home with several people using one shower may need more frequent touch-ups than a lightly used guest bathroom.
Use the timer as a guide, not a reason to skip label directions or ignore a problem that needs more care. If the floor still has a sticky patch at minute thirty, spot-clean it and leave the room ventilated. If the grout needs dedicated work, schedule that separately. For a focused routine, keep only the needed items on the counter and return the rest after the surfaces are clean and dry.
Frequently Asked Questions
Can you really deep clean a bathroom in 30 minutes?
Yes, if the bathroom gets regular upkeep and you focus on the main fixtures and surfaces. Heavy buildup, detailed grout work, or mold problems need more time and may need a different response.
What should you clean first?
Clear clutter and apply suitable cleaners first, following their labels. Then clean the shower or tub, toilet, sink and counter, and finish with the floor so drips and loosened soil don’t land on areas you just cleaned.
Can you use vinegar and baking soda together to clean a bathroom?
They react and largely neutralize each other, so don’t rely on the combination as a powerful cleaner. Choose a product labeled for the residue and safe for the surface instead.
Is bleach safe to use in the bathroom?
Use bleach only as directed on its label, with the ventilation and precautions it specifies. Never mix it with ammonia, vinegar, toilet cleaner, or other products.
How do you remove soap scum or hard-water spots?
Choose a cleaner labeled for the residue and compatible with the surface, then follow its timing and rinse directions. Stubborn marks may need a repeated treatment rather than a harder scrub or an abrasive tool.
What should you do about recurring mold?
Address moisture and ventilation as well as the visible area, following relevant product and public-health guidance for small spots. Extensive growth, repeated return, or suspected mold inside a wall calls for professional assessment.
Conclusion
Set a timer for the main surfaces and fixtures, follow product labels, and let the cleaning order save you from doing the same work twice. Thirty minutes can make a regularly maintained bathroom feel fresh again, but a neglected shower, recurring mold, or delicate surface deserves a slower plan.
Keep the routine steady: clear the counter, clean from high to low, and leave the room ventilated as surfaces dry. A clean bathroom should look cared for—and smell like fresh air, not a cloud of mixed cleaners.