
TL;DR

Get cleaning gear delivered free with Prime
- Fast, free delivery on millions of items
- Prime Video, Amazon Music and more included
- Member-only deals all year
To stop mold from coming back in the shower, remove visible growth with a surface-appropriate cleaner, then reduce the moisture that feeds it. Fix leaks and damaged grout or caulk, run a properly vented exhaust fan during showers and for about 20–30 minutes afterward, and leave the enclosure open so surfaces can dry.
You scrub the shower until the tile shines, then spot a dark seam in the same corner a week later. That repeat appearance is a clue: cleaning may have removed what you could see, while damp air, trapped water, or a leak kept the conditions right for more growth.
Mold spores are common indoors; persistent moisture is what lets them grow. A shower can look clean and still stay damp behind a curtain, in a door track, or around failing caulk. Think of mold prevention like drying a wet towel: washing helps, but leaving it in a heap keeps it musty.
This guide shows you how to stop mold from coming back in the shower by checking for water problems, helping surfaces dry faster, and caring for grout and caulk. You’ll also learn how to clean safely and when recurring growth calls for a qualified professional.
Find and repair drips, leaks, cracked grout, or failed caulk before covering or recaulking a damp area.
Run a properly working exhaust fan during a shower and for about 20–30 minutes afterward; it should vent outdoors.
Leave the shower door ajar or spread the curtain, and wipe standing water from walls, ledges, and tracks.
Choose cleaners for the surface, follow the label, ventilate the room, and never mix bleach with other cleaners.
Get qualified advice for extensive or recurring growth, persistent musty odors, or suspected water damage behind finishes.
Home care · Moisture control
How to Stop Mold From Coming Back in the Shower
Cleaning removes what you can see. Lasting prevention means finding what stays wet, fixing water problems, and helping the shower dry between uses.
01 / Read the pattern
Why does shower mold return after cleaning?
A recurring spot is a clue about moisture. Notice where it appears and how quickly the room dries before reaching for a stronger product.
Check the water path
A dark line near a faucet, tub edge, or corner may point to a drip, pooling water, cracked grout, or failed caulk. If it stays damp when the shower is unused, investigate a leak.
Check ventilation
Several damp surfaces, a fogged mirror, or lingering humidity can suggest weak room-wide drying. The fan should draw air and send it outdoors, not into an attic.
Look beyond the surface
Water can collect behind tile or under a shower base. Persistent odor, repeated growth, or suspected water damage calls for qualified advice.
02 / Five checks before another cleaner
Fix the conditions that keep the shower wet
Work through the likely moisture source first. Fresh caulk cannot fix a leak, and clean tile can become damp again if the room stays humid.
Look for drips and leaks
Check faucets, showerheads, accessible pipes, and the floor outside the enclosure. A slow drip can keep one seam wet long after bathing.
Check grout and caulk
Repair cracked grout or replace split, peeling caulk once the area is clean and dry. Do not seal over a leak or trap moisture behind a new bead.
Run a working fan
Use it during the shower and for about 20–30 minutes afterward. Clean the grille and check airflow; repair or replace a weak or misdirected fan.
Open the enclosure
Leave the glass door ajar or spread the curtain so air reaches wet surfaces instead of being trapped in folds or tracks.
Wipe standing water
Clear puddles from ledges and door tracks. Clean corners and grout regularly with a product suited to the surface, following its label.
Dry nearby fabrics
Hang towels and bath mats instead of leaving them bunched up. Wash or replace shower curtains and liners as needed.
03 / A repeatable routine
Clean, repair, dry, then watch what changes
Treat prevention as a short cycle. If the same patch returns, its location and timing can help narrow down the cause.
04 / Safe cleaning + when to get help
Choose the right response for the surface
Clean, rinse, and dry
Visible growth on a sound, nonporous surface may be manageable with an appropriate cleaner. Follow label directions, ventilate the room, and rinse or dry as directed.
Get qualified advice
Moisture or growth may extend below the surface, making thorough cleaning harder. Seek help for extensive or recurring growth, persistent musty odors, or suspected hidden damage.
Never mix bleach with ammonia, acids, vinegar, or other cleaners. Repeatedly using stronger chemicals can damage materials or create hazardous fumes without fixing the moisture source. People with asthma, allergies, or other health concerns may want to avoid disturbing mold and seek appropriate advice.
05 / The quick-dry window
Small habits add up between showers
Back-to-back showers, a closed curtain, and a bunched bath mat can leave a room damp longer. Pair fan time with open airflow and a quick wipe where water pools.
Why Does Shower Mold Keep Coming Back After You Clean It?
Shower mold keeps coming back when moisture remains after you remove the visible growth. Mold spores are common indoors, but a wet corner, slow leak, or damp grout line can give them a place to grow again. Cleaning the surface treats the symptom; drying the room and fixing water problems address the conditions behind it. This distinction matters because a cleaner can make a surface look better for a while without changing how wet it gets after the next shower.
Look for the dampest spots first: the lower corners of the shower, grout near a faucet, the track beneath a glass door, and the hem of a curtain. The location and pattern can help narrow down the cause. For example, if one dark line returns beside the tub while the rest of the tile stays clear, water may be collecting there or getting behind a failed seam. If growth appears across several surfaces and the mirror stays fogged, slow room-wide drying or weak ventilation may be part of the problem. A musty smell that lingers after the room appears dry deserves attention, too, because surfaces can look dry while hidden materials remain damp.
Water can hide behind tile or beneath a shower base, so repeated growth does not always mean you missed a spot with the sponge. Cracked grout, separated caulk, or a dripping fixture can keep a wall damp out of sight. Do not cover a leak with fresh caulk; sealing over the visible opening without stopping the water can trap moisture and delay a proper repair. Identify and repair the source, then address the damaged area.
Clean surfaces, then ask what is keeping them wet. If the same patch returns, treat the pattern as a reason to check for trapped moisture or a leak. Where it returns can be more useful than how dark it looks: a persistent spot at a seam suggests a different problem than condensation across the whole room.
On a sound, nonporous surface, visible mold may be manageable with a suitable cleaner and careful drying. Porous or water-damaged materials can be harder to clean thoroughly because growth or moisture may extend below the surface. Repeatedly applying stronger chemicals may discolor materials or create hazardous fumes without correcting the underlying dampness. If the area keeps returning, spreads, or smells musty, consider getting qualified advice instead of repeating stronger chemical treatments.
Products Worth Considering

Bose TV Speaker (2nd Gen) Compact Soundbar with Bluetooth and HDMI Connectivity

Sonos Era 100 Wireless Smart Speaker, Black

Samsung 48-Inch S90H OLED 4K Smart TV (2026)
As an affiliate, we earn on qualifying purchases.
How to Stop Mold From Coming Back: Start With These Five Checks
To stop mold from coming back, first find and fix the moisture source, then improve drying and clean the affected surfaces. This order matters: fresh caulk cannot solve a leak, and a spotless tile wall can get damp again if the room stays humid. Work through these checks before buying another mold remover. Each check helps separate a local water problem from a room-wide drying problem, so you can spend effort on the cause most likely to matter.
- Check for drips and leaks. Look around faucets, showerheads, pipes you can access, and the floor outside the enclosure. A slow drip can keep one seam wet long after a shower. If the same spot stays damp when no one has used the shower, that points toward an ongoing leak rather than ordinary post-shower condensation.
- Inspect grout and caulk. Look for cracks, gaps, peeling edges, and places where water collects. These materials do different jobs: grout fills many joints between tiles, while flexible caulk is often used where surfaces meet. Repair damaged grout or replace failed caulk after the area is clean and dry. If the material is sound but the stain returns, the moisture may be coming from elsewhere.
- Run the exhaust fan. Use it while bathing and for about 20–30 minutes afterward, if it works and vents outdoors. The fan removes humid air from the room; a fan that only circulates air or vents into an attic can move moisture without taking it out of the building.
- Open up the enclosure. Leave the shower door ajar or spread the curtain so air can reach wet surfaces. This gives water on hidden or folded surfaces a chance to evaporate instead of remaining trapped against itself.
- Remove standing water and clean regularly. Wipe puddles from ledges and door tracks, and use a surface-appropriate cleaner according to its label. A quick wipe can prevent a small pool from repeatedly wetting the same seam, but it cannot compensate for a leak or damaged surface.
Imagine a family showering back to back on a chilly morning. The bathroom mirror stays fogged, and a damp bath mat sits folded in a corner. Running the fan between showers, spreading the curtain, and hanging the mat to dry can reduce the lingering dampness that turns a clean-looking room into a slow-drying one. If the mirror clears but a single corner remains wet, focus next on that corner’s seams and nearby plumbing rather than assuming the fan is the only issue.
Take note of what changes and where growth returns. If you fix a drip but the same area remains damp, the water may be coming from behind a finish or from a problem that needs a professional inspection. Follow local building requirements for ventilation work, and use a licensed professional for electrical repairs or fan installation where required. Recording when the area is wet and what you have tried can make it easier to explain the pattern during an inspection.
Help Your Shower Dry Faster With a Fan, Open Door, and Quick Wipe
A shower dries faster when moving air carries moisture out and wet surfaces have room to release water. Run a properly working exhaust fan during bathing and for about 20–30 minutes afterward. Keep the shower door open enough for air to circulate, and spread the curtain instead of letting its folds cling together like a damp accordion. These steps work together: the fan lowers humid air in the room, while an open enclosure helps air reach the surfaces where droplets are sitting.
A fan only helps if it moves air outdoors. Clean dust from its grille according to the manufacturer’s instructions, then check whether it draws air while running. A fan that rattles, sounds unusually weak, or leaves the room foggy long after a shower may need attention. A fan that vents into an attic can send moisture into the wrong place; that can create problems beyond the shower, so have ventilation concerns checked and follow local building requirements. Keeping a fan running longer may help only if the fan is working and the air has a proper route out.
Make drying easy enough to repeat. A small squeegee can clear water from glass and tile in a minute, while a quick wipe of the bottom door track removes the shallow puddle that often sits there. The tradeoff is a little routine effort in exchange for less water left in the places that take longest to dry. You do not need to make every surface perfectly dry; focus on standing water and the spots that repeatedly stay damp. For instance, if you notice droplets clinging to the shower walls when you brush your teeth, leave the door ajar and let the fan keep running while you get ready.
- Keep the fan grille clean so dust does not block airflow.
- Spread wet curtains and hang towels and bath mats where air reaches them.
- Wipe standing water from ledges, tracks, and corners where it pools.
- Get professional help for electrical work or ventilation changes that require it.
A bathroom without a window can still benefit from a working, properly vented fan and a habit of leaving the enclosure open. If dampness hangs around despite those steps, the room may have a ventilation issue or a hidden water source. Inspect for leaks and ask a qualified professional to assess the ventilation rather than relying on open doors alone.
Clean Tile, Grout, Curtains, and Tracks Without Damaging Them
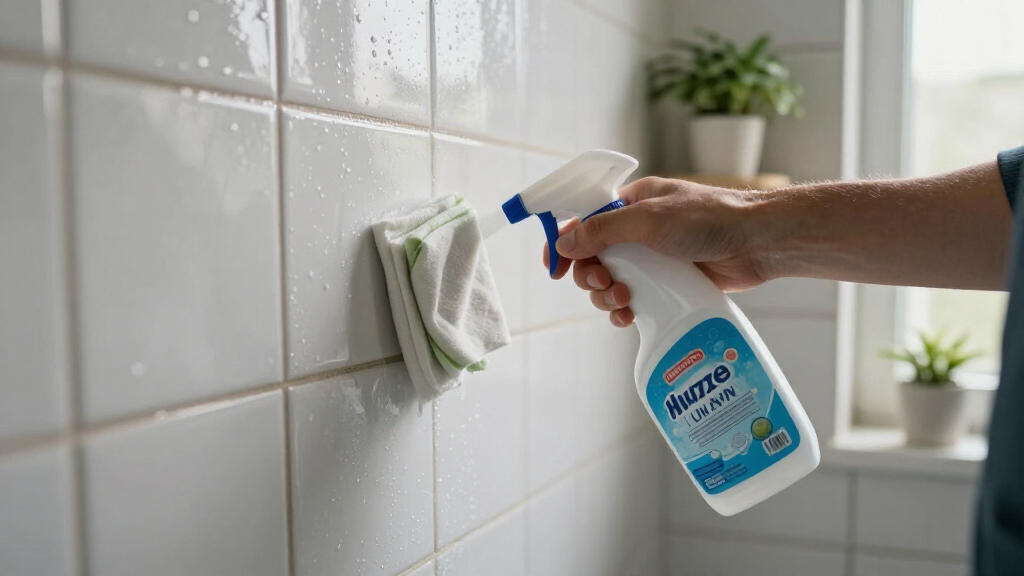
Use a cleaner suited to the shower material, follow its label, and rinse or dry the surface as directed. Tile, grout, silicone, plastic curtains, and metal door tracks do not all respond the same way to cleaners. A product that works on one surface may discolor or damage another, so check the manufacturer’s care guidance before scrubbing. Matching the product to the surface matters because aggressive cleaning can roughen or weaken a finish, making maintenance harder without solving the moisture problem.
Pay attention to the small places a quick spray-and-rinse misses: the corner where two walls meet, the grout line behind a shampoo bottle, the curtain’s lower edge, and the narrow channel beneath a glass door. A soft brush can help reach a grout line; a cloth or detail brush may fit a door track. For a washable curtain or liner, follow its care label and let it dry fully rather than bunching it wet against the tub. The goal is to remove residue and visible growth while also leaving the area in a condition that can dry; cleaning a seam and then leaving pooled rinse water there can undo some of that effort.
Never mix bleach with ammonia, acids, vinegar, or other cleaners. These combinations can produce hazardous fumes. Ventilate the room, use any protective equipment listed on the product label, and keep children and pets away while cleaning. Do not treat a stronger smell or harsher chemical as proof of a better result. If one labeled product does not work, rinse as directed and let the surface dry before considering another method, rather than layering products that may react.
Bleach and other chemicals have limits, especially on porous or water-damaged materials. Mold on a nonporous surface may be cleanable, but mold that has penetrated a material can be harder to remove fully. If growth stays in the same grout or caulk despite careful cleaning, the material may need repair or replacement, or moisture may be coming from behind it. That is why a clean surface is not always evidence that the underlying problem is resolved.
Match the method to the material. A gentle, label-directed clean followed by thorough drying is safer than trying several products on the same damp surface. If the material is deteriorating or the growth keeps returning, inspection or repair may be more useful than another round of scrubbing.
For example, if dark staining remains on a silicone bead after you clean it, do not keep layering products over the caulk. Check for peeling or gaps, and replace compromised caulk on a clean, dry surface. Allow the new bead to cure for the time specified by its manufacturer before using the shower. That waiting period helps the seal set properly; getting it wet early can weaken the repair and let the same moisture cycle start again.
Know When Grout or Caulk Needs Repair Instead of Another Scrub
Repair grout or replace caulk when it is cracked, loose, split, or peeling, because gaps can let water reach places you cannot clean from the shower surface. Staining alone does not prove that a seal has failed, but persistent mold staining can be a reason to inspect the material closely. The goal is to stop water from getting behind the finish, not just to make the seam look brighter. A seam that looks intact but remains wet can still point to a different moisture source, so appearance should be considered alongside how and where the dampness returns.
Run your eyes along the corners, the tub-to-wall joint, and the edges around fixtures. If you see a gap or a bead that has pulled away, keep water off the area and arrange the repair. Fresh caulk needs a clean, dry surface and enough curing time before the shower gets wet. Rushing that wait can spoil the seal and bring the same damp problem back. If the underlying surface is wet or damaged, simply applying a new bead may hide the symptom briefly while leaving the repair unable to bond well.
Grout and caulk serve different jobs: grout fills many tile joints, while flexible caulk is commonly used where surfaces meet and may move. If the joint between the tub and wall is split, adding grout over it may not provide a durable fix because a rigid filler may not accommodate movement at that seam. Follow the product and installation guidance for the material, and ask a qualified professional if water damage or hidden leaks may be involved.
Consider a household that keeps scrubbing a blackened corner but never checks whether the caulk has separated from the tile. The color may fade for a while, yet the gap can keep admitting water. Repair the failed joint after addressing any leak, then let it cure as directed before bathing again. If a gap opens again soon after repair, that can be a clue that the joint is moving, the surface was not prepared properly, or water is still reaching the area.
If a musty odor or recurring patch remains after the repair, look beyond the visible seam. Water can travel under finishes, and a shower base or wall may need inspection. A qualified professional can help determine whether the trouble is surface-level or tied to hidden water damage. This can prevent repeated cosmetic repairs that cost time but do not stop the moisture reaching the material.
Know When Recurring Mold Needs a Qualified Professional
Get qualified help when mold is extensive, repeatedly returns after cleaning, comes with a persistent musty odor, or appears alongside suspected hidden water damage. Those signs can point to a moisture source that routine surface cleaning will not fix. A professional can inspect the area and advise whether repair or remediation is needed. The value of an inspection is that it can distinguish an isolated surface stain from a continuing leak or damp material, which call for different solutions.
Use extra care if you have asthma, allergies, or another health concern. Avoid disturbing moldy material, and seek appropriate health advice if you are unsure how to proceed. Scrubbing or scraping can spread debris, so do not tear into walls or pull up finishes just to see what is behind them. Opening a wall without a plan can also expose more material and make it harder to control the work area.
Home mold testing is not a substitute for finding and correcting moisture. When a shower corner grows mold again and again, the practical questions are whether a leak exists, whether the surface is damaged, and whether ventilation is doing its job. Current public-health guidance emphasizes moisture control, prompt leak repair, ventilation, and safe cleaning rather than relying on routine chemical treatment or home tests. Testing may identify what is present, but by itself it does not tell you why that location stays damp or how to stop the recurrence.
If you rent, photograph the recurring growth, note dates and any drips or ventilation problems, and contact your landlord or property manager in writing. For example, a dated photo showing the same damp ceiling edge after each repair can help make the problem easier to investigate. A short record of when the shower was used, how long the fan ran, and whether the surface dried can also help clarify whether the problem is constant or tied to bathing. Local rules differ, so check the relevant housing or public-health authority for your area if the issue is not addressed.
Professional help is especially sensible if growth extends beyond a small surface patch or if you suspect water behind tile. Fix the source before closing or covering damaged material. That one choice can prevent a cosmetic repair from hiding an ongoing moisture problem. Ask what caused the moisture, what materials are affected, and what repair will keep the area dry; those answers help you judge whether the proposed work addresses the recurrence rather than only the visible growth.
Frequently Asked Questions
Why does mold keep returning after I clean the shower?
Mold returns when moisture remains or keeps reaching the same spot. Check for leaks, failed caulk, cracked grout, damp door tracks, and weak ventilation. If the same area grows back after cleaning, investigate the moisture source rather than relying on a stronger cleaner.
How long should I run the bathroom fan after a shower?
Run a properly working fan during the shower and for about 20–30 minutes afterward. It should vent outdoors; a dirty, weak, or incorrectly vented fan may not clear moisture effectively. Follow the fan manufacturer’s instructions and local building requirements.
Should I leave the shower door or curtain open?
Yes. Leave the door ajar or spread the curtain so air can reach the wet surfaces. A curtain folded against itself can stay damp, while an open enclosure gives droplets a better chance to dry.
Does bleach kill mold in grout or silicone?
Bleach and other chemicals have limitations, especially on porous or water-damaged materials. Use only a cleaner labeled for the specific surface, and follow its directions. Never mix bleach with vinegar, ammonia, acids, or other cleaners; hazardous fumes can result.
When should I call a professional about shower mold?
Seek qualified help if growth is extensive, repeatedly returns after cleaning, comes with a persistent musty odor, or suggests water damage behind tile or another finish. People with asthma, allergies, or other health concerns may want to avoid disturbing mold and ask for appropriate advice.
Conclusion
To stop shower mold from returning, make the shower dry faster and fix the water problem feeding it. Clean with a suitable product, run the fan, open the enclosure, and keep an eye on seams and corners. If the same patch comes back or the room smells musty, look for a leak or hidden moisture before you scrub again.
A dry shower should smell like soap and clean air, not a damp towel left in a heap. Start with the spot that keeps returning, and trace the water.