TL;DR

Get cleaning gear delivered free with Prime
- Fast, free delivery on millions of items
- Prime Video, Amazon Music and more included
- Member-only deals all year
To whiten grout that’s gone yellow, first remove loose dirt and try warm water with a pH-neutral cleaner, then use a grout-safe product according to its label if needed. Check the tile and grout material before cleaning, never mix products, and let the grout dry before judging the result. If the color persists or the grout is damaged, a compatible grout colorant or repair may work better than repeated scrubbing.
You scrub the shower wall, rinse it until the tile shines, and step back. The grout still looks the color of old tea. Yellow grout can make an otherwise clean bathroom or kitchen look worn, but the discoloration does not always come from one cause, and a stronger cleaner is not automatically a better fix.
To whiten grout that’s gone yellow, start by working out what may have stained it and what kind of grout and tile you have. Ordinary soap residue may lift with gentle cleaning; hard-water deposits, mildew, aging grout, or a discolored sealer call for different responses. The steps below show you how to clean carefully, protect sensitive surfaces, and decide when recoloring or repair makes more sense.
Identify the likely cause of yellowing and the tile and grout materials before choosing a cleaner.
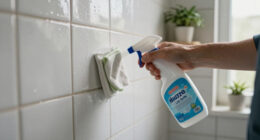
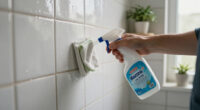
Start with loose-dirt removal, a pH-neutral cleaner, a soft nylon brush, and a thorough rinse.
Use bleach or oxygen-based cleaners only when the product and surface guidance allow them; never mix cleaning products.
Let grout dry completely before judging the result; persistent stains may call for colorant or repair.
Recurring discoloration, a musty smell, or persistent dampness calls for attention to the moisture source.
The Right Way to Whiten Grout That’s Gone Yellow
Start by finding the likely cause and checking your tile and grout. Clean gently, rinse well, and let the grout dry before deciding whether it needs a compatible colorant or repair.
What may be turning the grout yellow?
Location, texture, smell, and how quickly the stain returns are useful clues. The shade alone cannot identify the cause.
Soap, oils & grease
Body oils, soap film, and cooking splashes can settle into porous grout and collect more dirt.
Hard-water deposits
Minerals may leave yellowish or dull patches around showers, sinks, and taps.
Cleaner buildup
Some products leave a film that attracts soil or changes how the grout looks.
Mildew or growth
Growth can look yellow, gray, or black, especially in damp areas with poor ventilation.
Age or discoloration
Grout and sealers can change over time; a stain below the surface may resist cleaning.
Notice the pattern
A shower corner that stays damp differs from a backsplash beside a greasy stove.
If discoloration returns quickly, spreads, smells musty, or appears with persistent dampness, investigate ventilation or a leak instead of repeatedly bleaching the surface.
Check the surface before choosing a cleaner
The same product can be suitable for one tile and damaging to another. Read the label and test an inconspicuous spot.
Know what you are cleaning
Cement-based grout is porous and generally needs more care than epoxy grout. Natural stone, including marble and limestone, can be etched by acids or harmed by harsh products.
Match the method to the stain
Gentle cleaning may lift ordinary soil. A grout-safe oxygen-based product may help some organic stains, but formulas and compatibility vary by brand.
Five steps for a careful clean
Work in a small test area first, especially if you do not know which cleaner or sealer was used before.
To whiten yellow grout, remove loose dirt, wash with a mild compatible cleaner, scrub gently, rinse thoroughly, and let the grout dry completely before judging the result.
Clear loose dirt
Vacuum or dry-wipe dust and crumbs. In kitchens, wipe away surface grease first.
PrepareWash gently
Use warm water with a pH-neutral cleaner suitable for the tile and grout. Follow its label.
CleanBrush softly
Use a soft nylon brush and light pressure. Keep metal bristles away from tile and grout.
Lift soilRinse thoroughly
Use clean water to remove loosened soil and cleaner residue from the grout lines.
Remove residueLet it dry
Wait until the grout is completely dry. Wet grout can look darker than it will when dry.
AssessIf the stain remains
Use a stronger grout-safe product only if its label allows use on your surface. Do not extend dwell time beyond directions. If the fully dry grout remains evenly yellow, repeated scrubbing may wear it; a compatible grout colorant or refresh product can give a more even look. Crumbling or cracked grout may need repair or replacement.
Safety rules worth keeping
Product labels and surface guidance take priority. Protect yourself, the tile, and the people sharing the space.
Never combine bleach with ammonia, vinegar, acids, or other cleaners. Mixing products can create dangerous fumes.
Vinegar and acidic cleaners can etch natural stone and weaken cement grout.
Bleach may lighten some stains, but can affect grout color or damage materials. Use only when labels allow.
Wear gloves, ventilate the space, and keep children and pets away while products are in use.
Abrasive powders and stiff wire brushes can scratch tile or damage grout unless the maker recommends them.
Use the specified amount, dwell time, ventilation, and rinsing steps on the product label.
Help keep clean grout looking clean
Small habits reduce residue and moisture—the conditions that can make discoloration return.
Improve ventilation and wipe shower surfaces regularly.
Rinse away cleaner residue so a film does not attract new soil.
Fix leaks and persistent dampness promptly.
Seal clean, dry cement grout as directed; sealer reduces staining but does not make grout stain-proof.
Follow the clues to the next step
A simple decision path keeps the treatment connected to what you observe.
Check location, texture, smell, dampness, and recurrence.
Confirm grout and tile, then check compatible care guidance.
Remove soil, wash, brush softly, rinse, and let it dry.
Consider colorant or repair; investigate moisture if it returns.
Find out why your grout turned yellow before you scrub
Yellow grout can come from soap and body oils, cooking grease, hard-water minerals, product residue, mildew, or age. The color alone does not identify the cause, so check the location, texture, smell, and whether the stain returns after cleaning. Those clues matter because the wrong treatment can leave residue, damage a surface, or hide a moisture problem without solving it. A shower corner that stays damp tells a different story from a kitchen backsplash near a greasy stove.
In a bathroom, soap film and skin oils can settle into porous cement grout over time. They form a surface layer that may respond to gentle cleaning, but repeated cleaner buildup can make the grout look dirty again by trapping new soil. Around a sink or showerhead, hard-water deposits may leave a yellowish or dull patch; because minerals behave differently from oily residue, simply scrubbing harder may have little effect. In a kitchen, splashes of oil and food can cling to grout near the range. Some cleaners also leave residue that attracts dirt, so a line can darken again even after a thorough wipe.
Mildew or other growth may look yellow, gray, or black. A musty smell, recurring discoloration, spreading spots, or persistent dampness deserves more attention than a single stain; cleaning the surface will not fix a leak or poor ventilation. For example, if a shower corner turns yellow again within days and remains damp long after bathing, look for the moisture source instead of repeatedly bleaching the grout. That pattern suggests conditions are allowing the problem to return, and stronger surface treatment may only delay the next recurrence.
Age and material changes matter, too. Grout or sealer can discolor over time, and a stain below the surface may resist ordinary cleaning. Think of cleaning as removing what is on the grout; it cannot reverse every change inside the material. If a cleaned, fully dry line remains uniformly yellow, further scrubbing may wear the grout without making it look new, so recoloring or repair may be the more practical choice.
Products Worth Considering

Dyson Ball Animal Total Clean Upright Vacuum

Sonos Era 100 SL Compact Microphone-Free Speaker, Black

Blueair Blue Pure 211i Max Air Purifier
As an affiliate, we earn on qualifying purchases.
Check your tile and grout before choosing a cleaner
Before trying to whiten grout that’s gone yellow, identify the tile and grout material and check the cleaner’s label. Cement-based grout is porous and needs more care than epoxy grout, while natural stone such as marble and limestone can be etched by acids or harmed by harsh products. A cleaner that is fine for a ceramic shower wall may be a poor choice for a marble vanity. Compatibility matters because a cleaner can remove a stain while also dulling the surrounding finish or changing the grout color.
If you know the tile or grout brand, check its care guidance; otherwise, begin with the least aggressive compatible option and test a hidden spot. A test gives you a chance to notice dulling, color change, or a finish problem before you treat the whole floor. It also helps reveal whether the cleaner is doing anything, which can prevent repeated applications that add risk without improving the result. Leave the area to dry so you can judge the change fairly. Wet grout often looks darker than dry grout.
Use a soft nylon brush for grout and avoid metal bristles, which can scratch tile or damage grout. Skip abrasive powders unless the manufacturer recommends them for your materials. For instance, a homeowner cleaning a pale stone bathroom floor should not assume a vinegar mixture is safe just because it is popular online; the acid can damage natural stone and cement grout. A gentle method may take more time, but it preserves the surface and leaves room to step up to a stronger compatible product if needed.
Grout-safe oxygen-based cleaners may help with some organic stains, but formulas and compatibility vary. Follow the specific product directions, including the dwell time, ventilation advice, and rinsing instructions. If a label does not say a product is safe for your tile and grout, choose one that does or check with the manufacturer. The tradeoff is straightforward: a product designed for a particular stain may work faster, while a broad or unverified cleaner can create a new surface problem.
Follow these steps to clean yellow grout gently
To whiten grout that’s gone yellow, remove loose dirt, wash with a mild compatible cleaner, gently scrub, rinse well, and let the grout dry before deciding whether it worked. This order keeps grit from scratching the tile and helps you avoid jumping straight to a harsh product. Treat a small test area first, especially if you do not know what cleaner or sealer was used before. Each step has a purpose: cleaning away surface soil first makes it easier to see whether the stain is in the grout itself, while a full dry-down prevents moisture from making the color look temporarily darker.
- Clear the area. Remove loose dust and crumbs with a vacuum or dry wipe. In a kitchen, wipe away surface grease before working on the grout lines.
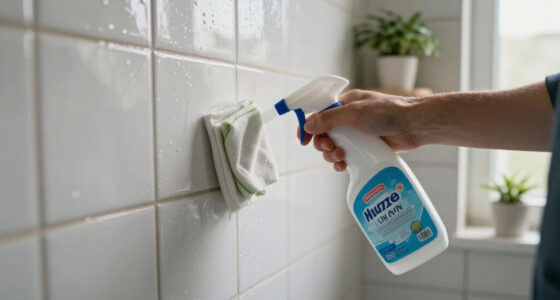
- Wash gently. Use warm water with a pH-neutral cleaner suitable for the tile and grout. Follow the label rather than guessing how much to use.
- Brush softly. Work with a soft nylon brush and light pressure. If the grout line is narrow, a small brush can help you stay off delicate tile edges.
- Rinse thoroughly. Remove cleaner and loosened soil with clean water so residue does not dry into the grout.
- Let it dry. Wait until the grout is completely dry before judging the color or applying another treatment.
For example, if the grout between a shower’s ceramic tiles has a thin soap film, a careful wash and rinse may be enough. If a stain remains once dry, use a stronger grout-safe product only if its label allows use on that surface. Do not leave a cleaner on longer than its directions say; extra dwell time can damage surfaces or leave a film. Give each treatment time to work as directed, then reassess before repeating it. That helps distinguish a stain that is slowly lifting from one that is unlikely to respond to cleaning.
Wear gloves if the cleaner calls for them, ventilate the room, and keep children and pets away while products are in use. Never mix cleaning products. Bleach, ammonia, vinegar, acids, and other cleaners can react dangerously when combined; use one product at a time and rinse as directed before considering another. These precautions also make the results easier to interpret: if you change one product at a time, you can tell which treatment helped and avoid exposing the surface to an unnecessary combination.
Choose a treatment that fits the stain and surface
The best treatment depends on what has yellowed the grout and what materials surround it. Mild soap residue often responds to routine cleaning, while organic stains may respond to a compatible oxygen-based cleaner. Mineral deposits, aged grout, and chemical discoloration may need a different approach, and some changes cannot be cleaned away. Choosing by cause reduces the chance of spending time on a treatment that cannot work or using a product strong enough to damage the tile.
| What you notice | Reasonable next step | Watch out for |
|---|---|---|
| Light film in a shower or sink area | Try warm water and a pH-neutral cleaner | Rinse away residue |
| Organic-looking stain on compatible grout | Consider a grout-safe oxygen-based cleaner by its label | Test the material and ventilate |
| Yellowing around a stone surface | Check stone and grout care guidance first | Avoid acids unless the manufacturer permits them |
| Stain stays after cleaning and drying | Ask whether a grout colorant or repair suits the area | Cleaning may not reverse aging or deep discoloration |
Chlorine bleach may lighten some stains, but it is not right for every grout or tile and can change color or harm materials. Use it only if the product label and the surface manufacturer’s guidance both allow it. Never mix bleach with ammonia, vinegar, acids, or another cleaner. If you are unsure what was used previously, rinse thoroughly and let the area dry before choosing a new product. This caution may mean slower progress, but it lowers the chance that a temporary improvement comes at the cost of a permanently altered grout line or tile finish.
A kitchen backsplash gives a useful example: greasy splashes near the stove may need a cleaner intended for that soil, while the same product may not suit nearby natural stone. Match the method to both the stain and the surface. There is no universal grout whitener that safely handles every material and every cause, so a small test and a targeted cleaner are usually a better tradeoff than treating the whole area with a strong general-purpose product.
Know when recoloring or repair beats more scrubbing
If compatible cleaning does not change the yellowing after the grout dries, the discoloration may come from aging, a failing sealer, a deep stain, or damaged grout. Repeated scrubbing can wear the surface without restoring its original shade. At that point, a grout colorant or refresh product may give a more even appearance than another round of stronger cleaner. The useful signal is not just that one pass failed, but that the color stays after the surface is clean and fully dry; that suggests the cause may be within the grout or sealer rather than loose soil.
Choose a colorant made for your grout and follow its preparation, application, and drying directions. The grout usually needs to be clean and fully dry first, and the product must suit the tile edges and use area. Picture a kitchen backsplash with old, patchy cream grout: a compatible colorant can create a more consistent look, while aggressive scrubbing may leave some lines pale and others yellow. Recoloring is a cosmetic reset, so it can save effort when the joints are stable, but it will not correct an underlying moisture issue or restore structural strength.
Colorant is not a fix for loose, cracked, or crumbling grout. Those signs suggest repair or replacement may be needed, particularly where water can get behind a shower surface. If the grout repeatedly stains or the area stays wet, address the underlying issue before covering the appearance. A maintenance product cannot stop a leak or correct a ventilation problem. Covering active deterioration can make it harder to notice whether the condition is worsening.
When you are unsure whether the grout needs repair, a tile professional can assess persistent damage or water concerns. Follow the tile and grout manufacturer’s guidance for any repair. For a small, stable stain that does not recur, a colorant may be a reasonable cosmetic option; for a failing joint, repair is the more durable response. The choice comes down to the condition of the grout: recoloring changes how sound grout looks, while repair restores a joint that no longer performs its job.
Keep cleaned grout brighter with a few simple habits
You can slow new staining by removing residue, reducing long periods of dampness, and cleaning visible buildup before it settles into porous grout. A daily wipe is not necessary for every home, but a quick rinse and squeegee after a shower can reduce soap film and standing water. In a busy household, even wiping the shower corners a few times a week can make deep cleaning less frequent. These habits work by limiting the material and moisture that stains build up on, so they reduce maintenance rather than making grout stain-proof.
- Rinse cleaner away instead of letting it dry on grout.
- Ventilate after bathing with an operating fan or an open window when practical.
- Wipe kitchen splashes near sinks and cooktops before grease and food dry.
- Fix leaks and persistent dampness rather than cleaning the same stain repeatedly.
Once cement-based grout is clean, dry, and in suitable condition, an appropriate sealer may help reduce future staining. Sealer does not make grout stain-proof, and it may need reapplication as directed by its manufacturer. Epoxy grout generally does not need sealing, so check your grout type before buying a sealer. Sealing is useful for reducing how readily some spills soak in, but it adds a maintenance step and cannot compensate for standing water or neglected residue.
For example, after cleaning a shower, rinse away shampoo and cleaner residue, run the fan, and let the surface dry. In a kitchen, a damp cloth can remove a fresh splash before it dries into the grout line. Small habits help make an otherwise clean bathroom or kitchen look cared for without reaching for a harsh product every week. Choose a routine you can maintain; a consistent quick wipe is more useful than an elaborate schedule that is hard to keep.
Frequently Asked Questions
Can I use bleach on yellow grout?
Sometimes, but it depends on the grout, tile, and bleach product. Check both the product label and the surface manufacturer’s guidance, test a hidden spot, ventilate the room, and never combine bleach with another cleaner.
Will baking soda and vinegar whiten grout?
Vinegar is acidic and can harm cement grout or natural stone, so this popular combination is not a safe default. A grout-safe cleaner that matches your tile and grout is a more predictable choice.
How can I tell whether a yellow stain is mildew?
Color alone cannot confirm mildew. If discoloration spreads or returns quickly, smells musty, or appears with persistent dampness, investigate ventilation or a moisture source instead of relying on repeated surface cleaning.
How long should I leave grout cleaner on?
Follow the product label because formulas and dwell times differ. Leaving cleaner on too long may damage a surface or leave residue; rinse as directed and let the grout dry before judging the result.
Should I seal grout after cleaning it?
Many cement-based grouts can be sealed once they are fully clean and dry, if the grout and sealer manufacturers say it is suitable. Epoxy grout generally does not need sealing, and sealer does not make grout stain-proof.
What if the yellowing does not come off?
The grout may be aged, deeply stained, or affected by a discolored sealer. A compatible grout colorant may even out its appearance; cracked or crumbling grout may need repair or replacement instead.
Conclusion
Start gently: identify the tile and grout, test a compatible cleaner in a hidden spot, rinse well, and wait for the grout to dry. If the yellow remains, look for a deeper stain, aging, a moisture issue, or damaged grout before you scrub again.
Keep the room ventilated and the grout rinsed clean. A soft brush and a little patience can do more for a bright tile line than a cupboard full of improvised mixtures.