TL;DR
Cleaning a floor after renovation dust requires quick action with dry sweeping, vacuuming, and careful wet mopping. Using the right tools and methods prevents dust from settling or spreading, leaving your floors fresh and safe.
Start cleaning immediately after renovation to prevent dust from settling and hardening.
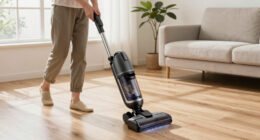
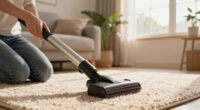
Use a vacuum with a HEPA filter for effective removal of fine dust from carpets and floors.
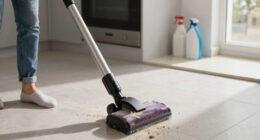
Switch between dry sweeping, vacuuming, and damp mopping for best results.
Protect yourself with masks and gloves, and ventilate the space during cleaning.
Regular maintenance and air purification keep dust levels low over time.
What Makes Renovation Dust So Tricky to Clean?
Renovation dust isn’t just regular dirt. It’s often a mix of drywall particles, plaster, cement, and tiny bits of wood or metal. This dust is incredibly fine, almost like powder, and it easily settles into every nook and cranny. If you ignore it, it can harden into a stubborn layer that’s tough to remove later. For example, after a drywall job, a dense layer of dust can cling to textured tiles or carpet fibers, making it look dull and dingy.
Understanding its sneaky nature helps you plan a more effective cleaning process. It’s not just about wiping the surface — you need to pick up those tiny particles from deep within textured surfaces and porous materials. Recognizing the fine, powdery nature of this dust emphasizes the importance of using tools that can trap or lift it without redistributing it, which is crucial for maintaining indoor air quality and preventing long-term surface damage.

Shark Upright Vacuum Cleaner | Navigator Lift-Away | Pet Hair, Carpet & Hard Floor Cleaning | Upholstery & Crevice Tools | HEPA Filter | Swivel Steering | Large Dust Cup Capacity | Lavender | NV352
POWERFUL SUCTION FOR CARPET & HARD FLOORS: Clean carpets and hard floors with strong multi-surface suction. This lightweight…
As an affiliate, we earn on qualifying purchases.
As an affiliate, we earn on qualifying purchases.
Your First Move: Prepare and Protect Yourself
Before diving into cleaning, clear the room. Move furniture, rugs, and anything that’s in the way. Wear a mask — a simple dust mask or N95 respirator — plus gloves and goggles. Renovation dust isn’t just messy; it can be harmful if inhaled or if it contacts your skin. Good ventilation is key — open windows and doors wide to let fresh air sweep out the dust clouds.
For example, when cleaning a living room after a kitchen remodel, I always start by removing pillows, curtains, and small decor. Then, I put on a mask and crack open every window. It makes a huge difference in how much dust you breathe in and how clean the air feels afterward. Protecting yourself isn’t just about comfort; it’s about reducing health risks associated with inhaling fine particles that can cause respiratory issues or irritate allergies, especially during vigorous cleaning activities that can stir up settled dust.

CLEANHOME Microfiber Dust Mop for Hardwood Floor Cleaning, Dry and Wet Baseboard and Floor Duster, Household Cleaning Tool for Kitchen, Bathroom
Microfiber Dust Mop for Deep Cleaning:The microfiber mop designed to excel as a floor mop for deep cleaning….
As an affiliate, we earn on qualifying purchases.
As an affiliate, we earn on qualifying purchases.
How to Remove Dust Without Making a Mess
Start with dry cleaning. Use a broom or a microfiber dust mop to sweep the surface gently. For carpets, a vacuum with a HEPA filter is your best friend. It traps even the tiniest particles, preventing them from floating back into the air. For example, a 15-minute sweep with a microfiber mop can pick up most of the loose dust on hardwood or tile floors. This initial dry removal is critical because it reduces the bulk of loose dust, but it’s only the first step—dry cleaning alone can sometimes disturb settled dust, causing it to become airborne again. Therefore, combining it with subsequent wet cleaning ensures a more thorough removal and minimizes the risk of lingering particles that can cause health issues or surface dullness over time.
Here’s a quick step-by-step:
- Swiffer or sweep the entire floor, paying attention to corners and edges.
- Vacuum carpets and rugs thoroughly, moving slowly to catch every fiber.
- Check for stubborn spots—sometimes dust hides under baseboards or in grout lines, which requires targeted attention to prevent long-term buildup that can affect surface integrity and appearance.

G & F Products Particulate Respirator Dust Mask Two-Strap Cup Style Design, Lightweight with Cushioning Nose Foam, 50 Masks
50 DISPOSABLE DUST MASKS: A value 50-pack of lightweight, cup-style masks with two straps and a soft foam…
As an affiliate, we earn on qualifying purchases.
As an affiliate, we earn on qualifying purchases.
The Power of Wet Cleaning: When and How to Use It
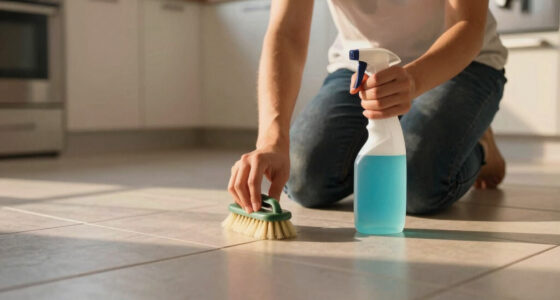
Once loose dust is gone, switch to damp mopping for hard floors. Use a microfiber mop dampened with a pH-neutral cleaner suitable for your floor type. For example, on ceramic tiles, a gentle solution with a splash of vinegar works well. For hardwood, avoid excess water — just a lightly damp mop. This step picks up remaining dust and leaves your floor gleaming. Wet cleaning is especially important because it captures particles that dry cleaning might miss—particularly in textured surfaces or porous materials where dust can settle deeply. The dampness helps lift dust from tiny crevices, preventing it from resettling and causing dullness or potential surface damage over time. It also reduces airborne dust, improving indoor air quality and creating a safer environment for inhabitants.
Pro tip: rinse the mop frequently and change the water often. Stubborn spots may need a second pass or a soft scrub with a microfiber cloth. After mopping, dry the surface with a clean towel to prevent streaks or water damage, especially on wood or laminate floors. This step ensures that residual moisture doesn’t lead to warping or mold growth, which is a common concern with improper drying techniques.

Spray Wet Mops for Hardwood Floor Cleaning: MEXERRIS Floor Mop with 5 Washable Pads for Swiffer Powermop & 2 Refillable Bottles – Home Commercial Dust Dry Mops for Wood Laminate Vinyl Tiles Ceramic
2 Pack 410ML Refillable Bottles – Mexerris spray mop comes with 2 pcs anti-leakage refillable water bottles. when…
As an affiliate, we earn on qualifying purchases.
As an affiliate, we earn on qualifying purchases.
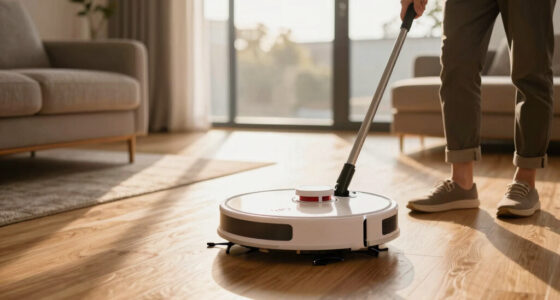
Deep Cleaning Tech and Tools That Really Work
Modern vacuums with HEPA filters and adjustable suction make a huge difference. They trap fine dust better than standard vacuums. Microfiber mops are excellent because they attract dust and debris without spreading it around. Electrostatic dusters can also help capture dust from textured or uneven surfaces, like stone or tile.
For example, using a microfiber mop with a built-in spray system can make wet cleaning faster and more thorough. Additionally, steam cleaners—if your flooring allows—can loosen stubborn dust and sanitize at the same time. Always check your floor’s manufacturer recommendations before using steam. Steam cleaning can be highly effective but may pose risks on certain delicate surfaces, such as hardwood or laminate, where excess moisture can cause warping or damage if not used properly. Choosing the right tools and techniques is about balancing effectiveness with surface safety, ensuring thorough cleaning without unintended harm.
When to Call in the Pros and Why It Matters
If your renovation was extensive or the dust is overwhelming, hiring professional cleaners might be your best bet. Experts have industrial-grade vacuums, specialized cleaning solutions, and experience with delicate surfaces. For example, after a major bathroom overhaul, a professional team can ensure every crevice, grout line, and textured surface is thoroughly cleaned, preventing dust from lingering or causing damage. Their equipment can reach and clean areas that are difficult to access with standard household tools, reducing the chance of residual dust affecting indoor air quality or damaging sensitive surfaces. Additionally, professionals can identify and address areas prone to dust accumulation that homeowners might overlook, such as under appliances or behind fixtures, which can be critical in preventing long-term issues like mold or surface deterioration.
Professional cleaning also helps protect your health — especially if you or family members have allergies or respiratory issues. It’s a smart investment for a truly spotless, safe home.
Keeping Dust at Bay: Post-Cleaning Tips
Once your floors are sparkling, maintain that cleanliness with regular sweeping and mopping. Use an air purifier with a HEPA filter to reduce airborne dust. A simple routine—vacuuming carpets weekly and mopping hard floors bi-weekly—can prevent dust buildup. For example, I keep a microfiber mop and a HEPA vacuum handy for quick touch-ups after any small renovation or DIY project.
Also, seal off renovation areas with plastic sheeting until all dust settles. This simple step prevents dust from migrating to other rooms, keeping your entire home cleaner longer. Consistent maintenance and vigilant sealing help prevent the re-accumulation of fine particles, which can be especially important if you have allergies or respiratory sensitivities, as they significantly reduce the risk of dust-related health issues over time.
Frequently Asked Questions
How soon after renovation should I start cleaning my floors?
Begin cleaning as soon as the work stops and dust has settled, ideally within 24 hours. Prompt action helps prevent dust from hardening into stubborn layers that are harder to remove later.
What cleaning products are safest for my floors?
Use pH-neutral, non-abrasive cleaners designed for your specific flooring type. For hardwood, stick to gentle solutions; for tile or vinyl, slightly stronger cleaners are fine. Always check manufacturer recommendations.
Can I use a regular vacuum cleaner?
No, a vacuum with a HEPA filter is recommended because it captures the tiny, fine dust particles better than standard vacuums. This step is crucial for improving indoor air quality and preventing dust from resettling.
How do I prevent dust from spreading to other areas?
Seal off the work zone with plastic sheeting, clean from top to bottom, and avoid sweeping or vacuuming other rooms until the dust is well contained. This stops dust migration and keeps your home cleaner overall.
Is professional cleaning necessary?
For large, heavily dusty renovations or if you want peace of mind, professional cleaning ensures every nook and cranny is thoroughly addressed. It’s especially helpful if you or your family have allergies or respiratory sensitivities.