
TL;DR
The fastest way to clean a blender is to rinse immediately after use, blend warm soapy water for 30 seconds, then rinse thoroughly. Modern self-cleaning models and natural solutions like vinegar boost efficiency, saving you time.
Ever finished a smoothie and dreaded the sticky, stubborn mess left behind? Cleaning a blender doesn’t have to be a chore that drags on. The secret is acting fast and using the right tricks to get it sparkling in no time. In this guide, you’ll learn the quickest, most effective way to clean your blender—whether you’re in a rush or want to keep it in top shape without fuss.
From simple rinses to natural cleaning hacks, these tips help you save minutes while keeping your blender fresh and odor-free. Ready to transform a messy cleanup into a quick, effortless routine? Let’s dive in.
Rinse your blender immediately after use to prevent dried residue.
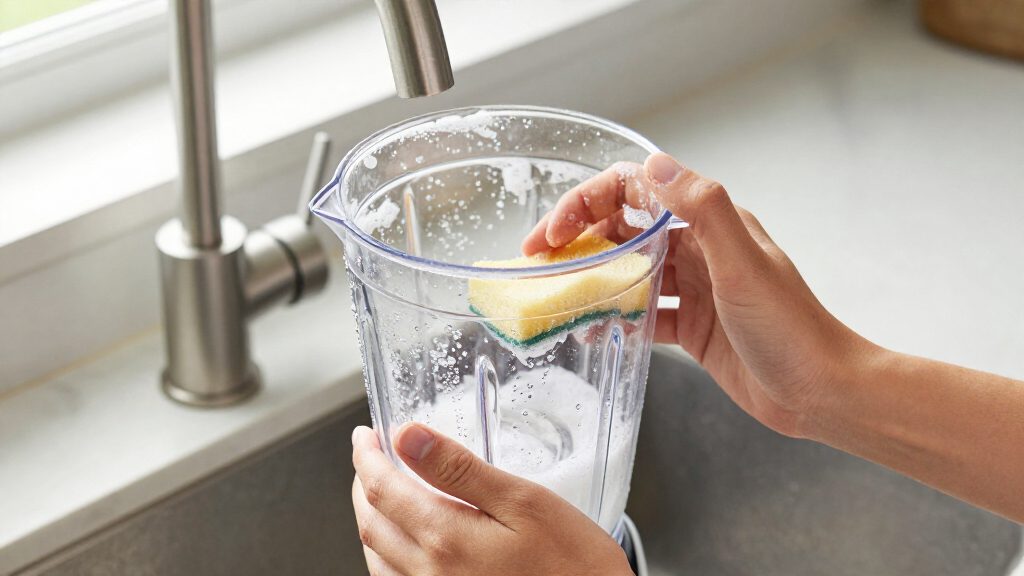
Blend warm, soapy water for 30 seconds to clean quickly and effectively.
Use natural agents like vinegar or lemon to eliminate odors and stains.
Modern self-cleaning blenders can cut cleaning time by more than half.
Deep clean your blender monthly to prevent buildup and odors.
Why Immediate Rinsing Saves You Time and Effort
The best way to keep your blender clean fast is to rinse it immediately after use. When food residues dry and stick, they become a nightmare to scrub later. Imagine the difference between rinsing a smoothie container right after blending versus letting it sit overnight—big difference.
By rinsing right away, you prevent residues from drying out and becoming hardened, which requires more aggressive scrubbing or soaking. This proactive step is crucial because dried residues are more resistant to cleaning, often trapping bacteria and odors. The longer you wait, the more difficult it becomes to remove all traces thoroughly, potentially leading to lingering smells or mold. Additionally, immediate rinsing reduces the need for harsh chemical cleaners, which can degrade the material over time and affect the taste of future blends. Think of it like washing your hands immediately after a messy project—less effort, less soap, and a cleaner container overall. This habit not only saves time but also preserves your blender’s longevity and ensures it remains in pristine condition for years to come.
As an affiliate, we earn on qualifying purchases.
Step-by-Step: The 3-Minute Quick Clean Routine
- Fill the blender halfway with warm water. Add 2-3 drops of dish soap.
- Secure the lid tightly. Run the blender on high for 30-60 seconds. You’ll hear the blades whirring and water splashing.
- Pour out the soapy water and rinse the jar thoroughly with clean water.
- Dry with a soft cloth or let it air dry.
This routine takes less than 3 minutes and effectively removes most residues and odors. The combination of warm water and soap, when agitated by the blades, works by breaking down oils, fruit residues, and stubborn particles instantly. This process is especially effective because the high-speed motion creates a scrubbing action that loosens and lifts debris from all surfaces inside the jar. It’s a strategic use of physics—using the blender’s motor to do the heavy lifting—making cleaning not only faster but also more thorough. This method minimizes residual buildup, which can otherwise lead to bacterial growth, mold, or unpleasant smells if neglected. Regularly practicing this routine ensures your blender stays hygienic, odor-free, and in optimal working condition, reducing the need for more intensive cleaning sessions that can be time-consuming and require chemical cleaners.
As an affiliate, we earn on qualifying purchases.
Why Modern Self-Cleaning Blenders Make Everything Faster
Many new blenders, like Vitamix and Blendtec, feature built-in cleaning cycles that significantly cut down on cleaning time. These cycles are designed to be a hands-free solution that takes advantage of the powerful motors and sharp blades to thoroughly clean the interior without manual scrubbing. When activated, the self-cleaning function usually involves adding water and a small amount of soap, then pressing a button—after which the blender does the work for you.
This process is especially beneficial after making sticky or dense mixes like nut butters, doughs, or thick smoothies that tend to cling stubbornly to the sides. The automated cycle ensures that all surfaces are scrubbed clean, reaching areas that manual cleaning might miss or require extra effort to clean thoroughly. The efficiency of these cycles also means less water and fewer cleaning chemicals are needed, making them an eco-friendly choice. For busy households, the convenience of a self-cleaning blender minimizes downtime and effort, allowing you to enjoy your smoothies without the hassle of scrubbing. Plus, since the process is quick and consistent, it helps maintain the appliance’s condition, preventing residue buildup that could impair performance or cause odors over time.
As an affiliate, we earn on qualifying purchases.
Natural Cleaning Hacks to Eliminate Odors and Stains
If your blender develops a funky smell or stubborn stains that resist normal cleaning, natural solutions can be both effective and gentle. Fill the jar with equal parts vinegar and water, then blend on high for 30 seconds. The acidity of vinegar acts as a natural disinfectant, breaking down mineral deposits, residues, and bacteria that cause odors or stains. Rinsing thoroughly afterward ensures no vinegar taste remains, but the residual acidity continues to neutralize lingering smells and bacteria, keeping your blender fresh over time.
Adding a few drops of lemon juice or baking soda before blending enhances this effect. Lemon juice contains citric acid, which dissolves residues and neutralizes odors, leaving a bright, clean scent. Baking soda, on the other hand, acts as a gentle abrasive that helps scrub away stubborn stains and absorbs odors, making it ideal for deep cleaning. These natural remedies are safe, inexpensive, and environmentally friendly, making them perfect for eco-conscious households. Regular use of these hacks not only keeps your blender smelling fresh and looking clean but also helps prevent the buildup of bacteria and mold, extending the lifespan of your appliance and ensuring each use is as hygienic as the first.
As an affiliate, we earn on qualifying purchases.
Comparison: Manual Cleaning vs. Self-Cleaning Blenders
| Feature | Manual Cleaning | Self-Cleaning Blenders |
|---|---|---|
| Time Needed | 5-10 minutes | Less than 2 minutes |
| Effort | Scrubbing, soaking | Press a button |
| Effectiveness | Good if thorough | Excellent for routine cleaning |
| Cost | Standard cleaning supplies | Higher initial investment |
While manual cleaning offers the advantage of meticulous control, it often requires more time, physical effort, and the use of cleaning tools that can scratch or damage the surface if not used carefully. Self-cleaning blenders, on the other hand, leverage technology to automate the cleaning process, making it faster and more consistent. Although the initial cost is higher, the time saved and reduced effort can justify the investment, especially for those who prioritize convenience and hygiene. The choice ultimately depends on your lifestyle and cleaning preferences, but understanding these tradeoffs helps you make an informed decision for your kitchen routine.
Avoid These Common Mistakes That Slow Down Your Cleaning
- Delay cleaning—residue hardens and becomes tougher to remove, making the task more time-consuming and increasing the likelihood of odors or mold development.
- Use harsh abrasives or steel wool—these can scratch or damage the surface, compromising the integrity of your blender and potentially creating hiding spots for bacteria.
- Submerge the motor base in water—this risks damaging the electrical components and voiding warranties, so it’s essential to keep it dry and clean with a damp cloth instead.
- Ignore odors—regular cleaning with vinegar or lemon prevents smells from building up, which can be difficult to eliminate once entrenched, affecting the taste of future blends and overall hygiene.
For example, leaving a smoothie in the jar overnight often results in stubborn stains and a sour smell the next day, which are more challenging to remove if cleaning is postponed. Developing a routine that avoids these mistakes ensures your blender remains in prime condition, reducing cleaning time and maintaining food safety standards.
How Often Should You Deep Clean Your Blender?
Deep cleaning isn’t necessary after every use but should be part of a regular maintenance schedule—typically once a month for average household use. Heavy use, such as making nut butters, thick doughs, or blending fibrous vegetables, can cause residues to accumulate more quickly, increasing the risk of odors, mold, or bacterial growth if not addressed promptly. Deep cleaning involves more thorough methods like soaking components in vinegar and baking soda or using specialized cleaning cycles if your blender has that feature. Think of it as giving your blender a comprehensive spa day—restoring all parts to optimal hygiene and performance. Regular deep cleans prevent buildup on blades, gaskets, and seals, ensuring that your appliance functions smoothly and stays odor-free. Skipping this step can lead to persistent smells, reduced blending efficiency, and even damage over time, so scheduling a monthly deep clean is a smart way to extend your blender’s lifespan and maintain top-notch hygiene.
Frequently Asked Questions
What is the fastest way to clean a blender after making smoothies?
The quickest method is to immediately rinse the jar, then fill it with warm water and a few drops of dish soap. Run the blender on high for 30 seconds, rinse thoroughly, and dry. This routine takes less than 3 minutes and keeps your blender spotless.Can I put my blender parts in the dishwasher?
Many blender jars and lids are dishwasher safe, but check your manufacturer’s instructions first. Avoid submerging the motor base; instead, wipe it with a damp cloth. Using the dishwasher for jars saves time and effort.How do I remove stubborn stains or odors from my blender?
Fill the jar with equal parts vinegar and water, then blend on high for 30 seconds. Rinse well. For extra freshness, add lemon juice or baking soda before blending. These natural remedies are effective and safe.Are there natural or eco-friendly cleaning methods?
Yes, vinegar, lemon juice, and baking soda are excellent natural cleaners. They cut through grime, eliminate odors, and are gentle on surfaces. These options are perfect for a green-clean routine.How often should I deep clean my blender?
Deep clean once a month if you use it regularly. For heavy use, like making nut butters or dough, consider cleaning more frequently. Regular deep cleaning prevents buildup and keeps your blades sharp.Conclusion
The secret to a speedy blender cleanup is simple: act fast and use the right tools. With just a few minutes after blending, you keep your appliance fresh and ready for the next task. Imagine pulling out a spotless, odor-free blender every time—no fuss, no delay.
Next time you finish a smoothie, remember: rinse, blend, rinse again, and breathe easy knowing your blender stays in top shape without wasting your precious time.