TL;DR

Get cleaning gear delivered free — and shop member deals
- Fast, free delivery on millions of items
- Access to Prime Big Deal Days deals on October 6–7
- Prime Video, Amazon Music and more included
Cleaning inside a toaster safely means unplugging, cooling, removing crumbs, and gently dislodging debris without water or metal tools. Regular cleaning prevents fires and extends its life, with recent innovations making maintenance easier.
Picture this: a flickering flame, sparks dancing from a pile of crumbs. That’s what can happen if you ignore cleaning your toaster inside. It’s not just about crumbs; it’s about safety, appliance longevity, and even saving a fire hazard lurking in your kitchen.
In this guide, you’ll learn how to clean your toaster properly—step by step, safely, and without damaging its delicate parts. You’ll find out what recent innovations make maintenance easier, and how to keep your toaster in top shape with simple routines. Ready to keep your mornings safe and your toaster happy? Let’s dive in.
Always unplug and cool your toaster before cleaning to avoid shocks or burns.
Use non-metallic tools like brushes or compressed air to dislodge crumbs inside slots safely.
Never use water inside the toaster—stick to dry or damp cleaning methods for electrical safety.
Regularly clean the crumb tray to prevent fire hazards and prolong your appliance’s lifespan.
Recent models and tools make cleaning easier—look for features like removable trays and maintenance alerts.
Unplug, Cool Down, and Remove the Crumb Tray First
Before you even think about cleaning, unplug the toaster. It’s the safest move—no power, no risk of shocks. Wait until it’s completely cool; hot surfaces and water don’t mix. Then, remove the crumb tray, which most models have right at the bottom. It’s a little drawer that catches crumbs, and it’s your first line of defense against fire hazards.
Once out, empty the tray into the trash or compost. Wipe it with warm, soapy water. If it’s stubborn, soak it for a few minutes—no scrubbing with abrasive pads. This simple step clears most of the gunk and prevents buildup that could ignite. Remember, safety first: always disconnect and cool before cleaning.
As an affiliate, we earn on qualifying purchases.
How to Clean Inside the Slots Without Damage
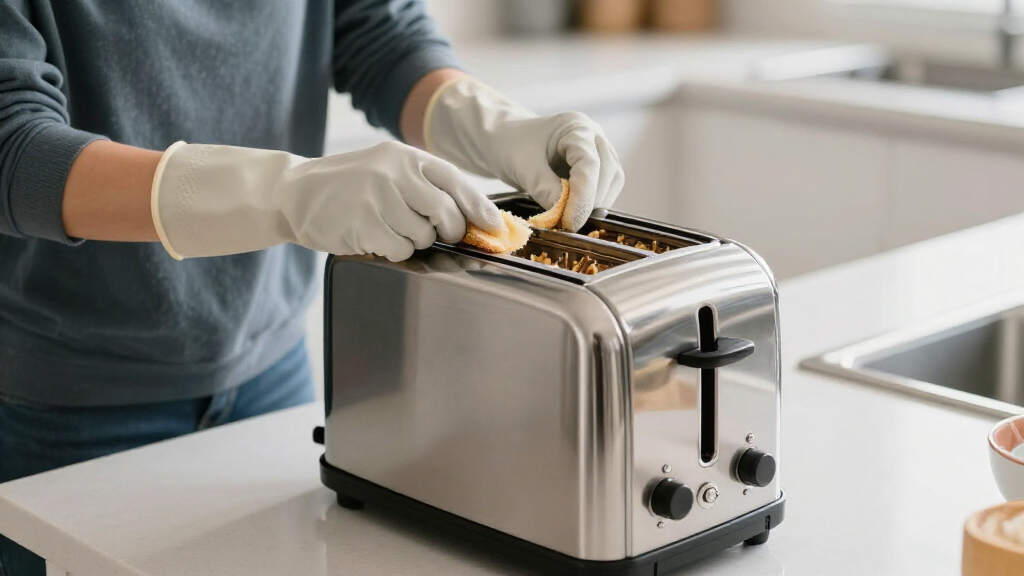
Cleaning inside the slots is where many get nervous. The key? Use gentle tools—you want to dislodge crumbs, not damage the heating elements or wiring. A soft brush or a can of compressed air works wonders.
- Unplug the toaster and let it cool completely.
- Use a silicone or soft-bristled brush to sweep out the crumbs from the slots.
- If crumbs stubbornly stick, blow them out with compressed air—holding the can upright and short bursts.
- Avoid inserting metal utensils or sharp objects—these can damage delicate parts and pose safety risks.
Properly cleaning inside the slots is crucial because accumulated crumbs can obstruct heat flow, leading to uneven toasting and potential overheating. Dislodging these crumbs gently ensures the heating elements operate efficiently, preventing hot spots that could cause damage or fire. Using non-metallic tools minimizes the risk of scratching or puncturing delicate components, which could compromise safety and longevity. Compressed air, when used correctly, provides a blast of force that dislodges stubborn debris without physical contact, reducing the chance of damage. This careful approach balances thorough cleaning with preserving the integrity of your appliance, ultimately extending its lifespan and maintaining safe operation.
compressed air for cleaning toaster slots
As an affiliate, we earn on qualifying purchases.
As an affiliate, we earn on qualifying purchases.
Avoid Water Inside — Keep It Dry for Safety and Longevity
The biggest mistake? Using water inside your toaster. Water and electricity are a dangerous combo. Submerging or pouring water into the appliance can cause short circuits, corrosion, or even electrical shocks. Moisture inside electrical components accelerates deterioration, which can lead to costly repairs or the need for replacement. Keeping your toaster dry isn’t just about safety—it directly impacts its lifespan and consistent performance.
Instead, stick to damp cloths for external cleaning. For removable parts like the crumb tray, warm soapy water is fine. But inside? Just air, brushes, or gentle wiping. This approach ensures you remove surface grime without risking internal damage. Think of your toaster as a fine piece of machinery; moisture is its enemy. Properly drying and avoiding water inside prevents corrosion of metal parts and electrical failures, ultimately saving you money and hassle while maintaining safe operation.
non-metallic cleaning brush for toaster
As an affiliate, we earn on qualifying purchases.
As an affiliate, we earn on qualifying purchases.
Recent Innovations Make Cleaning Easier Than Ever
Newer toasters are designed with maintenance in mind. Some include self-cleaning features, like easy-to-remove crumb trays or interior coatings that resist buildup. Others now have smart alerts that tell you when it’s time to clean. These innovations are driven by a desire to improve safety, convenience, and appliance lifespan. For example, self-cleaning trays reduce the risk of forgotten crumbs, which are the primary fire hazard. Interior coatings help prevent stubborn residue, making routine cleaning faster and less abrasive. Smart alerts leverage technology to remind users, minimizing neglect that could lead to safety issues.
Advances in cleaning tools also help. Silicone brushes gently scrub without scratching, and compressed air cans are more powerful yet safe for delicate parts. Eco-friendly cleaning products are gaining popularity, too, reducing chemical exposure in your kitchen. These innovations reflect a broader trend: making maintenance safer, easier, and more effective so that regular cleaning becomes a simple part of your routine rather than a chore.
Imagine a toaster that whispers, ‘Hey, I need a quick clean’—these tech-savvy features aren’t just fancy; they make your life easier and safer.
As an affiliate, we earn on qualifying purchases.
Step-by-Step: Your Simple 4-Step Cleaning Routine
To keep your toaster safe and performing well, follow this quick routine:
- Unplug and wait for it to cool completely.
- Remove and clean the crumb tray with warm, soapy water.
- Gently brush or blow out crumbs from the interior slots with compressed air.
- Wipe down the exterior with a damp cloth and reassemble once everything’s dry.
This routine takes about 10 minutes but saves you from potential fires and costly repairs. Plus, it keeps your mornings running smoothly and safely.
Frequently Asked Questions
Is it safe to clean the inside of a toaster with water?
No, water can damage the electrical components and cause shocks. Use dry methods like brushes or compressed air for internal cleaning, and only water for removable parts outside the appliance.
How often should I clean my toaster?
If used daily, aim for every 1-2 weeks. Regular cleaning prevents buildup of crumbs, which can be a fire hazard and reduce the toaster’s lifespan.
Can I use a metal brush or knife to clean inside?
No, metal tools can scratch or damage the heating elements and wiring. Always opt for soft brushes, silicone tools, or compressed air to keep internal parts safe.
What’s the best way to remove stubborn crumbs?
Use a soft brush or compressed air. Avoid poking with sharp objects. Gentle, consistent dislodging is safest and most effective.
Are there any special cleaning products recommended?
Stick to warm, soapy water for removable parts and damp cloths for the exterior. Avoid harsh chemicals that could damage the toaster or leave residues.
Conclusion
Cleaning inside a toaster doesn’t have to be a chore wrapped in danger. With simple steps—unplug, cool, dislodge crumbs gently, and keep everything dry—you protect your home and your appliance.
Imagine a morning where your toaster works flawlessly, without smoke or sparks. That’s the power of regular, safe maintenance. Keep it simple, stay safe, and enjoy toast that’s perfect every time.
Fall Picks
fall essentials
As an affiliate, we earn on qualifying purchases.