
TL;DR

Get cleaning gear delivered free with Prime
- Fast, free delivery on millions of items
- Prime Video, Amazon Music and more included
- Member-only deals all year
To clean a bathroom vent fan safely, switch off the fan and its circuit breaker, follow the manufacturer’s instructions, and remove the grille without forcing it. Vacuum accessible dust, wash the grille only if the manual allows it, let it dry fully, then reinstall it before restoring power. Cleaning may help airflow, but persistent noise or weak ventilation can signal a motor, duct, or installation problem.
A dusty bathroom fan can sound like a tiny helicopter overhead, then still leave your mirror fogged long after your shower. The dust on the grille and accessible housing can restrict airflow, but cleaning those parts safely takes more than a quick swipe with a wet cloth.
This guide shows you how to clean bathroom vents and fans without forcing the cover, spraying the motor, or taking risks on a wobbly chair. You’ll learn how to shut off power, remove and clean an approved grille, keep electrical parts dry, and recognize when a noisy or weak fan needs a professional’s attention.
Turn off the wall switch and the circuit breaker, then confirm the fan cannot start before you remove its grille.
Follow the fan manual; release screws or spring clips gently and never force a stuck cover.
Vacuum accessible dust with a brush attachment; wash a removable grille only when allowed, and dry it fully.
Keep liquids away from the motor and wiring, and restore power only after reassembly.
Persistent grinding, rattling, burning smells, sparks, damaged wiring, or weak airflow after cleaning call for qualified help.
Home care / Safe maintenance guide
How to Clean Bathroom Vents and Fans Safely
A dusty fan can sound like a tiny helicopter and still leave your mirror fogged. Clean the grille and reachable surfaces carefully, keep electrical parts dry, and know when airflow problems need a closer look.
Power off first. Keep the motor and wiring dry.
Switch off the wall control and circuit breaker before removing the grille. Restore power only after everything is dry and reassembled.01 / Why clean it?
Clear the intake. Set a sensible limit.
Dust, hair, and lint can narrow the grille opening and make it harder for humid air to reach the fan. Cleaning accessible parts can help airflow, but it cannot fix every cause of a steamy bathroom.
Dust can restrict flow
A gray film around the grille slots—or loose pet hair—can reduce the open area where air enters.
Humidity lingers
When ventilation is weak, moisture may take longer to leave mirrors, walls, and towels after a shower.
Some faults are hidden
A blocked or disconnected duct, an undersized fan, or a blocked exterior vent may need professional inspection.
02 / Safe setup
Make the work area safe before the cover comes off.
A wall switch alone is not enough protection while your hands are near moving parts or electrical connections. If you cannot identify the correct circuit, stop and ask a qualified electrician rather than guessing.
Switch off the fan and breaker
Turn off the wall control, then the circuit breaker. Confirm the fan cannot start and follow any additional instructions in the manufacturer’s manual.
Use steady footing
Place a stable ladder on a dry, level floor. Avoid a bathtub edge or rolling chair; dry a slick floor before setting up.
Shield your eyes and lungs
Wear eye protection and a dust mask. Support the grille as you release it so it cannot fall unexpectedly.
Leave damaged fans off
Frayed wiring, scorch marks, sparks, or a burnt smell call for a qualified electrician or repair professional—not routine cleaning.
03 / The routine
Seven steps from power-off to normal operation.
Fan designs differ. Check the manual before removing the grille, and stop if the cover resists its described release method.
Isolate
Switch off fan and breaker.
Confirm
Check it cannot start; read the manual.
Release
Support grille; undo clips or screws gently.
Vacuum
Brush away reachable dust only.
Wash
Only if permitted; use mild soapy water.
Dry
Let the grille dry completely.
Reassemble
Secure grille, restore power, listen.
04 / Keep it gentle
Clean the parts you can reach safely.
A vacuum brush or soft brush gives you control at the opening. Avoid pushing debris deeper or disturbing components that routine cleaning does not require.
*Wash only when the manual allows it. Use warm water and mild soap on the removable grille, then dry it fully. Never spray cleaner into the fan, immerse motor parts, pull wires, or use compressed air that may push dust farther inside.
05 / Diagnose what remains
Cleaning helps the intake. Persistent symptoms need a wider look.
Listen after reassembly and check whether the room clears more effectively. A clean grille does not confirm that the entire exhaust path is open or that the fan is correctly sized.
Visible dust or weaker airflow
Inspect every few months as a starting point. Use, pets, and dust levels determine how often cleaning is needed.
New rattle after cleaning
With power off, check that the grille clips or screws are secure. A loose cover can vibrate during operation.
Grinding, damage, weak flow
Persistent noise, burning smells, sparks, damaged wiring, or weak airflow after cleaning call for qualified help.
06 / Quick answers
Common questions, safely answered.
How often should I clean a bathroom fan?
Inspect it every few months and clean when dust is visible or airflow seems reduced. Follow the manufacturer’s advice; homes with frequent showers, pets, or more dust may need checks more often.
Can I clean it without removing the fan?
Often, yes. You can usually remove the grille and vacuum accessible dust without taking out the housing. Do not reach into inaccessible electrical or moving parts.
Do I need to turn off the breaker?
Yes. Turn off the breaker before removing the cover or working near the fan, then confirm the fan cannot start.
Can I wash the grille?
Only if the manual permits washing and the grille is removable. Let it dry completely before reinstalling it.
Why a dusty fan can leave your bathroom damp
A bathroom exhaust fan moves humid air through the grille, into a duct, and outdoors. Dust on the grille or accessible fan parts can narrow the opening and make it harder for air to pass. The effect may be modest at first, but reduced airflow gives moisture more time to settle on mirrors, walls, and towels. In a frequently used bathroom, that can mean longer drying times and more persistent dampness.
Dust often collects as a gray film around the grille’s slots. In a home with pets, loose hair may cling to it, while lint from nearby laundry can add another layer. The buildup matters because the fan depends on an open path for air: restricting the intake can reduce how much humid air it removes, and the motor may sound louder as it works against that restriction. Noise alone, however, does not prove dust is the cause.
Cleaning the visible, accessible parts can help the fan work more effectively, but it only addresses the part of the airflow path you can safely reach. A blocked duct, a disconnected exhaust duct, a fan that is too small for the room, or a blocked exterior vent can all limit performance. For example, if the grille looks clean but the bathroom stays steamy and the fan barely seems to move air, cleaning the same surface again is unlikely to solve the problem; the obstruction or sizing issue may be farther along the route.
Bathroom exhaust fans help remove humidity, odors, and airborne particles, but they work as part of a larger airflow path. That distinction sets a useful boundary: cleaning handles dust you can safely reach, while problems that persist afterward may need inspection of the duct, exterior vent, or fan itself.
Products Worth Considering

Roborock F25 GT Set Cordless Wet Dry Vacuum Cleaner and Mop with 2 Brushes

Dyson V8 Cyclone Cordless Vacuum
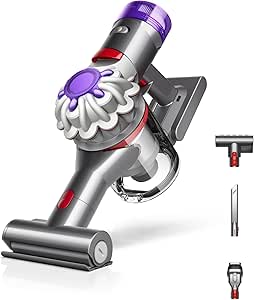
Dyson Car+Boat Cordless Handheld Vacuum
As an affiliate, we earn on qualifying purchases.
Turn off the breaker before opening the fan
Before you remove a bathroom fan grille or reach near its housing, switch off the fan at the wall and turn off the circuit breaker that supplies it. The wall switch controls normal use, but a different control, wiring fault, or accidental switch operation could still start the fan. Turning off the breaker reduces that risk while your hands are close to moving parts and electrical connections.
Start by identifying the correct breaker, then switch it off and check that the fan will not run. Follow the fan’s manual if it gives additional instructions for isolating power. If you can’t confidently identify the correct circuit, stop and ask a qualified electrician rather than guessing while your hands are near electrical components. An uncertain circuit means you cannot be sure the equipment is de-energized.
Next, set up safely. Use a stable ladder on a dry, level floor; don’t balance on a bathtub edge or a rolling chair. Wear eye protection and a dust mask, since a curtain of old dust can fall toward your face as you loosen the cover. For instance, if you notice the floor is slick from a recent shower, dry it before placing the ladder. A secure setup also lets you support the grille as it comes free instead of grabbing for it if it drops.
Keep power off until the grille is back in place and every washed part is fully dry. Moisture near electrical parts can create a shock or damage hazard, while restoring power before the cover is secure can expose moving components.
Stop immediately if you see frayed or exposed wiring, scorch marks, sparks, or a burnt smell. These signs can indicate damage that cleaning cannot address. Leave the fan off and contact an electrician or qualified repair professional; routine cleaning is not the right time to repair wiring.
Follow these steps to clean the grille and accessible housing
- Switch off the fan and breaker. Confirm the fan cannot start, and check the manufacturer’s instructions before removing the cover. This protects you while the grille is off and helps you avoid relying on a wall switch alone.
- Release the grille gently. Look for screws or spring clips. Support the cover as you release it, and don’t pull hard if it resists. Forcing it can break clips or damage the finish; a stuck cover may have a different release method described in the manual.
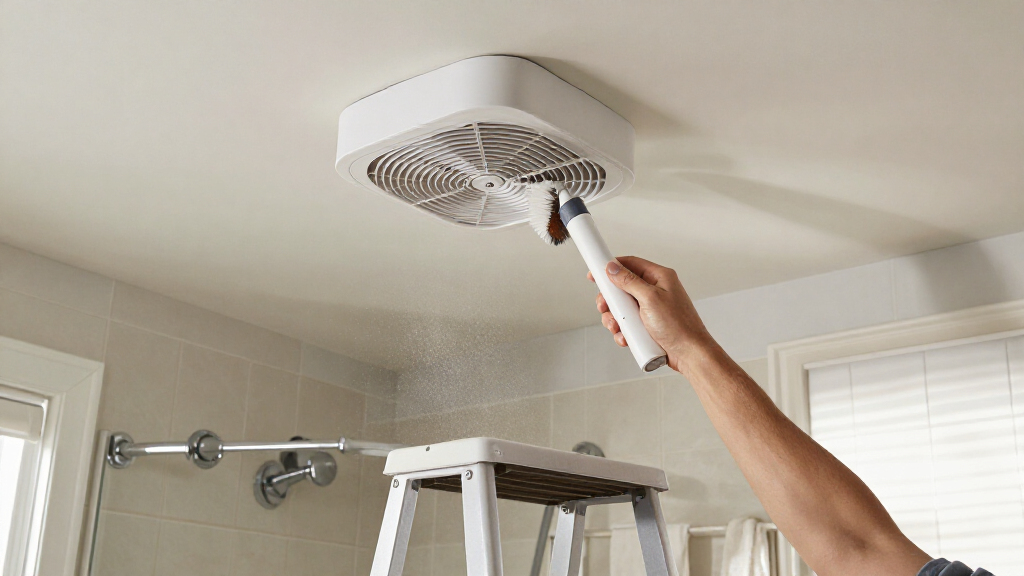
- Remove loose dust. Use a vacuum with a brush attachment or a soft brush on the grille and accessible housing. Keep the brush away from wiring and moving parts. Removing dust at the opening helps preserve airflow without pushing debris farther into the fan.
- Wash the grille if permitted. If the manual allows washing and the grille is removable, use warm water and mild soap. Rinse it and leave it to dry completely. A damp grille can carry moisture back toward the housing when reinstalled.
- Wipe carefully and reassemble. Clean accessible surfaces with a dry or lightly damp cloth only where the manual permits. Refit the dry grille and secure its clips or screws before restoring power. Correct reassembly keeps the cover stable and helps prevent rattling.
Work slowly around the fan’s opening. A brush attachment gives you more control than blowing dust with compressed air, which may push debris deeper into the housing or duct. Take a common hallway bathroom: the grille can look clean from below, yet a thin ring of lint may sit just inside the opening. Vacuum only the dust you can easily reach without pulling on wires or putting your fingers near the motor. The limit is deliberate: dust beyond easy reach may be attached to parts that should not be disturbed during routine cleaning.
If the grille has spring clips, support its weight while you release them; some covers hang from the clips and can drop if you let go. Designs vary, so follow the manual rather than forcing a cover that seems stuck. If a part won’t release with the described method, stop and check the instructions. A few extra minutes to identify the release mechanism can prevent a broken clip or damaged housing.
Never spray cleaner into the fan, immerse motor parts, or assume that a lightly damp cloth is safe on every component. Keep liquid on the washable grille only, and reinstall it after it is fully dry. When you restore power, listen for normal operation; a new rattle or grinding sound may mean a cover is loose or a mechanical problem has become noticeable. Switch it off and investigate with a qualified professional if the sound persists.
Choose a cleaning schedule that fits your bathroom
Inspect your bathroom fan every few months, then clean it when you see dust or notice weaker airflow; the right interval depends on use, dust levels, and the fan manufacturer’s guidance. A few times a year is a practical starting point, not a fixed rule for every home. Inspection helps you respond to actual buildup instead of cleaning on a schedule that may be too frequent for one bathroom and too sparse for another.
A guest bathroom used once a week may collect dust slowly. A small bathroom used by a family every morning and evening may need checks more often, especially if a pet’s hair drifts through the room or the fan grille sits near a laundry area. You don’t need to wait for a thick gray layer: visible buildup is already a useful prompt to inspect it. More frequent use means more humid air passes through the fan, while nearby lint and hair can add material to the grille.
Pair a quick visual check with a real-life cue. If steam lingers longer than usual after a shower, or the grille starts to look fuzzy, note it on your household cleaning calendar. That doesn’t prove dust is the cause, but it gives you a sensible moment to inspect the accessible parts and compare the fan’s behavior before and after cleaning. If performance does not improve, the comparison is useful evidence that the cause may be outside the area you cleaned.
Newer fans may have humidity sensors, timers, or quieter motors. Those features can change how the fan operates, but they do not remove the need for cleaning; controls and service instructions vary by model. A sensor may cause the fan to run after you leave, for example, so switching off a wall control may not isolate it. If your fan runs automatically or behaves differently after cleaning, consult the manual before changing its settings or attempting service.
Know what cleaning can—and cannot—fix
Cleaning can remove accessible dust and may help the fan move air more effectively, but it cannot repair a damaged motor, clear every duct blockage, or guarantee that bathroom mold will disappear. Treat a clean grille as one part of moisture control, not a cure-all. If dampness continues, the distinction matters: repeating a surface clean may consume time while the underlying ventilation or moisture issue remains.
After reassembly, check whether the fan runs as it did before. Persistent grinding or rattling, a fan that will not start, or airflow that still seems weak can point to a worn motor, installation issue, or obstruction. A clean-looking grille with a steamy bathroom is like a clear doorway leading to a blocked hallway: the problem may be farther along the route. If the fan is noisier after cleaning, first consider whether the cover is seated correctly; if the noise persists, avoid dismantling the motor to diagnose it.
Use the fan during and after showers as directed by its manufacturer, and keep the room’s air path clear. The fan has to draw replacement air into the room as it exhausts humid air. If the door seals tightly or the room has little way for replacement air to enter, the fan may have trouble moving air even when its grille is clean. A blocked exterior vent or difficult-to-reach duct may need qualified repair rather than more cleaning from below.
Cleaning alone does not prevent mold. It may support ventilation, but moisture can still come from leaks, inadequate airflow, or other sources. If dampness persists, check for leaks and address the underlying moisture problem. For mold that keeps returning or a repair involving electrical components or difficult ductwork, contact an appropriate professional; don’t dismantle the fan or disturb a larger problem just to keep cleaning.
Use this comparison to pick a safe cleaning method
The safest cleaning method depends on which part you are handling: use dry dust removal around the housing, and wash only a removable grille when the manufacturer permits it. The tradeoff is simple: water can loosen grime on a washable grille, but near the motor or wiring it adds a moisture risk. Keeping that boundary clear helps you avoid sending liquid or debris into the motor and wiring.
| Fan part | Safer approach | What to avoid |
|---|---|---|
| Removable grille | Vacuum or brush off dust; wash with warm, soapy water if the manual allows | Reinstalling it while damp or forcing clips |
| Accessible housing | Use a vacuum brush or soft brush on reachable dust | Reaching into hidden areas or pulling wires |
| Motor and wiring | Leave them alone unless the manual gives a specific approved method | Spraying, soaking, or wiping with a wet cloth |
| Duct or exterior vent | Ask a qualified repair professional when access or blockage is suspected | Assuming a clean grille means the full duct is clear |
For example, if you remove a grille and find a visible dust ring on the reachable housing, a brush attachment can lift it without coating the nearby motor in cleaner. If dust has disappeared but airflow remains poor, repeating the same cleaning may not help; a blockage or mechanical issue could need attention. That result helps you decide when to stop cleaning and seek a diagnosis.
Compressed air can send dust deeper into the housing or duct, so a vacuum and soft brush usually give you better control. If your manual specifically permits compressed air, protect your eyes and avoid directing it at wiring or the motor. When the instructions are unclear, use the gentler method or get advice from the manufacturer; the goal is to remove reachable dust without creating a new problem inside the housing.
Frequently Asked Questions
How often should I clean a bathroom fan?
Inspect the fan every few months and clean it when you see dust or notice weaker airflow. Homes with frequent showers, pets, or more dust may need more frequent checks; follow the manufacturer’s advice for your model.
Do I need to turn off the breaker to clean a bathroom fan?
Yes. Switch off the wall control and the circuit breaker before removing the grille or reaching near the fan. Confirm that it cannot start, and ask an electrician if you can’t identify the correct circuit.
Can I wash the bathroom fan grille?
If it is removable and the manufacturer allows washing, use warm water and mild soap, then let it dry completely. Do not wash the motor or electrical parts, and don’t reinstall a damp grille.
Can I clean a bathroom fan without removing it?
Often, you can clean the removable grille and vacuum dust from accessible areas without taking out the fan housing. Follow the manual and avoid reaching into hidden spaces, moving parts, or wiring.
What should I do if the fan is still noisy or airflow is weak?
Check that you reinstalled the grille correctly and removed the accessible dust. Persistent grinding or rattling, or weak airflow after cleaning, may point to a motor, duct, blockage, or installation issue. Leave damaged or sparking equipment off and contact a qualified professional.
Does cleaning a bathroom fan prevent mold?
Cleaning may help preserve airflow, but it does not guarantee mold prevention. Use the fan as directed, keep the room’s air path clear, and address leaks or persistent dampness; seek professional help if the moisture problem continues.
Conclusion
Before you clean a bathroom fan, switch off its breaker and check the manual. Remove only the parts designed to come off, keep the motor and wiring dry, and wait until the grille is fully dry before restoring power.
A clean grille can help the fan do its job, but it can’t clear every duct or repair a worn motor. When the mirror still wears a veil of steam or the fan grinds overhead, let a qualified professional trace the problem beyond the dust.