TL;DR
Cleaning between floor tiles involves removing dirt and stains from grout lines. Regular brushing, natural solutions like baking soda, and sealing grout help keep floors looking like new. Deep cleaning every few months prevents buildup and extends grout life.
If your tiled floors look dull or stained, dirt and grime in the tiny gaps between tiles might be the culprit. These grout lines act like dirt magnets, trapping dust, grease, and stains over time. But fear not—cleaning them isn’t a mystery reserved for professionals.
In this guide, you’ll learn practical, easy ways to keep those gaps sparkling. No harsh chemicals, no fancy tools—just simple steps anyone can follow to make their floors look fresh and well-maintained.
Regular brushing with a stiff brush keeps grout clean and prevents buildup.
A baking soda paste combined with vinegar tackles most stains safely and cheaply.
Sealing grout lines every 1-2 years significantly reduces staining and mold growth.
Deep cleaning every 3-6 months keeps tiles looking bright and new.
Steam cleaning offers a chemical-free option for deep grout dirt removal.
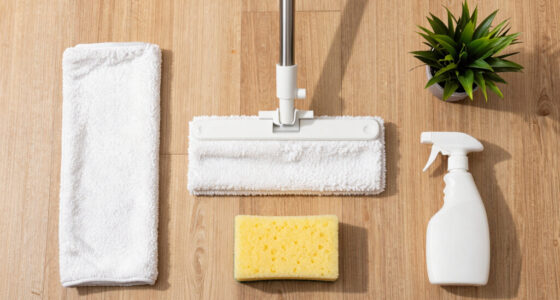
Clean grout lines without harsh chemicals or costly tools.
The tiny gaps between tiles trap dust, grease, soap scum, moisture, and stains. A stiff brush, baking soda paste, careful rinsing, and periodic sealing can restore brightness while protecting the floor underneath.
Seal grout well and the next clean can be up to 50% easier.
Grout is the floor’s dirt magnet.
Grout is porous, so grime can move below the surface. That dull gray line may be more than cosmetic: neglected grout can hold moisture, mold, and bacteria, especially in kitchens, bathrooms, and humid rooms.
Dirt settles deep
Dust, grease, and soap residue collect in the gaps and become harder to remove once they dry into the grout pores.
Mold gets a foothold
Wet grout lines in low-ventilation rooms can develop dark streaks, mildew odor, and recurring stains.
Sealant buys time
A penetrating grout sealer creates a barrier that reduces staining, limits moisture absorption, and makes routine cleaning faster.

Lumkew Grout Cleaner Brush V Shape, Stiff Grout Cleaning Brushes for Tile Floor, Handheld Grout Scrub Brush Set for Shower, Bathroom, Kitchen, Household Use,2 pcs
V Shape Design: V grout cleaner brush fits precisely into each groove, and reaches deeply into narrow joints….
As an affiliate, we earn on qualifying purchases.
As an affiliate, we earn on qualifying purchases.
A gentle clean that protects tile.
Use firm brushing and mild chemistry first. Test any solution on a small hidden area before using vinegar, bleach, or commercial cleaners, especially near natural stone.
Clear
Move rugs, chairs, and loose items so every grout line is visible.
Mix
Make a paste with 1/2 cup baking soda and enough water to spread.
Apply
Work the paste evenly along the grout without flooding the joints.
Scrub
Use a stiff toothbrush or grout brush with small circular motions.
Wait
Let the cleaner sit for 5-10 minutes on stains or dark buildup.
Rinse
Remove residue with a damp microfiber cloth or mop.
Dry
Finish with a towel or dry mop to slow future mold growth.
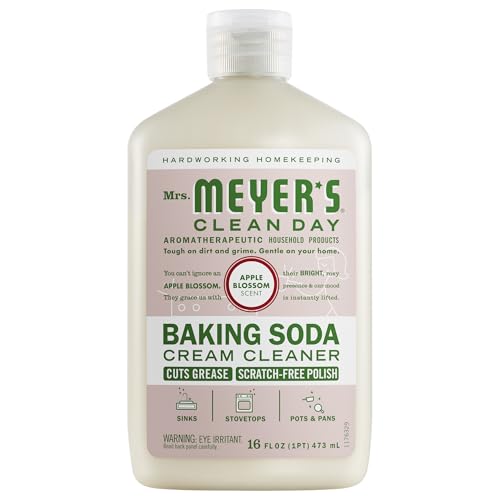
MRS. MEYER'S CLEAN DAY Baking Soda Cream Cleaner, Cuts Grease, Scratch-Free Polish, Apple Blossom, 16 Fl Oz, Pack of 1
Mrs. Meyer’s Baking Soda Cream Cleaner removes soap scum and grease build-up to make your kitchen sparkle
As an affiliate, we earn on qualifying purchases.
As an affiliate, we earn on qualifying purchases.
What does the heavy lifting?
Most grout cleaning success comes from four forces: loosen grime, agitate it, rinse fully, then block the next stain with a sealer.
Impact by maintenance habit
Start mild. Escalate only when stains stay put.
For everyday grime, baking soda paste and a grout brush are enough. For mineral deposits or soap scum, vinegar can help but should be used cautiously. For very old discoloration, grout colorant or regrouting may outperform repeated scrubbing.

Grout Pen White Tile Grout Paint: Waterproof Grout Paint Pen, Whitener and Grout Sealer Marker for Cleaner Looking Grout Lines – White, Narrow 5mm Tip (7mL) – 3 Pack
LOOK BRAND NEW: Skip scrubbing tiles and use GROUT PEN to paint and recolor your grout for a…
As an affiliate, we earn on qualifying purchases.
As an affiliate, we earn on qualifying purchases.
Pick the right method for the stain.
Different grout problems need different tools. The safest sequence is natural cleaner, brush agitation, careful rinse, and only then a stronger product if the surface can handle it.
| Method | Best for | Natural tile safety | Deep stains | Notes |
|---|---|---|---|---|
| Baking soda paste | Daily dirt, light stains, deodorizing | ✓ Generally gentle | ~ Repeat may be needed | Apply, wait 5-10 minutes, scrub, rinse well. |
| Vinegar solution | Soap scum and mineral deposits | ✗ Avoid on natural stone | ~ Useful on buildup | Use diluted, test first, and never over-soak grout. |
| Steam cleaning | Chemical-free deep cleaning | ~ Check heat tolerance | ✓ Strong grime removal | Good for sealed ceramic or porcelain tile floors. |
| Bleach solution | Mold spotting and severe discoloration | ✗ Higher damage risk | ✓ Can be effective | Dilute, ventilate, wear gloves, and rinse fully. |
| Grout colorant | Old grout that stays stained | ✓ When applied correctly | ✓ Restores appearance | Best after cleaning and drying the grout lines. |
Cleaning intensity scale
gentle to aggressive
Steam Mop for Floor Cleaning, Multi-Purpose Steam Cleaner with Handheld Steamer & Accessories, Deep Cleaning Floor Steamer for Hardwood and Tile, Pet-Friendly Steam Mop for Home
Powerful Steam Mop for Deep Floor Cleaning: This steam mop cleaner delivers 260°F high-temperature steam in just 15…
As an affiliate, we earn on qualifying purchases.
As an affiliate, we earn on qualifying purchases.
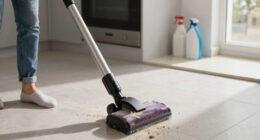
From dull floor to protected grout.
Clean grout is a maintenance chain: remove loose grit, lift stains, rinse residue, dry the joints, and seal the surface before grime settles back in.
Sweep weekly
Loose grit cannot grind into grout if it is removed early.
Brush lines
Stiff bristles reach the narrow gaps a mop misses.
Lift stains
Baking soda paste handles most ordinary discoloration.
Dry thoroughly
Less moisture means fewer mildew-friendly conditions.
Seal again
Reapply every 1-2 years to reduce future staining.
Common grout-cleaning questions.
The biggest mistakes are over-wetting grout, skipping the rinse, using harsh acids on delicate tile, and delaying sealant until stains are already permanent.
How do I remove stubborn stains?
Apply baking soda paste directly to the stain, wait 5-10 minutes, scrub with a stiff brush, rinse, and repeat if needed.
Can I use bleach?
Yes, but dilute it, ventilate the room, wear gloves, test a small area, and avoid leaving it on long enough to discolor grout.
How do I prevent mold?
Keep grout dry, improve airflow, clean regularly, and seal the lines so moisture cannot penetrate as easily.
Are DIY cleaners enough?
For light stains, yes. For heavy discoloration, grout colorant, steam cleaning, or regrouting may be more effective.
Why Cleaning Between Tiles Matters More Than You Think
Cleaning between tiles isn’t just about looks. Grout lines are porous and absorb dirt, stains, and even mold if neglected. This porosity means that over time, grime can penetrate deeper into the grout, making it harder to clean and increasing the risk of mold growth, which can pose health hazards. Discoloration isn’t just an aesthetic issue—it can indicate underlying mold or bacteria that might affect indoor air quality.
For example, a homeowner in a humid climate noticed black streaks in their kitchen tiles. A quick scrub with baking soda and a sealant restored the grout’s original color and created a protective barrier against moisture and stains. This highlights why routine cleaning and sealing are critical—they don’t just keep your floors looking good, but also prevent long-term damage and health risks.
Maintaining clean grout preserves the structural integrity of your flooring, prevents costly repairs, and keeps your home healthier. Think of it as a small investment of time that offers significant returns in durability and safety.
How to Prepare Your Tools and Supplies for a Quick Deep Clean
- Gather a stiff-bristled toothbrush or a dedicated grout brush. The stiff bristles are essential because they can dislodge embedded dirt and stains more effectively than softer brushes, which often just push dirt around or miss deep-set grime.
- Choose a mild cleaning solution—baking soda, vinegar, or a commercial grout cleaner. Understanding the properties of these solutions helps you target different types of stains. For instance, baking soda is mildly abrasive and deodorizes, making it great for general cleaning. Vinegar is acidic and dissolves mineral deposits and soap scum but can etch natural stone if used excessively.
- Get a microfiber cloth or mop for rinsing and drying. Microfiber cloths are highly effective because they trap dirt and moisture without scratching surfaces, ensuring a thorough clean without damage.
- Optional: a small plastic spatula or scraper for stubborn buildup. This tool helps lift hardened grime or old sealant without scratching your tiles or grout, preventing damage that could lead to more costly repairs later.
Using the right tools isn’t just about convenience—it directly impacts the effectiveness of your cleaning and the longevity of your tile surfaces. Proper preparation ensures you don’t have to redo the job or risk damaging your floors, saving time and money in the long run.
Step-by-Step: How to Clean Between Floor Tiles Without Damage
- Clear the area. Removing furniture or rugs ensures unobstructed access to all grout lines, preventing missed spots and uneven cleaning that could lead to discoloration or buildup.
- Mix a cleaning solution. For gentle cleaning, combine 1/2 cup baking soda with enough water to form a paste. This paste acts as a mild abrasive, breaking down dirt while being safe for most tiles. For tougher stains, dilute vinegar or use a commercial cleaner, but always test a small area first to avoid damaging delicate surfaces.
- Apply the cleaner. Use a small brush or cloth to spread the paste or solution onto the grout lines. Applying evenly ensures consistent cleaning and prevents over-saturating the grout, which could weaken it over time.
- Scrub gently. Use the toothbrush or grout brush to work into the grout, applying firm, circular motions. This action helps lift dirt embedded deep within the porosity of the grout and prevents scratching or etching the surface.
- Let sit. Allow the cleaner to sit for 5-10 minutes, especially on deep stains or mold. This dwell time enables chemical reactions or physical loosening of grime, making removal easier and more effective.
- Rinse thoroughly. Wipe down with a damp microfiber cloth or mop, removing all residue. Proper rinsing prevents leftover cleaner from continuing to react or causing discoloration.
- Dry well. Use a clean towel or dry mop to remove excess moisture. Keeping grout dry after cleaning inhibits mold growth and prolongs the clean appearance.
Patience and attention to detail matter. For example, stubborn stains may require multiple applications or a different cleaner. Avoid harsh acids or abrasives that can erode or damage your grout or tile surface, which could lead to costly repairs or replacements later.
This routine not only restores brightness but also helps maintain the structural integrity of your grout, preventing cracking or crumbling caused by neglect or improper cleaning techniques.
Frequently Asked Questions
How do I remove stubborn stains from grout?
Apply a paste of baking soda and water directly to the stain. Let it sit for 5-10 minutes, then scrub with a stiff brush. Rinse thoroughly with water. Repeat if necessary for tough stains.
Can I use bleach to clean grout?
Yes, bleach can be effective but use it cautiously. Dilute it properly, test on a small area, and avoid leaving it on too long to prevent discoloration or damage to tiles and grout.
What’s the best way to prevent mold between tiles?
Keep the area dry, improve ventilation, and clean regularly with mold-inhibiting solutions. Sealing grout also helps block moisture from penetrating and causing mold growth.
How often should I deep clean between tiles?
Perform regular sweeping and mopping weekly, with deep cleaning every 3-6 months depending on traffic and humidity levels.
Are DIY solutions enough for stained grout?
For light stains, natural solutions like baking soda or vinegar work well. For heavy discoloration, regrouting or using a grout colorant is often more effective.
Conclusion
Keeping the spaces between your tiles clean isn’t just about looks—it’s about protecting your floors and your health. With simple tools and natural solutions, you can make grout look like new in minutes. Regular upkeep saves time and effort in the long run.
Imagine a kitchen where every tile gleams, and mold is a distant memory. Your floors can look that good—if you stay on top of the cleaning with a few easy habits. Why wait for stains to settle when you can keep your home fresh today?