TL;DR
Use a well-wrung microfiber mop, avoid excess water, and dry the floor thoroughly. These simple steps prevent streaks and leave your tiles gleaming. Regular cleaning and the right solutions make all the difference.
Ever notice how some floors shine perfectly, while others leave behind annoying streaks? It’s not just about the cleaning solution — it’s how you mop. If you want your tiles to look like they’ve been polished, it’s all about technique, tools, and a little know-how.
In this guide, you’ll learn exactly how to mop tile floors so they sparkle without streaks. From choosing the right mop to drying techniques, I’ll walk you through proven steps that turn your cleaning routine into a streak-free success.
Always wring your mop thoroughly — excess water causes streaks.
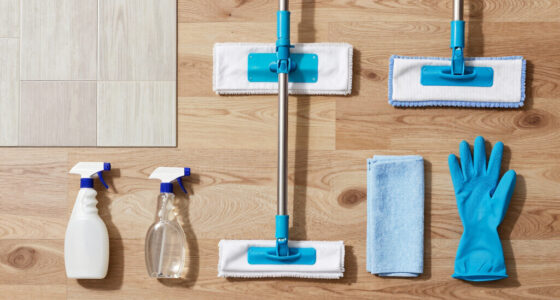
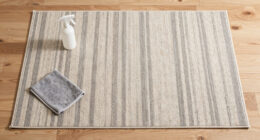
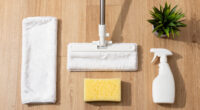
Use microfiber tools for better absorption and less residue.
Work in small sections, rinsing and wringing your mop frequently.
Dry floors immediately with a microfiber cloth or squeegee.
Regularly clean your tools to prevent transferring dirt back onto your tile.
The Right Way to Mop Tile Floors Without Streaks
TL;DR: Use a clean, well-wrung microfiber mop, avoid excess water, clean in small sections, and dry the floor immediately. Streak-free tile is less about scrubbing harder and more about controlling water, residue, and timing.
Excess water dries unevenly and leaves visible streaks, especially on glossy ceramic and porcelain tile.
Microfiber traps dirt, absorbs more moisture, and leaves behind less residue than old string mops.
“Damp, not wet. Clean, not soapy. Dry, not air-dried.”
Start With the Floor, Not the Mop
Loose grit, dusty corners, and old residue turn clean water into a streak-making slurry. A quick sweep or vacuum sets up the finish before the mop ever touches the tile.
Remove Dry Debris
Vacuum or sweep first to lift grit that can scratch tile, muddy the mop water, and create dull-looking trails across the surface.
Choose Gentle Cleaner
Use mild detergent or a pH-neutral cleaner. Diluted vinegar can work on ceramic or porcelain, but avoid it on natural stone.
Use Warm Water
Warm water dissolves soil better than cold water. Skip very hot water on sensitive tile, grout, or sealed stone surfaces.

Microfiber Mops for Hardwood Floor Cleaning – BPAWA Flat Floor Mop with 4 Washable Pads for Laminate Wood Tile Vinyl Home Kitchen Bathroom – 59" Adjustable Handle
Microfiber Mops for Floor Cleaning: Flat floor mop with adjustable long handle, flexible lightweight but sturdy, great for…
As an affiliate, we earn on qualifying purchases.
As an affiliate, we earn on qualifying purchases.
The Five-Step Streak-Free Flow
Think of mopping as a controlled sequence: loosen dirt, lift it, limit moisture, then remove the last film before it can dry into marks.
Sweep
Clear dust, crumbs, pet hair, and grit from tile and grout lines.
Dilute
Use a low-residue cleaner matched to ceramic, porcelain, or stone.
Wring
Twist or press the mop until it is damp rather than dripping.
Section
Mop in overlapping lines, rinsing and wringing every small area.
Dry
Buff with microfiber or pull moisture away with a squeegee.

ATTITUDE Floor Cleaner, EWG Verified, Streak-Free, Vegan & Plant-Based for Tile, Wood & Laminate Floors, Citrus Zest Scent, 35.2 Fl Oz
EWG VERIFIED: This tile floor cleaner is formulated with clean ingredients and certified by the Environmental Working Group…
As an affiliate, we earn on qualifying purchases.
As an affiliate, we earn on qualifying purchases.
What Actually Causes Streaks?
Most streaks come from too much water, dirty tools, residue-heavy cleaners, and air drying. Control those four variables and tile starts looking freshly polished.

CLEANHOME Rubber Floor Squeegee for Concrete Floor, Tile Floor, Metal Aluminium Heavy Duty Garage Shower Floor Squeegee Broom for Removing Water, Commercial Scrubber Mop with Extendable Long Handle
Heavy-Duty Floor Squeegee: Elevate your cleaning routine with our high-performance floor squeegee. Crafted with a robust rubber blade…
As an affiliate, we earn on qualifying purchases.
As an affiliate, we earn on qualifying purchases.
Traditional Mopping vs. Streak-Free Technique
The cleaner matters, but the method matters more. Modern streak-free mopping reduces water, improves dirt pickup, and finishes with deliberate drying.
| Aspect | Traditional Mopping | Streak-Free Mopping | Result Signal |
|---|---|---|---|
| Tools | String mop and bucket | Microfiber mop, self-wringing mop, or steam mop | ✓ Better absorption |
| Water Use | Often too much water | Well-wrung and damp only | ✓ Fewer water spots |
| Technique | Random strokes and inconsistent pressure | Small sections with overlapping strokes | ✓ Even finish |
| Drying | Air drying | Immediate microfiber buff or squeegee pass | ✓ Cleaner shine |
| Risk | ✗ Streaks and dull spots | ~ More deliberate effort | ✓ Professional look |
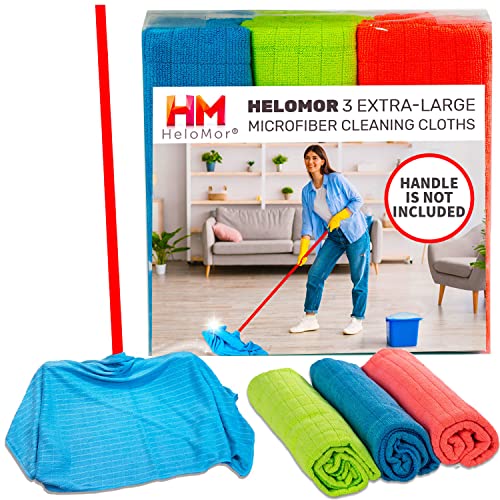
HELOMOR 3 Extra Large Microfiber Cleaning Cloths, 30"x18" Floor Towels for Squeegee Mop, Reusable Multi-Purpose Cleaning Rags for House, Kitchen, Car & Windows, Highly Absorbent, Lint-Free
Extra Large & Highly Absorbent – These extra large microfiber cleaning cloth towels (30"x18") cover more surface area,…
As an affiliate, we earn on qualifying purchases.
As an affiliate, we earn on qualifying purchases.
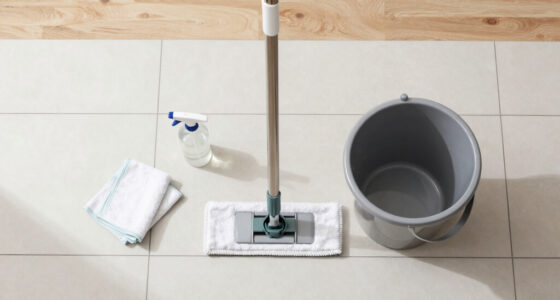
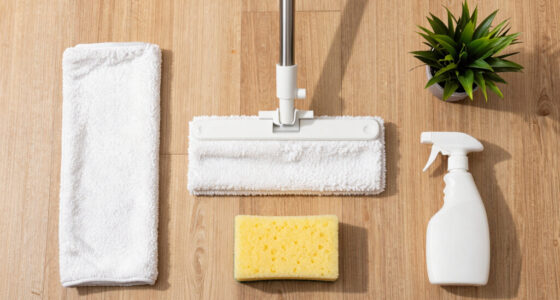
Tool Choices That Change the Finish
A good tool removes dirt without flooding the floor. The best setup is absorbent, washable, and easy to wring consistently.
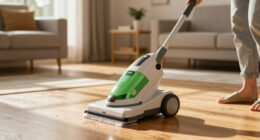
Microfiber Flat Mop
Best everyday choice for ceramic and porcelain tile. It spreads cleaner evenly, traps fine dust, and holds enough moisture without leaving puddles.
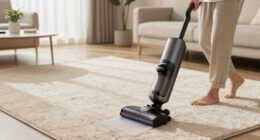
Steam or Self-Wringing Mop
Steam mops can sanitize without harsh chemicals, while self-wringing tools reduce the biggest streak trigger: inconsistent water control.
Traceability: From Mess to Gleam
Each choice affects the next one. A cleaner mop means cleaner water; cleaner water means less residue; less residue means fewer streaks after drying.
Sweep First
Remove loose grit.
Dilute Cleaner
Prevent film.
Wring Hard
Limit water.
Overlap Lines
Even pressure.
Buff Dry
Stop spots.
Clear Shine
No streaks.
Quick Mistake Check
If your tile still looks dull after mopping, troubleshoot the routine before blaming the floor. Most fixes are simple and immediate.
Too Much Water
Puddles dry at different speeds and leave mineral marks or streaks. Wring until the mop feels like a squeezed sponge.
Dirty Tools
A grimy mop transfers old soil back to clean tile. Wash or replace mop heads regularly to prevent dull residue.
Skipping the Dry Pass
Air drying is convenient, but microfiber buffing or squeegeeing is the secret step behind a clear, streak-free finish.
How to Prepare Your Floor for a Streak-Free Mop
Start with a clean slate. Vacuum or sweep your tiles thoroughly to remove loose dirt and debris. This prevents scratching and makes your mopping more effective. Think of it like preparing a canvas before painting — a smooth surface ensures a flawless finish.
Next, pick a gentle, pH-neutral cleaner suited for your tile type. For ceramic or porcelain, a mild detergent or a mixture of water and vinegar works well. For natural stone, stick to pH-neutral solutions to avoid damage.
Example: Before mopping my kitchen, I sweep first, then use a solution of warm water with a few drops of dish soap. It cuts through grease and dust without leaving residues that cause streaks.
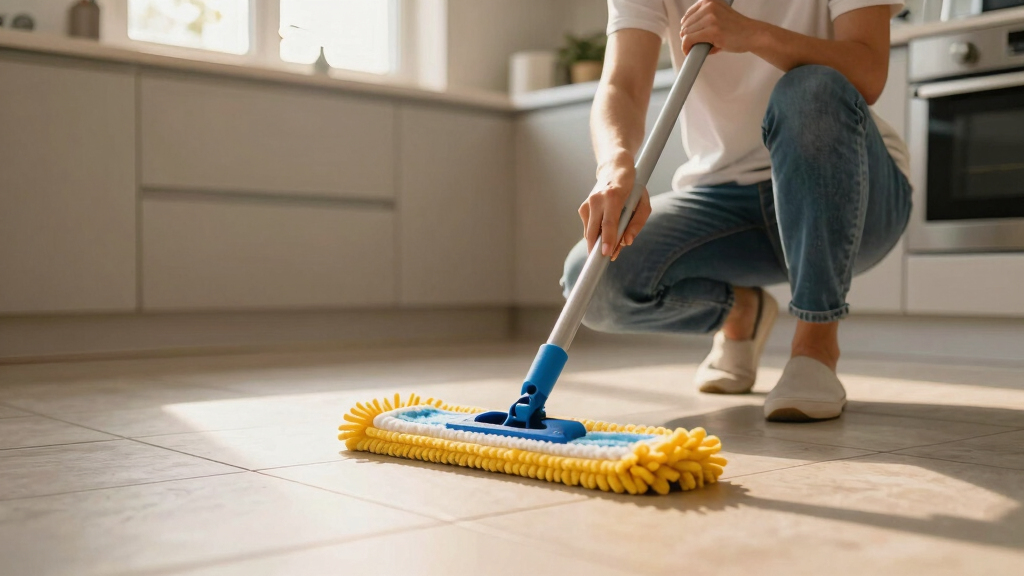
Choose the Perfect Mop and Tools for a Streak-Free Finish
The right mop makes all the difference. Microfiber mops excel at trapping dirt and absorbing water, minimizing streaks. A well-maintained, clean mop head prevents transferring dirt back onto your floors.
For example, a microfiber flat mop with a washable head provides even coverage and is gentle on tiles. A microfiber cloth or sponge mop also works—just make sure it’s clean before each use.
Pro tip: Replace or wash your mop head regularly. Dirty mops spread grime, leading to streaky surfaces.
Choosing the right tools isn’t just about convenience; it directly impacts the quality of your cleaning. A poor-quality mop that doesn’t absorb well or leaves fibers behind can cause streaks or residue, undermining your efforts. Investing in high-quality microfiber tools ensures better dirt pickup and less water retention, which are crucial for a streak-free finish. Additionally, maintaining your tools by washing or replacing mop heads prevents the buildup of dirt and oils that can transfer back onto your tiles, causing dullness or streaks over time. The tradeoff is often upfront cost versus long-term effectiveness — but in this case, quality tools pay off in the clarity and shine of your floors.
Mastering the Mopping Technique for a Flawless Finish
Start with a well-wrung mop. Too much water causes streaks, while a damp mop picks up dirt without leaving excess moisture. Wring out your mop until only a slight dampness remains — like a wrung-out sponge.
Work in small sections, mopping in straight lines or overlapping strokes. Rinse and wring your mop frequently to avoid spreading dirt around. For large areas, use a figure-eight motion for even coverage.
Example: I mop my bathroom tiles in 3-foot sections, rinsing the mop each time. The result? A gleaming, streak-free shine every time.
Deep understanding of mopping technique reveals that the way you move the mop affects the uniformity of your clean. Straight, overlapping strokes ensure that the entire area is covered evenly, preventing streaks caused by inconsistent pressure or missed spots. Rinsing the mop frequently prevents dirt from being redistributed, which can lead to dull spots or streaks. The sectioning method allows you to focus on small areas, ensuring thorough cleaning before moving on. The tradeoff here is effort versus results: meticulous technique takes more time but guarantees a much higher quality finish. Proper technique also minimizes water use, reducing the risk of excess moisture that causes streaks or water spots, especially on glossy tiles.
The Secret to No-Streak Drying and Final Touches
Dry the floor immediately after mopping to prevent water spots and streaks. Use a clean microfiber cloth or a squeegee to wipe away any remaining moisture. This step is key to a crystal-clear finish.
For an extra shine, buff the tiles with a dry microfiber cloth. It removes residual water and smooths out any streaks. Think of it as giving your floor a quick polish.
Example: After mopping my kitchen, I run a squeegee over the tiles and then buff with a dry cloth. The result? Floors that look freshly sealed.
This drying step is crucial because residual water can evaporate unevenly, leaving behind streaks or water spots that diminish the floor’s appearance. Using a microfiber cloth or squeegee ensures rapid removal of moisture, minimizing the chance for streaks to form. Buffing with a dry cloth further disperses any remaining water droplets and helps smooth out streaks from incomplete drying, resulting in a mirror-like shine. The tradeoff here is extra effort for a flawless look, but the payoff is a beautifully streak-free floor that looks professionally cleaned, enhancing both appearance and safety.
Recent Innovations That Make Mopping Easier and Cleaner
New microfiber mops with self-wringing features save time and reduce mess. Steam mops are gaining popularity for their deep cleaning power without chemicals. They sanitize as they clean, leaving floors streak-free.
Eco-friendly solutions like diluted vinegar or baking soda are safer for your family and better for your floors. Plus, they help prevent residue build-up that causes streaks.
Example: I switched to a steam mop for my tile kitchen floor, and I never go back. No streaks, no chemical smell, just shiny tiles.
Recent innovations in mopping technology and solutions not only simplify the process but also enhance the quality of the outcome. Self-wringing microfiber mops automate the crucial wringing step, ensuring consistent dampness and reducing user error. Steam mops, by using high-temperature vapor, can sanitize and clean more effectively than traditional methods, often without the need for harsh chemicals. They also tend to dry quickly, minimizing streaks caused by residual moisture. Eco-friendly cleaning solutions like vinegar or baking soda are safer for health and the environment, but their effectiveness depends on proper dilution and application. The tradeoff with newer tools is often in initial investment versus long-term convenience and superior results — modern tools tend to produce a more consistent, streak-free finish with less effort.
Quick Comparison: Traditional Mopping vs. Modern Streak-Free Techniques
| Aspect | Traditional Mopping | Streak-Free Mopping |
|---|---|---|
| Tools | String mop, bucket | Microfiber mop, self-wringing mop or steam mop |
| Water Use | Excess water often used | Well-wrung, damp only |
| Technique | Random strokes, inconsistent pressure | Sectioned, overlapping strokes, consistent pressure |
| Drying | Air drying, often streaky | Immediate drying with microfiber or squeegee |
| Results | Possible streaks, dull spots | Clear, shiny, streak-free |
Common Mistakes That Leave Your Floor Looking Dull and Streaky
Using too much water is the biggest culprit. It leaves puddles that dry unevenly, causing streaks. Also, not wringing out the mop thoroughly spreads dirt and residue.
Another mistake: skipping the drying step. Floors look streaky if water evaporates unevenly or leaves spots. Always dry immediately after mopping.
Tip: Rinse your mop often during cleaning. Dirty water just moves dirt around and makes the streaks worse.
Understanding these common mistakes helps you avoid the pitfalls that lead to streaky, dull floors. Excess water not only causes streaks but can also seep into grout lines, promoting mold or discoloration over time. Not wringing out the mop thoroughly results in transferring dirt and excess moisture, which can cause dullness and streaks. Skipping the drying process allows water spots and streaks to set as water evaporates unevenly, especially on glossy surfaces. Rinsing your mop frequently prevents dirt buildup, ensuring you’re not just spreading grime. Recognizing these errors and correcting them means your cleaning efforts will produce brighter, more uniform floors, saving you time and frustration in the long run.
Frequently Asked Questions
Can I use vinegar on all tile floors?
Vinegar works well on ceramic and porcelain tiles, dissolving dirt and grime naturally. However, avoid vinegar on natural stone like marble or granite, as it can etch the surface. Always test a small area first or check your tile manufacturer’s guidance.
What’s the best mop for streak-free tile floors?
Microfiber flat mops or microfiber sponge mops are best. They trap dirt effectively and require less water. Regularly wash the mop head for optimal results, and choose models with adjustable or self-wringing features for easy control.
How do I prevent streaks when drying the floor?
Immediately dry your floor with a clean microfiber cloth or squeegee after mopping. Avoid letting water sit or evaporate unevenly. Buff with a dry microfiber cloth for an extra glossy finish without streaks.
How often should I mop my tile floors?
High-traffic areas should be mopped weekly. Less-used spaces can be cleaned every 2-3 weeks. Regular maintenance keeps dirt from building up and reduces streaking chances.
Is steam mopping safe for all tile types?
Steam mops are generally safe for ceramic and porcelain tiles. For natural stone, check the manufacturer’s recommendations, as some stones can be damaged by heat or moisture. Always use a steam mop at the lowest setting and test first.
Conclusion
Mastering the art of streak-free mopping isn’t about fancy products — it’s about technique. Use a damp, well-wrung microfiber mop, work in small sections, and dry immediately. That’s what keeps your tiles shining like new.
Next time you mop, picture your floor as a mirror. With just a little extra care, you’ll get that perfect, streak-free shine every time. Your tiles will thank you.