TL;DR
Open a free Amazon Business account
Business pricing, bulk buying and tax-exempt orders.
Create a free accountAs an affiliate, we earn on qualifying purchases.
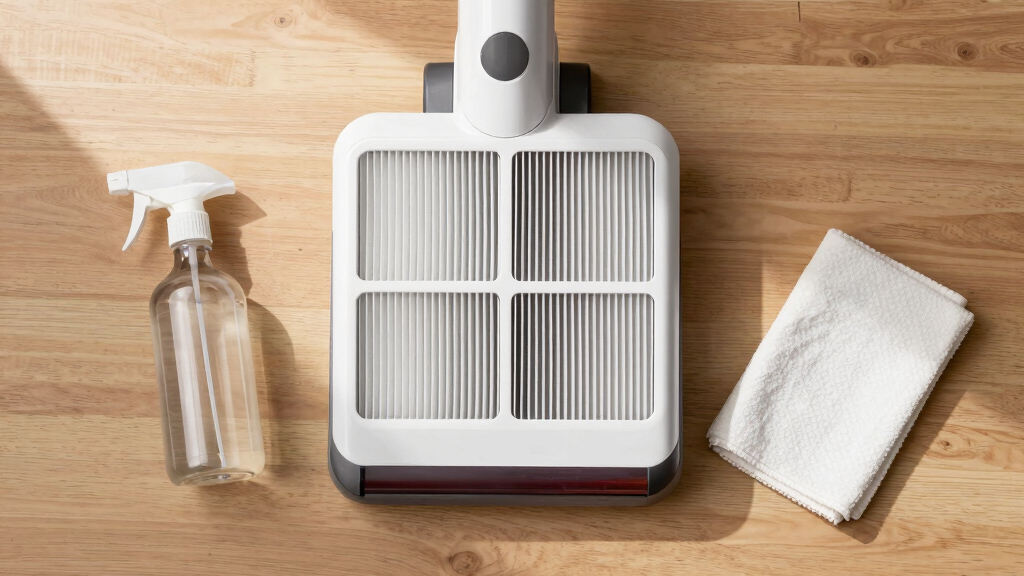
Clogged filters cause most vacuum problems like loss of suction and bad odors. Washing washable filters and replacing non-washable ones on schedule keeps your vacuum running smoothly and your home healthier. Always dry filters completely before reinstalling to avoid mold and damage.
Nothing’s more frustrating than a vacuum losing power just when you need it most. Often, the culprit isn’t the motor but a clogged or dirty filter. Cleaning your vacuum filter the right way can restore that lost suction, extend the life of your machine, and improve your home’s air quality.
In this guide, you’ll discover exactly how to identify your filter type, the proper cleaning steps, common mistakes to avoid, and how often to refresh your filters. No hype, just practical advice to keep your vacuum—and your air—cleaner.
Always identify your filter type before cleaning—washable or replace-only makes a big difference.
Never reinstall a damp filter—air dry for at least 24 hours to prevent mold and damage.
Clean washable filters every 1–3 months; replace non-washable filters every 6–12 months.
Avoid heat drying methods like hair dryers or sunlight. Use air-drying in a shaded spot.
Check your vacuum manual regularly—model-specific tips help maintain optimal performance.
How to Clean a Vacuum Filter the Right Way
Most “dying vacuum” complaints aren’t motor problems at all — they’re clogged filters. The right cleaning routine restores lost suction, extends your machine’s life, and keeps dust and allergens out of the air you breathe. No hype, just the practical method.
A clogged filter can cut suction by up to half — and recirculate fine allergens back into your home.
Filter blockage is the first suspect whenever a vacuum feels weak, smells dusty, or overheats.
Never reinstall a damp filter — trapped moisture breeds mold and can damage the motor.
Washable or Replace-Only? It Changes Everything
Washing the wrong filter tears or deforms its structure, wrecking its ability to trap dust. Check your manual or the manufacturer’s website first — Dyson, Shark, Miele, Hoover and Bissell all have model-specific rules.
| Filter Type | Washable? | Correct Method | Schedule |
|---|---|---|---|
| FoamCommon in Shark & stick vacs | ✓ Almost always | Rinse with lukewarm water; mild dish soap usually permitted. Squeeze — never wring. | Wash every 1–3 months |
| Pleated / Paper CartridgeVaries widely by model | ~ Check the manual | Some are washable, many are not. Fallback: tap out dust or brush gently — no water. | Wash or replace per manual |
| HEPAFine fiber mesh, allergy-grade | ✗ Usually not | Wash only if explicitly labeled “washable HEPA” — water destroys the fine fiber mesh. | Replace every 6–12 months |
| Carbon / OdorOdor-absorbing layer | ✗ Never | Replacement only. Water ruins the activated carbon’s odor-trapping capacity. | Replace every 6–12 months |
Six Steps, Done Right
The same core routine works across brands. The step everyone rushes — drying — is the one that matters most.
Unplug
Safety first — no surprises, no shocks.
Remove Filter
Usually behind the dustbin or an access panel.
Tap Out Debris
Knock loose dust into the trash before any water.
Rinse Lukewarm
Washable filters only. No soap unless the manual allows.
Air-Dry 24h+
Shaded spot. No hair dryer, oven, or direct sun.
Reinstall Dry
Only when 100% dry — suction restored.
The golden rule: never reinstall a damp filter. Trapped moisture becomes a breeding ground for mold and bacteria — causing musty odors, allergic reactions, and real motor damage. Patience here protects both your air quality and your appliance.
Four Mistakes That Kill Filters
One cautionary tale: a reader dried her HEPA filter on a radiator. It warped, and was useless from that moment on. Heat and haste are the enemies.
Reinstalling a wet filter
Trapped moisture grows mold, creates musty smells, impairs airflow, and forces the motor to work harder — shortening its life.
Speed-drying with heat
Hair dryers, ovens, radiators and direct sunlight warp or weaken filter fibers and frames, tearing holes in the filtration media.
Washing a non-washable filter
Water permanently deforms paper and standard HEPA media, collapsing the structure that traps fine dust and allergens.
Ignoring signs of wear
Torn edges, heavy discoloration, or a smell that persists after emptying mean the filter is done — running it recirculates debris.
How Often: Clean vs. Replace
Bar length shows the maximum interval between maintenance, on a 12-month scale. Pets, heavy dust or allergies in the home? Shorten every interval.
Skipping the schedule costs you twice: a clogged filter forces the motor to work harder — raising energy use, risking overheating and thermal cutoff, and eventually turning a $15 filter into a motor repair. Manufacturers increasingly tie warranties to proper filter maintenance, too.
One Dirty Filter Sets Off a Chain Reaction
Filter Clogs
Fine debris cakes the media, choking airflow.
Suction Drops
Cleaning power falls — up to 50% lost.
Motor Strains
Overheating risk; thermal cutoff may trip.
Air Suffers
Allergens and PM2.5 recirculate indoors.
Clean Breaks It
A 24-hour wash-and-dry resets the whole chain.
The Five Rules to Remember
Identify first. Washable vs. replace-only makes all the difference — check the manual before water touches anything.
Never reinstall damp. Air-dry at least 24 hours to prevent mold growth and motor damage.
Keep the rhythm. Wash washable filters every 1–3 months; replace non-washable ones every 6–12 months.
No heat, ever. Skip hair dryers, ovens and sunlight — air-dry in a shaded spot only.
Trust the manual. Model-specific guidance from the manufacturer keeps performance — and often the warranty — intact.
The trend: washable “lifetime” filters and app-based maintenance reminders are now selling points — maintain, don’t replace.
Identify Your Filter Type — Washable or Not and Why It Matters
First step: know what kind of filter you’re dealing with. Some filters are designed to be washed and reused, while others are meant to be replaced. For example, foam filters are almost always washable, while most paper or pleated filters are not.
Checking your vacuum’s manual or manufacturer website is key. If it says “washable,” you’re in luck—these can be cleaned multiple times. If not, you’ll need to replace them periodically. HEPA filters are tricky: most are not washable unless explicitly labeled “washable HEPA.”
Understanding why this distinction matters is crucial. Washing a washable filter can restore its effectiveness, ensuring optimal filtration and airflow. Conversely, attempting to wash a non-washable filter can damage its structure, causing tears or deformation that drastically reduce its ability to trap dust and allergens. This not only diminishes cleaning performance but can also lead to a buildup of debris that hampers airflow, increasing strain on the motor. Recognizing the filter type allows you to choose the correct maintenance method, directly impacting your vacuum’s efficiency, lifespan, and the quality of the air you breathe at home.
As an affiliate, we earn on qualifying purchases.
Step-by-Step Guide to Cleaning Your Vacuum Filter
- Unplug the vacuum. Safety first—no surprises or shocks.
- Remove the filter as per your model’s instructions. Usually, it’s accessible through the dustbin or behind a panel.
- Tap out loose dust and debris into the trash. This quick step reduces the dirt load before washing, preventing dirt from becoming embedded during cleaning.
- For washable filters: rinse under lukewarm water. Avoid soap unless the manufacturer says so, as some cleaning agents can leave residues that clog the filter or degrade its material. Gently squeeze out excess water—do not twist or wring, as this can damage delicate fibers.
- Let the filter air-dry completely—at least 24 hours—away from sunlight or heat sources. Proper drying ensures all residual moisture evaporates, preventing mold growth. Do not dry with a hair dryer or in an oven, as excessive heat can warp or weaken filter materials.
- Reinstall once fully dry. Your vacuum will thank you, and you’ll maintain optimal filtration and airflow.
Remember: never put a damp filter back into your vacuum. A damp filter can become a breeding ground for mold and bacteria, which can cause musty odors, allergic reactions, and even damage to your vacuum’s motor. Proper drying not only preserves the filter’s integrity but also safeguards your indoor air quality and the longevity of your appliance. Patience in this step is crucial—rushing drying can lead to future problems and reduce your vacuum’s lifespan.
As an affiliate, we earn on qualifying purchases.
Common Mistakes That Damage Your Filter (and How to Avoid Them)
- Reinstalling a wet filter: Causes mold growth, musty smells, and motor damage. When moisture is trapped inside, mold can develop, leading to unpleasant odors and potential health risks. Damp filters also impair airflow, forcing the motor to work harder, which increases wear and reduces its lifespan. This tradeoff between convenience and risk underscores the importance of thorough drying before reinstallation.
- Using heat to dry filters: Warps or weakens delicate fibers. Excessive heat from hair dryers, ovens, or direct sunlight can distort or weaken the filter material, making it less effective at trapping dust and allergens. It can also cause tears or holes that compromise filtration, leading to increased indoor dust recirculation and potential damage to the vacuum’s motor due to reduced airflow.
- Washing non-washable filters: Can tear or permanently deform them, leading to ineffective filtration. Attempting to clean filters not designed for washing often results in structural damage, reducing their ability to trap debris and allergens, which diminishes overall cleaning performance and can cause more frequent replacements.
- Ignoring filter signs of wear: Torn edges, excessive discoloration, or persistent odors indicate it’s time for a replacement. Continuing to use damaged filters allows dust, allergens, and debris to recirculate, worsening indoor air quality and increasing the load on your vacuum’s motor, potentially leading to costly repairs. Recognizing these signs early helps maintain efficiency and indoor health.
For example, a friend once dried her HEPA filter on a radiator, only to find it warped and useless afterward. This illustrates how improper drying techniques can irreparably damage filters, making them ineffective and potentially harming your vacuum. Always follow the manufacturer’s instructions carefully, especially regarding drying methods, to preserve your filter’s protective qualities and ensure your vacuum operates at peak performance.

Vacuum Filter Replacement for Shark Navigator Lift Away NV350 NV352 NV360
- Compatible with Multiple Shark Models: Fits various NV and UV series models
- Valuable Multi-Pack Set: Includes foam, felt, and HEPA filters
- High-Efficiency HEPA Filters: H13 true HEPA for effective air purification
As an affiliate, we earn on qualifying purchases.
As an affiliate, we earn on qualifying purchases.
How Often Should You Clean or Replace Your Vacuum Filter?
For washable filters, aim to clean every 1–3 months—more often if you have pets, heavy dust, or allergy sufferers in your home. Regular cleaning prevents the buildup of fine debris, which can clog the filter and reduce airflow. Reduced airflow forces the vacuum to work harder, increasing energy consumption and risking motor overheating. Over time, neglecting this routine can lead to diminished suction, higher utility bills, and a shorter lifespan for your vacuum.
For non-washable filters, replace every 6–12 months. Waiting too long allows dirt and debris to embed deeply, making the filter less effective at trapping allergens and dust. A clogged filter not only decreases suction but can also cause unpleasant odors and put additional strain on the motor, risking damage and costly repairs. If your vacuum emits a persistent smell even after emptying, it often indicates a dirty or damp filter that needs urgent attention. Timely replacement or cleaning restores proper airflow, maintaining both cleaning efficiency and indoor air quality.
Monitoring your filter’s condition and adhering to recommended schedules helps ensure consistent performance, reduces the likelihood of breakdowns, and maintains a healthy indoor environment. Think of it as a preventive maintenance habit—regular care saves you money and effort in the long run, while also keeping your home fresh and allergen-free.
As an affiliate, we earn on qualifying purchases.
The Latest Trends and What They Mean for You
Newer models often feature washable, lifetime filters that promise long-term savings and less waste. Brands like Dyson and Shark now promote “lifetime washable filters”—a shift driven by sustainability and cost-conscious consumers. These filters are designed to be cleaned regularly, which not only reduces the frequency of replacements but also lessens environmental impact by decreasing landfill waste. The tradeoff is that they require consistent maintenance; neglecting to clean them can lead to reduced suction and increased allergen recirculation, negating their benefits.
Post-2020, interest in indoor air quality has surged, making filter hygiene even more critical. Cordless stick vacuums, like Dyson V-series or Shark ION, have smaller, high-efficiency filters that clog faster due to their compact design. Regular cleaning—often monthly—is essential to maintain optimal performance. Ignoring this can result in decreased suction power, more allergens in the air, and reduced lifespan of the vacuum components, which diminishes the convenience these models offer.
Some models now include smart indicators or app alerts that notify you when it’s time to clean or replace filters. This integration of technology aims to simplify maintenance, ensuring filters stay in top condition without guesswork. By staying ahead of these trends, you can enhance your vacuum’s longevity and ensure your indoor air stays as clean as possible. Be cautious with aftermarket filters—cheap, inferior replacements may damage your vacuum or reduce filtration efficiency. Always opt for trusted brands or original parts to safeguard your investment and health.
Your Most Common Questions About Vacuum Filters—Answered
- Can I wash my vacuum filter with water? Yes, if it’s labeled washable. Otherwise, avoid water to prevent damage and deterioration of filtering materials.
- How often should I replace my HEPA filter? Typically every 6–12 months, depending on usage and signs of wear. Regular replacement ensures maximum filtration efficiency, especially important for allergy sufferers.
- Why does my vacuum smell bad even after emptying? Likely a dirty or damp filter. Cleaning or replacing it can eliminate odors and improve air quality.
- Can I put my filter in the dishwasher or washing machine? No, heat and mechanical action can deform or destroy most filters, especially HEPA and pleated types. Always follow manufacturer instructions.
- How long does a filter take to dry? At least 24 hours, fully air-dried away from heat or sunlight, to prevent mold and ensure optimal performance.
Conclusion
Keeping your vacuum filter clean isn’t just about maintaining suction. It’s about protecting your indoor air, extending your vacuum’s life, and saving money in the long run.
Remember: a clean filter is a happy, healthy home. Take a few minutes to do it right, and your vacuum will keep doing its job—and so will you.
College move-in / dorm season Picks
dorm essentials
As an affiliate, we earn on qualifying purchases.