TL;DR

Get cleaning gear delivered free with Prime
- Fast, free delivery on millions of items
- Prime Video, Amazon Music and more included
- Member-only deals all year
Empty your bagless vacuum carefully to prevent dust escape and preserve its suction. Turn it off, detach the canister outdoors if possible, and clean filters regularly. Proper disposal keeps your home cleaner and healthier.
Ever pulled out your bagless vacuum, only to find a cloud of dust escaping as you try to empty it? That’s a common frustration, but it’s also a sign you’re not doing it quite right. Properly emptying your vacuum isn’t just about neatness — it’s about keeping it running efficiently and safeguarding your indoor air quality.
In this guide, you’ll discover the exact steps to empty your bagless vacuum safely, how often to do it, and tips to prevent dust from escaping into your home. Doing it the right way can extend your vacuum’s life and make your cleaning routine cleaner and healthier.
Always turn off and unplug your vacuum before emptying to avoid shocks or accidental activation.
Empty the canister when it’s about 75% full to maintain suction and prevent motor strain.
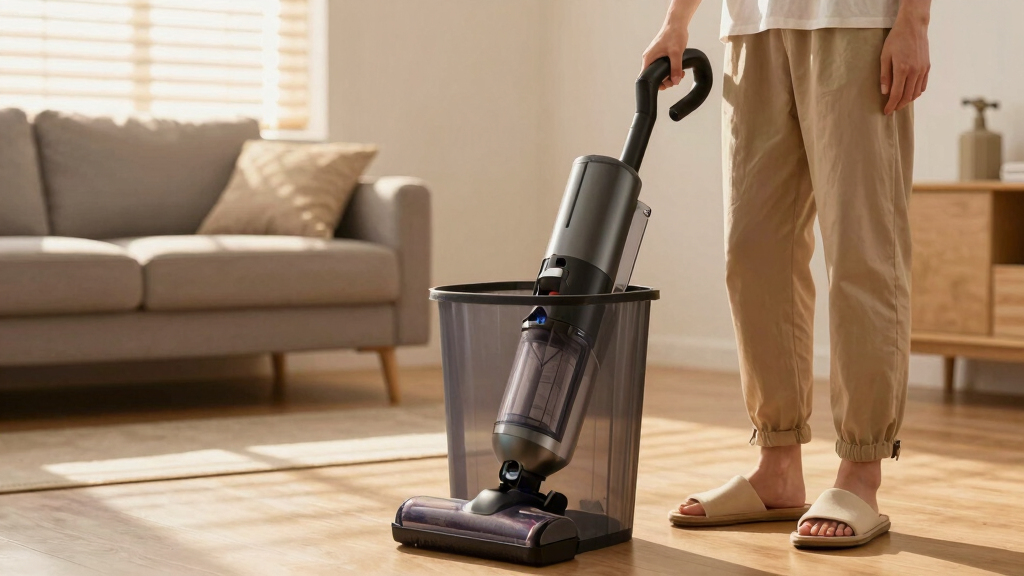
Empty outdoors or over a trash can slowly to prevent dust clouds and allergen spread.
Clean or replace filters regularly to sustain peak suction power and indoor air quality.
Check for blockages in the hose and wand after emptying to keep airflow clear.
The Right Way to Empty a Bagless Vacuum
A clean empty protects suction, reduces airborne dust and helps the motor last longer. The essential method: power down, move outdoors, release debris slowly and never reinstall a damp filter.
Empty before the canister passes this fill level.
Potential suction drop from an overfilled canister.
Damp filters should be reinstalled. Dry completely first.
Keep released dust away from indoor surfaces.
Or whenever the bin reaches three-quarters full.
Follow the model’s instructions and dry fully.
Typical range for non-washable filters.
Slow, sealed and deliberate
The goal is not simply to remove debris. It is to keep fine dust contained while protecting the seals, filtration path and airflow that make the vacuum work.
Power down
Switch the vacuum off and unplug it. Wear gloves if dust or allergens irritate your skin.
Detach upright
Release the canister gently and keep it upright while moving to an outdoor bin or lined trash can.
Open slowly
Lower the bin into the trash opening, release the lid and allow debris to fall naturally. Do not shake.
Inspect and click
Check the filter, hose and seals. Refit the dry canister until it clicks securely into place.
Every action protects the next
Containment, airflow and motor health are connected. A rushed empty can undo the cleaning you have just completed.
Follow the 75% rule
Waiting for a completely packed bin restricts airflow, makes disposal messier and increases motor strain. Check sooner when cleaning pet hair or heavy debris.
Capacity is not the same as efficiency
A bin can still hold more debris while the vacuum is already losing airflow. Treat the maximum line as a limit, not a target.
Less packed debris means fewer restrictions through the cyclone and filter path.
Consistent airflow reduces unnecessary heat and strain during cleaning.
Loose debris drops more cleanly than a compressed mass of dust and hair.
What helps—and what backfires
Small handling choices determine whether dust lands in the bin, returns to the room or remains trapped inside the vacuum.
| Practice | What happens | Verdict | Better move |
|---|---|---|---|
| Empty at 75% | Airflow remains more consistent and debris stays loose enough to release cleanly. | ✓ Recommended | Check the fill line before or after every cleaning session. |
| Shake or tap | Fine dust and allergens are forced into the air and onto nearby surfaces. | ✗ Avoid | Open the lid slowly and let gravity do the work. |
| Empty indoors | Airborne particles can resettle in the room you have just cleaned. | ✗ Avoid | Use an outdoor lidded bin or place the canister deep inside a trash bag. |
| Wash every filter | Some non-washable media may be damaged, reducing filtration performance. | ~ Check first | Confirm the manufacturer’s cleaning instructions for your model. |
| Reinstall damp | Moisture can encourage odors, mold or bacteria and may damage the vacuum. | ✗ Never | Allow all washable parts to dry completely before assembly. |
Keep the airflow path healthy
Exact intervals vary by model and usage. Pet hair, fine powders and allergy-sensitive homes usually require more frequent checks.
Empty and inspect
Wipe residual dust with a damp cloth or dry brush when the manufacturer permits it.
Rinse and air-dry
Use water only when approved. Wait until the filter is completely dry before reinstalling.
Replace as directed
Follow the manufacturer’s schedule or replace sooner if airflow or odor problems persist.
Model instructions always come first
Not every filter or canister is washable. Water, aggressive brushing or incorrect reassembly can damage filtration media and seals.
Before the next clean
If suction remains weak after emptying, the cause is usually a blockage, clogged filter or incorrectly seated canister.
Look for blockages
Inspect the hose and wand for packed hair, paper or debris that could restrict airflow.
Listen for the click
Seat the canister securely and confirm that lids, latches and seals close without gaps.
Keep it clean and dry
Store the vacuum away from moisture. Wash hands or discard gloves after handling debris.
Turn Off and Prepare for a Clean, Dust-Free Emptying
The first step is simple but crucial: turn off and unplug your vacuum. This prevents accidental activation and electrical hazards. If your vacuum has a switch, flip it to ‘off,’ then unplug the cord from the socket.
Wear gloves if you’re sensitive to dust or allergens. Think of it like handling a dusty treasure chest — better to keep your hands clean and avoid breathing in debris.
Imagine standing outside, canister in hand, ready to release a mini dust storm — not ideal. Preparing properly keeps dust where it belongs: in the trash.
bagless vacuum canister replacement
As an affiliate, we earn on qualifying purchases.
As an affiliate, we earn on qualifying purchases.
How to Empty a Bagless Vacuum Step-by-Step
- Detach the canister or dustbin. Usually, there’s a release button or latch — press or slide it to remove the bin.
- Take the canister outside or over a trash can. Hold it upright.
- Open the canister lid slowly, preferably over the trash. Let the debris fall out naturally — don’t shake or tap it aggressively.
- If your vacuum has a filter that’s washable, gently rinse it with water now. Let it dry completely before reassembling.
- Reattach the canister securely to the vacuum, ensuring it clicks into place.
- Clean or replace filters as per manufacturer instructions.
Think of this process like pouring out a bag of rice into a bowl — slow and steady prevents spills and dust clouds.
As an affiliate, we earn on qualifying purchases.
Avoid Common Mistakes That Make Dust Escape and Reduce Suction
| Mistake | What Happens |
|---|---|
| Overfilling the canister | When the canister is overfilled, it not only reduces suction but also puts extra strain on the motor, which can lead to overheating and premature failure. Overfilled canisters are more difficult to empty cleanly, increasing the risk of dust spillage. Shaking or tapping the canister to loosen debris seems helpful but often causes dust to escape into the air, aggravating allergies and reducing indoor air quality. Recognizing the optimal fill level (around 75%) allows you to balance capacity and performance, extending the lifespan of your vacuum and ensuring it works efficiently. |
| Shaking or tapping the canister | This action forces dust and allergens into the air, creating a cloud of fine particles that can irritate your respiratory system and settle on surfaces. It also increases the risk of dust escaping into your home environment if the canister isn’t sealed tightly during reattachment. Gentle handling preserves the dust containment and minimizes allergen release, which is essential for allergy sufferers or those concerned about indoor air quality. |
| Not cleaning filters regularly | Dirty or clogged filters impede airflow, decreasing suction power and making your vacuum work harder. Over time, this can lead to motor strain or failure. Neglecting filter maintenance allows dust and allergens to bypass filtration, reducing indoor air quality. Regular cleaning or replacement ensures optimal airflow, better cleaning efficiency, and a healthier indoor environment. This tradeoff between convenience and long-term performance highlights why consistent maintenance is vital for vacuum longevity. |
| Emptying over the sink or indoors | This practice often causes dust and debris to become airborne, especially if the canister isn’t opened carefully. Dust particles can settle on nearby surfaces, aggravate allergies, or be inhaled. Always empty the canister outdoors or directly into a trash can outside to contain dust effectively and prevent indoor messes. This approach minimizes the health risks associated with airborne dust during disposal and preserves indoor air quality. |
Think of your vacuum like a balloon — overfilled and shaken, it’s more likely to pop or release dust into your face. Keeping it under 75% full and handling it gently makes a big difference in maintaining suction and air quality.
As an affiliate, we earn on qualifying purchases.
How Often Should You Empty Your Vacuum? The 75% Rule
Empty the canister when it’s about 75% full. Waiting until it’s completely full can cause a noticeable drop in suction and put extra strain on your vacuum’s motor. Think of it like refilling your coffee cup before it’s empty — it ensures your machine keeps working efficiently without interruptions. Regularly emptying the canister before it reaches capacity helps prevent dust build-up that can clog filters and reduce airflow, thus prolonging the lifespan of your vacuum. If you ignore this guideline, you risk overworking the motor, which can lead to early failure and costly repairs. The key is to develop a habit of checking the fill level often, especially if you vacuum frequently or deal with pet hair and allergens.
As an affiliate, we earn on qualifying purchases.
Cleaning Filters and Canisters for Long-Term Performance
Regular cleaning of filters and canisters is essential for maintaining your vacuum’s performance over time. Washing washable filters with water every 1-3 months prevents dust buildup that can cause odors or mold growth, which can compromise indoor air quality. Ensuring filters are dry before reinstallation is critical; a damp filter can harbor mold or bacteria. For non-washable filters, follow the manufacturer’s recommendation for replacement—usually every 6-12 months. Cleaning the canister with a damp cloth or a dry brush removes residual dust, preventing odors and mold, and keeps your vacuum smelling fresh. Neglecting this routine can lead to decreased suction, unpleasant smells, and even health issues from trapped allergens. Think of it as giving your vacuum a health check — regular maintenance ensures longevity and optimal cleaning power.
Post-Emptying Tips to Keep Dust Contained and Your Home Fresh
After emptying, inspect the hose and wand for blockages, as debris can accumulate and impede airflow, reducing cleaning efficiency. Wipe down the canister with a damp cloth to remove residual dust and prevent odors from lingering. Store the vacuum in a clean, dry spot to avoid dust accumulation and potential mold growth. If you notice a lingering smell, sprinkle a little baking soda inside the canister before reattaching it. Baking soda absorbs odors and helps keep your vacuum smelling fresh between cleanings. Always wash your hands afterward or discard gloves to avoid tracking dust or allergens around your home. These simple steps help maintain a clean, healthy environment and extend the life of your vacuum.
Frequently Asked Questions
How often should I empty my bagless vacuum?
Typically, empty it after each use or when it’s about 75% full. This prevents suction loss and reduces motor strain, keeping your vacuum working efficiently for longer. Regularly monitoring the fill level ensures you avoid the pitfalls of overfilling, which can lead to decreased performance and potential damage. Developing this habit helps maintain consistent cleaning power and prolongs your vacuum’s lifespan.
Can I wash the vacuum canister?
If the manufacturer says it’s safe, wash the canister with water every few months. Make sure it’s completely dry before reassembling to avoid mold or odors. Otherwise, just empty it and wipe it down with a dry cloth. Proper drying is crucial because residual moisture can lead to mold growth, which not only causes odors but can also affect the vacuum’s internal components and indoor air quality.
How do I prevent dust from escaping when emptying?
Always empty outdoors or over a trash can, and open the canister slowly. Wearing gloves or using a dust mask can also protect you from allergens kicked up during the process. This careful approach minimizes dust dispersal, which is especially important for allergy sufferers or households with respiratory sensitivities. It also helps keep your indoor environment clean and free from airborne allergens.
What if my vacuum loses suction after emptying?
Check for clogs in the hose or wand, and inspect or replace filters. Ensuring the canister is seated properly also helps restore full suction power. Sometimes, improper reattachment or overlooked blockages can cause suction issues, so a thorough check can resolve the problem. Maintaining clean filters and clear pathways is essential for optimal performance and effective cleaning.
Is it better to use a bagless or bagged vacuum?
Bagless vacuums are convenient but require regular emptying and careful handling to prevent dust escape. Bagged models contain dust better but can be less convenient to empty. The choice depends on your sensitivity to dust, ease of maintenance preference, and cleaning frequency. Both types have tradeoffs: bagless models offer quick disposal but demand vigilance, while bagged models provide better containment at the expense of ongoing bag replacements.
Conclusion
Emptying your bagless vacuum correctly isn’t just a chore — it’s a simple step that keeps your home cleaner, your vacuum happier, and your air healthier.
Next time, think slow and steady. Handle that canister like a delicate treasure and do a quick filter check. Your vacuum will thank you — and so will your lungs.
Halloween Picks
halloween
As an affiliate, we earn on qualifying purchases.